Looks great!
Might I suggest the new BMR 1" drop lower control arms? I used them on my car with stock springs and koni shocks on the lower perch and the thing is slammed yet still rides great without cutting the springs (the front of my car sat abnormally high for some reason). They're spendy, but worth it if you don't want to use lowering springs and don't want to cut the stock ones (in your case, cut them more than you already did).
Also, what is "silking the edges"?
-
Fogs look great Jim....again, cut it out on the progress!
Dont make me update my thread.....Leave a comment:
-
Thanx Larry, Brent and James!
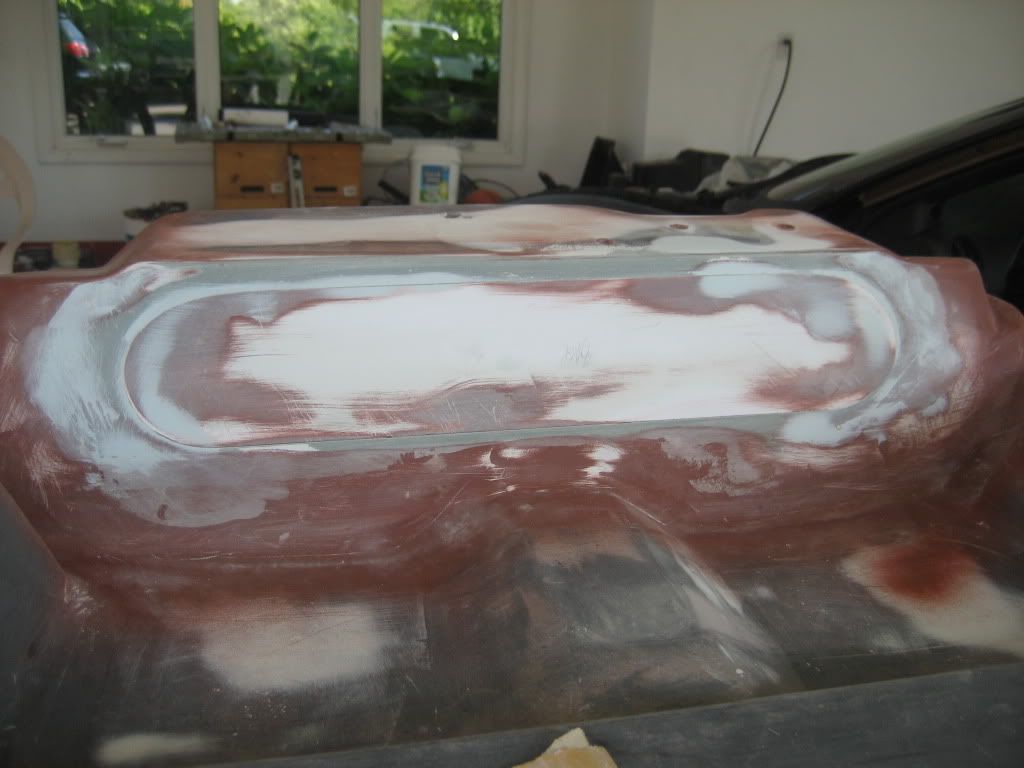
Volleyball tournament this weekend so not much got accomplished. The hood still needs to be block sanded, tweaked and returned to the "painter." We ended up finalizing the gaps and silking the edges to avoid cracking. That should (needs) be done this week.
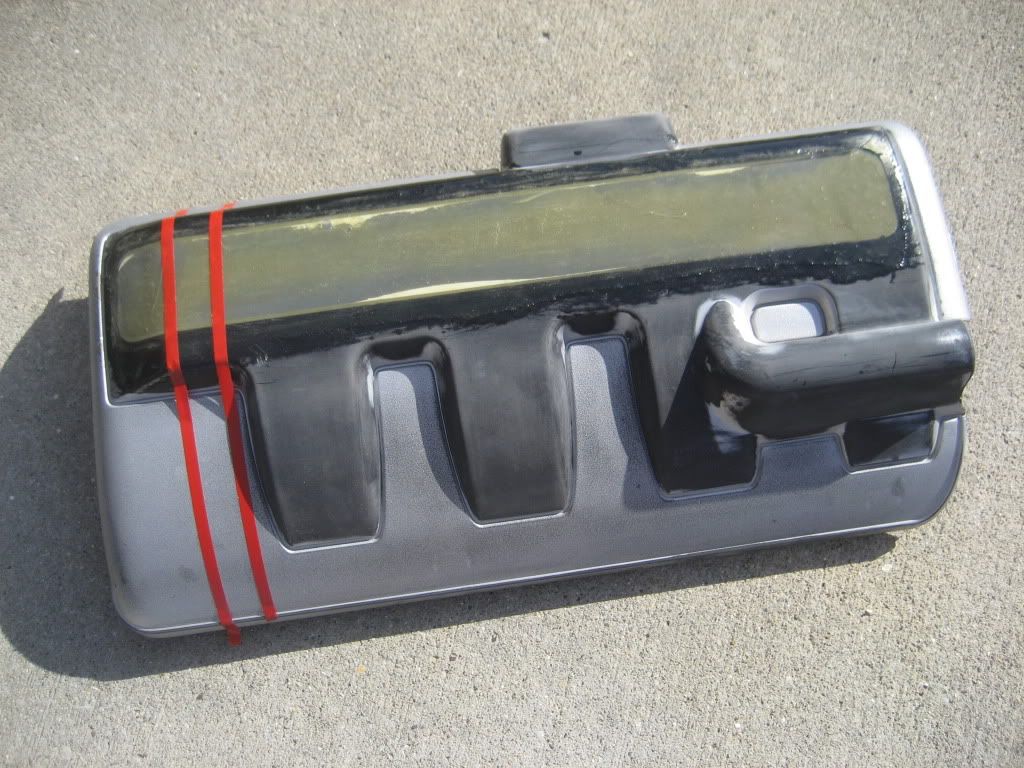
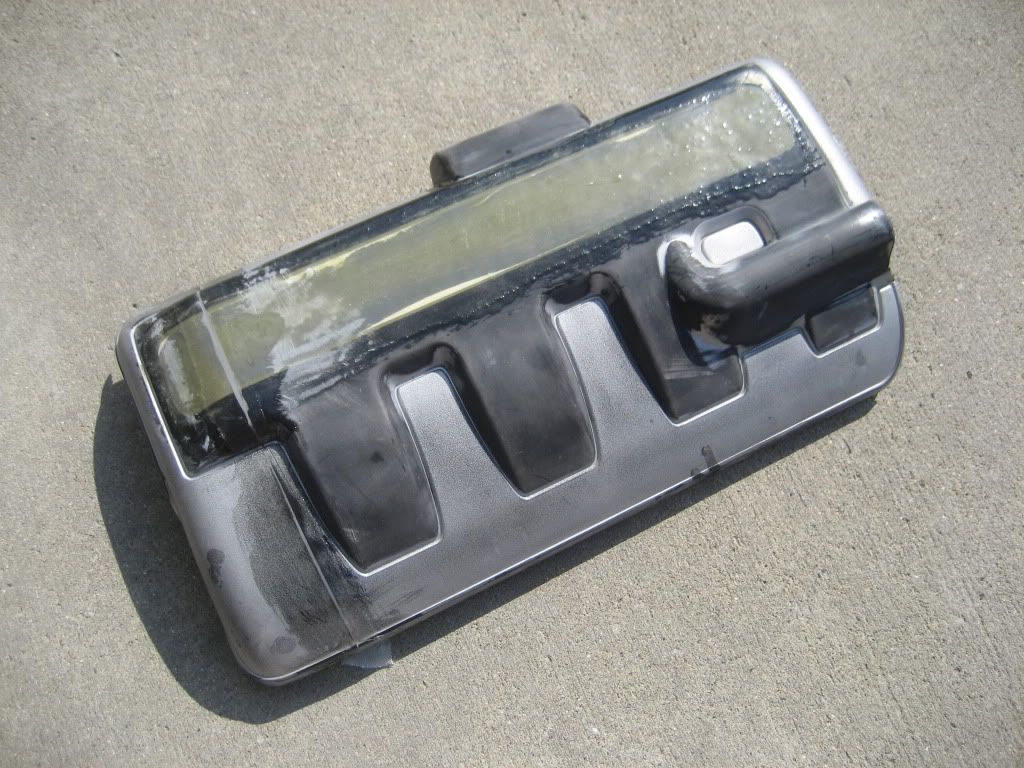
While we have the front fascia installed, it was time to bracket the C6 fog lamps in place. (These will be used as the park/turn lamps) We needed to pull out the cut off wheel to relieve some unwanted metal so we could get the huge "cans" located. Brackets were fabbed and the car set back on the ground to see the results. These pics. don't really do it justice.


 The next project after the hood is gone is to address the front ride height. I had already cut 1.25" out of the stock spring and it did not lower it by much. I am going to cut out another coil and see what happens. Now, I realize that the shorter you make the stock spring the stiffer it gets, so I will report back with results of this mess.
Leave a comment:
-
Love it! This is going to be a great car when it's done.
Someday I hope to go through the body rework stage on my car and straighten out some of the terrible factory gaps.....I'll do it BEFORE paint though....hahahaLeave a comment:
-
terrible build thread....too much successful progress....too many relevant posts.....
3-4mm gaps....lmao, spoken like someone in "the industry". any feas studies to support?
have to admit, looks pretty damn good Jim. you're killin me......Leave a comment:
-
I swear every time you jack or lift these fbodies the gaps change! I like the attention to detail you are doing matching and getting gaps uniform. Whatta great job!Leave a comment:
-
Unfortunately NO! It is hard to create a timing chart whenever a painter is part of the equation.Originally posted by Gregs_gsxr View Post
Thanks Fred, I can't wait to get it done, but seeing that the driving season is ending soon, we seem to be coming up with more hairbrain ideas!Awesome attention to detail, the final product will really be rewarding! Those heat extractors look pretty wicked too when the hood is open, nice ideaLast edited by BlackBirdDaddy; September 13th, 2011, 09:30 PM.Leave a comment:
-
Awesome attention to detail, the final product will really be rewarding! Those heat extractors look pretty wicked too when the hood is open, nice ideaLeave a comment:
-
looking great! any idea what his turn around time on spraying the hood I cant wait to see it completeLeave a comment:
-
Thanx Greg, Rick and Larry! Yea, a lot of distractions are keeping me from the project lately.
This past weekend I got a pretty good hit on it at least time wise. Even though the parts needed to sanded and rubbed, we needed to install the doors, fenders and front fascia in order to make sure the hood fits. I figured we could install them quick and then take them off again for the sand and rub. Well installing the doors and fenders turned out to be a 5 hour project on Saturday and the front fascia and hood another 4 hours on Sunday! Sooooo, I am not taking these damn things off again!
I forgot how bad the door gaps were and are on f-bodies. I couldn't bear to keep 8-10mm gap on the doors/quarters/fenders. So, starting at the doors, we gapped them to the quarters first trying to keep a 3-4mm gap.

Then, we installed the fenders (after opening some bolt holes) and gapped to the doors trying to keep a 3-4mm gap. For the most part it looks decent except for 2-3inches of the upper fender where it widens out to 5-6mm. I should have added to the damn door before it was painted! Also, now thinking about it, I would have "shaved" the handles and lock cylinder.

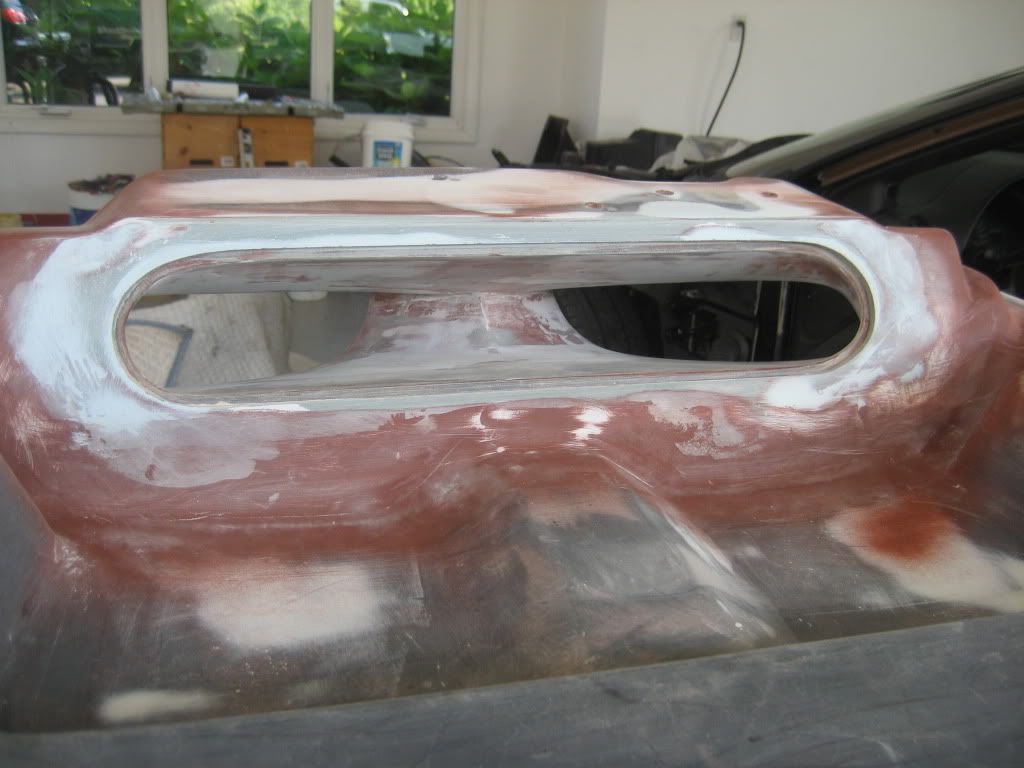
Now, time for the front fascia. A few holes had to be elongated in order to make up the difference of moving the doors and fenders rearward. That took more time and beer than I wanted. We got the hood back from being poly primed and was ready to bolted in place. It bolted in rather easy but all gaps as usual, looked like like a pile of crap. The gaps and surface to the fenders were so bad I had to add quite a bit of material and will also need to add resin and cloth the edges to keep from breaking.


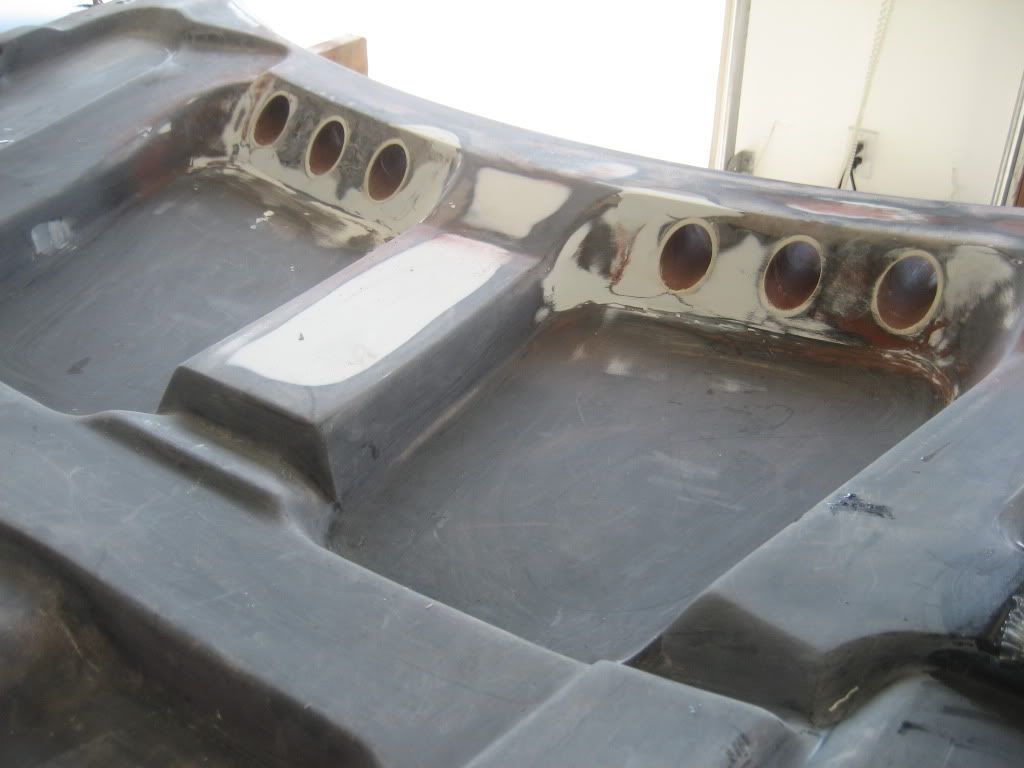
I should be done gapping the hood tomorrow and then need surface the poly prime and work the underside one more time prior to giving it back to the painter dude.
 Last edited by BlackBirdDaddy; September 13th, 2011, 08:12 PM.
Leave a comment:
-
Well whats happening! have not seen a recent progress report, I alway like these because of the clever and quality of work!Leave a comment:
-
Looks sweet and can understand all the details and work that your putting into car and imagine like you "can't wait to see finished", keep up the fine work!!!!Leave a comment:
-
 Yea Nathan, I have been working on nickel/dime things for the past several weeks. Got caught up in family stuff before school starts again ie: Cedar Point, volleyball tournaments, up north and whateverOriginally posted by nascarnate326 View Post
 Sooo, progress has been limited.
But, seeing that you have asked, here are a few things that I have been working on.
Rear filler panel: shaved the hatch lock and ready for paint. Now need to fab a cable release for the hatch seeing that the battery is mounted in the rear and will need hatch access if battery dies.

Finally finished the hood modifications and is at the painters getting a coat of polyester filler primer prior to final sand and paint.
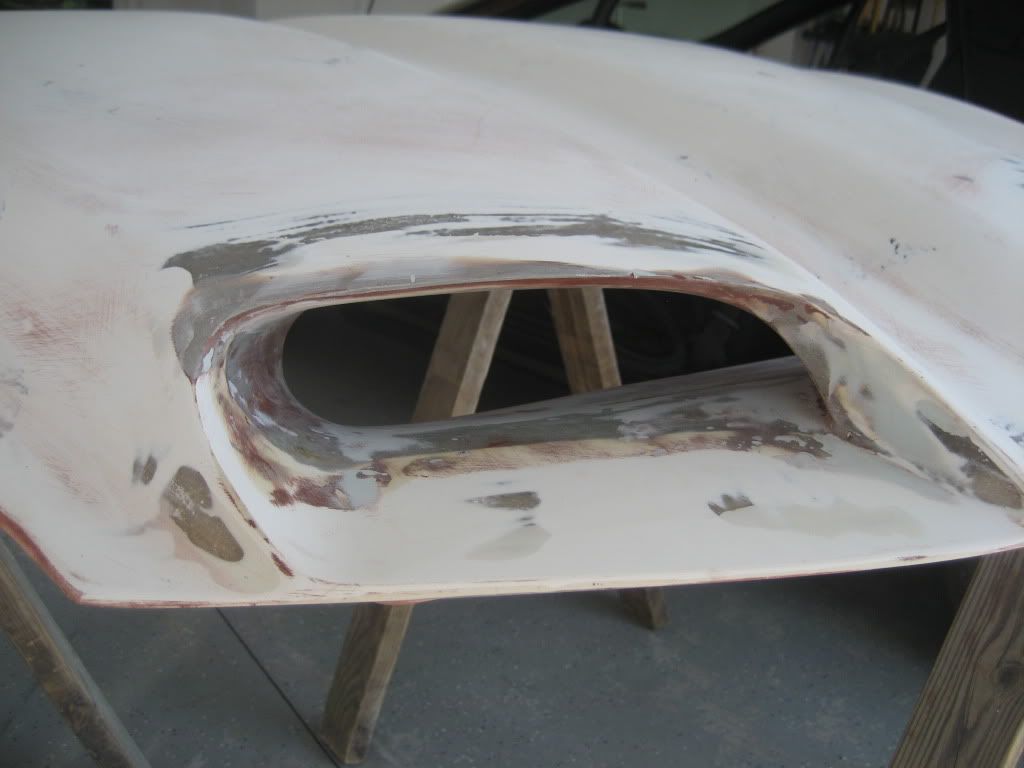
We made a snap in close-out panel in case the weatherman is wrong! (Honeycomb mesh will be installed where the close out panel resides in picture)
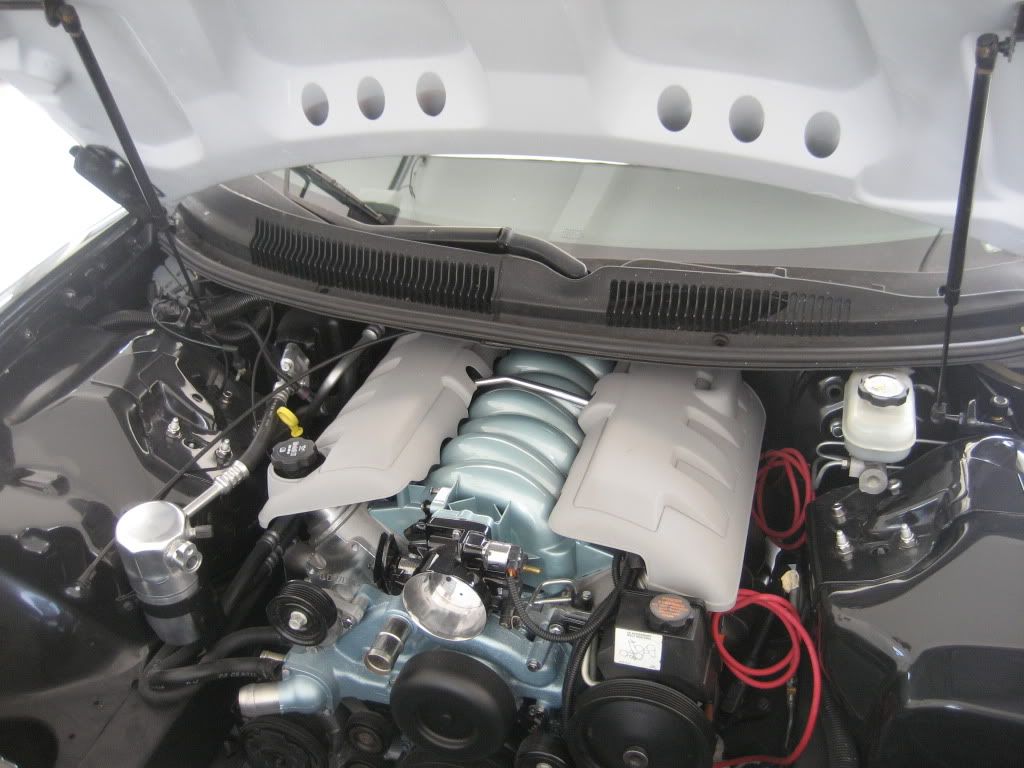
Fuel rail covers: the left side needed to be shortened to clear the power steering pump by about 5/8". Cut, bonded and glassed' to new size. Time for clean-up, poly prime and paint scheme.
Leave a comment:
Leave a comment: