Announcement

Collapse
No announcement yet.

My new 1988 T/A

Collapse
X
Collapse
Who has read this thread:
 
  • Filter
  • Time
  • Show
Clear All
new posts

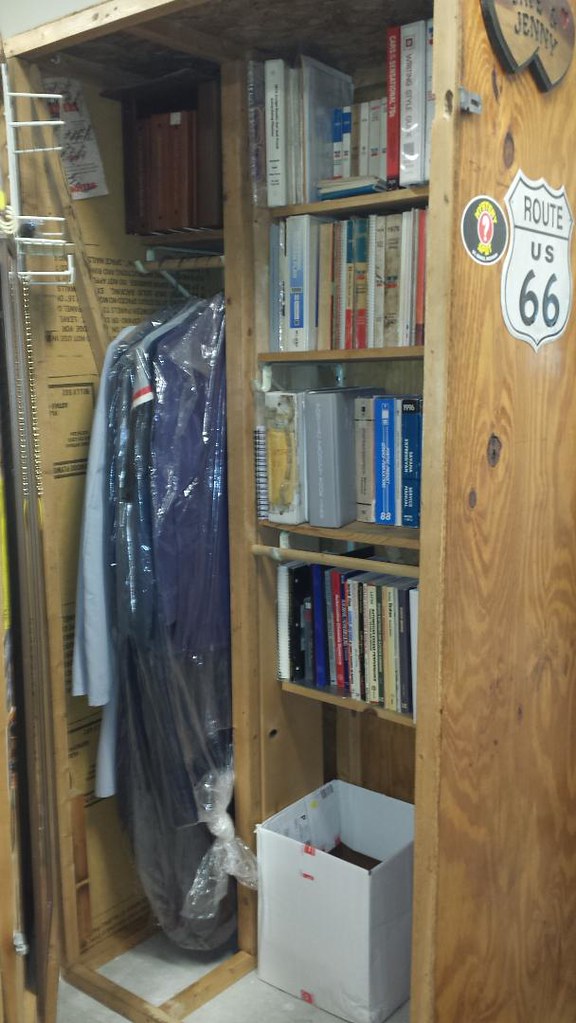
  • Indeed. And to a degree, it's a chicken and egg thing. In some of those boxes somewhere are all of my tools. I can't rebuild shelving and hang new wire racks and cabinets to replace the old without them. So I can't really start putting stuff away until I get them out. I still have more to do on the benches and pegboard, so not ready for them to come out even if I knew where they were!

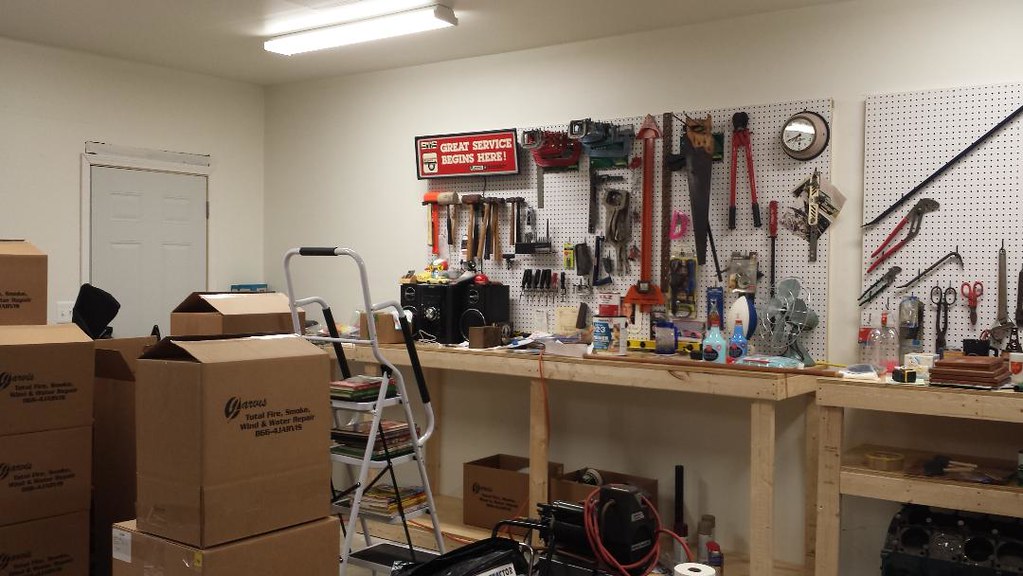
    I'm sure I'll still be working on this when this event hits it's 1 year anniv. at the end of February. And this doesn't take into consideration the 3-4x more boxes of stuff that I had to clean and store in the back garage. That will be an even longer time getting resolved.

    It makes my head hurt to take it all in at once. So I keep focusing on the project at hand...just keep chipping away at it each evening.
    DynoDave
    POCI # 72200


    1988 Pontiac Trans Am WS6

    Comment


    • That's the best way to approach it...it's overwhelming any other way.
      Gone but not forgotten: 1986 Chevrolet Camaro IROC-Z

      "You shall ride eternal. Shiny and chrome."

      Comment


      • After a lengthy month of December, I'm finally able to spend some time in the garage again.

        Got this batch and another the same size cleaned up for re-use.


        And started to unbox some of the tools that go up on the pegboard, and sort them by which half of the bench they go on. I'll never get the place back EXACTLY like it was, but I'd like to get as close as I reasonably can.


        Started in this upper corner, with this old dealership light. It came form the Chevy dealer I worked at in my home town.One of the promo items sent by GM automatically (without asking), and billed to the dealer account. It ended up (still boxed) in our dispatch tower. The service manager took one look at it, and the tower being glass on all 4 sides, decided we had no use for it, and gave it to me. Had to replace one of the bulbs inside, but could not find a 1/2 size 15W incandescent, so it's upgraded to a couple of LEDs. Just a little brighter than before, but looks good. It's amazing that this delicate, eggshell thin blow molded fixture survived the fire.


        DynoDave
        POCI # 72200


        1988 Pontiac Trans Am WS6

        Comment


        • Still working on things when I get the time.

          I have a couple of swivel lamps for each end of the bench. The lamps survived, but their mounting hardware did not. Also, the way the benches were reconstructed, there was no lip (overhang of the top) to clamp them to. So I had planned to used a couple of scrap 2x4 4" squares with a hole drilled in the middle to mount those lamps on.

          Meanwhile, one of my favorite new YouTube channels is for the Battleship New Jersey. A few weeks or so back the curator had an episode discussing the ships teak wood deck. The are replacing it, and pieces of the old deck are for sale as souvenirs, the purchase of which helps support the museum/ship. Perfect! I ordered up two squares of. Waiting for some teak deck cleaner and conditioner to come in, then I'll get them mounted. Video below. Mine appears to my eye to be WWII vintage, based on his description.


          Book cabinet survived and is all cleaned up. Very pleased that all of the books, manuals, and tons of factory documents and ads all survived. Lab coats and uniforms back from the dry cleaners.


          Tools are all back up on the pegboard....at least the ones I got back.You'll notice there's a lot of vacant space on this section.


          This side is a little more complete.


          Because the benches were not reconstructed properly, the 340 short block for my '72 Charger lost it's home (it also got coated with drywall mud and paint speckles, thank you contractors without tarps). To get it back into it's previous home, a pair of drawers (also built in the wrong place) will have to be torn out and rebuilt, then I can wheel it into the corner under the bench on this engine stand (bought God knows how long ago...I believe from the old State Fair Winter Swap Meet, when it was at the State Fairground on 8 mile). The Mopar reman small block Mopar shipping crate c1987 will have to go.


          Last edited by DynoDave; February 19th, 2022, 03:40 PM.
          DynoDave
          POCI # 72200


          1988 Pontiac Trans Am WS6

          Comment


          • That's really annoying...so they just...built shit wrong? And then managed to not even bother to cover an engine??
            Gone but not forgotten: 1986 Chevrolet Camaro IROC-Z

            "You shall ride eternal. Shiny and chrome."

            Comment


            • Yeah, a lot of "lowest bidder" work involved here I think. To be fair, the benches are nice, well built, and topped with some very nice, think plywood. But there are a quite a few dimensions that didn't end up quite like the old ones. I'll make it work.
              DynoDave
              POCI # 72200


              1988 Pontiac Trans Am WS6

              Comment


              • Dug out the cherry picker from the back garage (a small project in itself), and got the 340 moved from the pallet to the engine stand. Getting to this point was an entire evenings worth of work, starting at 5-ish, and didn't go into the house until 10:30. Wrestling that picker out of the over-stuffed back garage, dragging it across the frozen snowy yard, moving things in the attached garage to make space for it, assembling it (yes, even that fought me), figuring our how to mount the engine on the stand (tried it several ways before realizing it was not meant to be mounted with the engine mounts still bolted to the block), and finally wrestling the 4 arms of the stand into alignment with the holes on the block (this is a china made $39.99 swap meet item...precision is actually pretty good, but not perfect).

                And here it is. Victory!

                DynoDave
                POCI # 72200


                1988 Pontiac Trans Am WS6

                Comment


                • It would appear that my measurements with tape measure of the assembled stand, engine and bench were off by a 1/16th or so.
                  DynoDave
                  POCI # 72200


                  1988 Pontiac Trans Am WS6

                  Comment


                  • I did try (no photos) moving the engine into the spot by the bench where I wanted it to be under, just to make sure the bench or floor didn't slope that 1/16" or so, but no luck. Standing there watching the news out the Ukraine, and thinking about this mess, I thought if I tipped the engine and stand (can this spindly stand take all the weight of the engine tipped at an angle and on two wheels without collapsing?) up on two wheels, I could duck that china wall under the bench frame, and when it came out on the other side, the block is lower after the wall, and I'd be good (the engine is too long to make it all the way under the bench, so the wall at the flywheel and of the block will not be an issue). Turned out that while the idea was sound, and while the block and frame of the stand would clear, the casters (which turned out to be the widest spot) would not, colliding with the leg of the bench and gouging into the drywall.

                    DynoDave
                    POCI # 72200


                    1988 Pontiac Trans Am WS6

                    Comment


                    • Before I turned out the lights for the night, I stood there and thought about this for a while (a slow process ).

                      So close. If I could just get that bench a "tiny" bit higher. Tried lifting up on the bench...zero play. So the only thing that would help would be making the stand lower. There is room under the pan. If this garage and the other were set up (not still being reconstructed), I could cut a 1/2" out of each leg, weld it back together, and life would be good. But that's not an option right now. So I started looking at the iron casters. Very beefy, but a full 4" tall. If I could find some that were just a fraction of an inch shorter, I'd have the room I needed.

                      A quick visit to the local Ace Hardware the next day produced these. Not much shorter, but I only need maybe an 1/8th inch to clear comfortably. 90lb. rating each, so 360 across the four of them, should be enough for the short-block. They will probably flat spot terribly over the coming years, but I'm not worried about that right now.


                      Smaller roller bearing area, and using flattened pins for an axle Vs. the bolt on design of the original. Not as strong and serviceable, but also quite a bit thinner. You can't see it in this photo of the new caster in front of the old, but the wheel itself is half the width, and the axle is much slimmer (you can see the bolt/axle of the original caster in the background behind the new caster).


                      The other issue I foresaw while at the hardware store...the new downsized casters have a mounting stud just as tall (which means they will have the same reach through the tube frame...that's a good thing), but smaller in diameter. This would allow the new casters to wallow around in that hole, and under load, get cocked sideways in the frame. So I walked one of the new casters over to the Ace bulk material center, and picked up a piece of aluminum tube that would just go around the outside of the stud.


                      Back in the shop, a test fit of that tube into the hole in the frame showed it to be just a touch too big around. A quick bit of work with a round file (one of the few files that got returned post-fire) removed the powder coat and opened up the hole just a touch. I only opened the upper hole. Leaving the hole in the bottom of the frame tube smaller will prevent the bushing from dropping out of the bottom of the frame.


                      Test fit = perfect.


                      Marked and cut to length to create a bushing for the caster stud.


                      Set it into place = perfect. Shown here only partially installed. It sits flush with the frame when fully installed.


                      A mixed bag on the amount of grease on the caster bearings from their factory. One had an OK amount, two barely any, and one appeared to have none. A trip to the back garage and the 25 gal. drum of '50s vintage Sinclair brand bearing grease (doesn't everyone one have one of those?) for a little scoop of product. Each caster bearing got packed.


                      Cleaned up and ready for action. Action in this case means rolling it about 8' and sitting for a decade.


                      As long as we're at it, a touch of grease for the new busing too.


                      Installed and tightened. Now repeat 3 more times.
                      DynoDave
                      POCI # 72200


                      1988 Pontiac Trans Am WS6

                      Comment


                      • Victory (again)! And a damn site closer than I had hoped for. I was nervous for a moment.


                        While I expect those rubber casters to eventually flatten and fail under load, they are a day and night difference to roll around on. Those iron casters sucked, very hard to roll, and damn near impossible to steer. With these new casters, it's like steering a shopping cart. Super easy.

                        Wheeled into place for a long nap.

                        With a Trans Am powertrain build up (along with a whole host of other mods) as Job #1, the Chrysler Cordoba will be build #2. The Duster #3, and the poor Charger #4. Hope to get to it before I die. So easy access of this stored engine is not a priority.


                        Not sure the engine is even salvageable (or the car). But it's the numbers matching engine, so we'll keep it and determine it's fate another day. Before this space gets boxed in by a large filing cabinet, I'll add an additional layer of oil/grease to the bores and other machined surfaces, then bag it as best I can.
                        DynoDave
                        POCI # 72200


                        1988 Pontiac Trans Am WS6

                        Comment


                        • Man, that just squeaks right into that spot!
                          Gone but not forgotten: 1986 Chevrolet Camaro IROC-Z

                          "You shall ride eternal. Shiny and chrome."

                          Comment


                          • Yeah, they didn't leave me any too much room.

                            It's close because the bench is built wrong. That vertical support is supposed to be centered on the bench, no off-set closer to the wall like that. So not only is the spot for the engine impacted, it also means these drawers which share that vertical element are also off-set, which when you put the Steelcase file cabinet back in place gives you this.


                            The good news...plenty of room for that bit of the 340 that hangs out from under the bench.


                            Today I have to decide if I'm going to live with the poorly built box those drawers are in, and that they are in the wrong spot, or if I'm just going to live with it like it is and move on to the other 100s of projects to get this space done.
                            DynoDave
                            POCI # 72200


                            1988 Pontiac Trans Am WS6

                            Comment


                            • It's a difficult choice - will it be worth all the work and will the intended functionality be enough that fixing them is worth your time?
                              Gone but not forgotten: 1986 Chevrolet Camaro IROC-Z

                              "You shall ride eternal. Shiny and chrome."

                              Comment


                              • I know myself well enough to know that it's going to drive me nuts every time I open it (which isn't very often with what I store in there). So I decided to move. I thought the whole thing was built with screws, but I find some of it is toe nailed, and the parts on the wall are also nailed, which means even more drywall damage to repair. I decided to live with it, and improve it as much as I can. I picked up some pressed hard board material to make some kind of face for it. I'm no carpenter or cabinet maker, but just about anything will look better than those 2x4 stud ends sticking out at you, and the rat holes around the drawers.

                                This was the last decision stopping me from priming and painting the bench frame. So with the dress-up panel made, I got everything taped up while the NASCAR race was on. With that done, I ran out of energy for the day. I'll try to get the first coat of primer on the frame tomorrow.

                                DynoDave
                                POCI # 72200


                                1988 Pontiac Trans Am WS6

                                Comment

                                Working...
                                X