 Tweet
Tweet
Can we put it in Yoshi so I can feel some power then take it back out lol
-
-
It'll be nice to finally be able to drive around with you again when this thing is done. Seems like forever man.sigpic
99 Camaro Z28 A4Comment
-
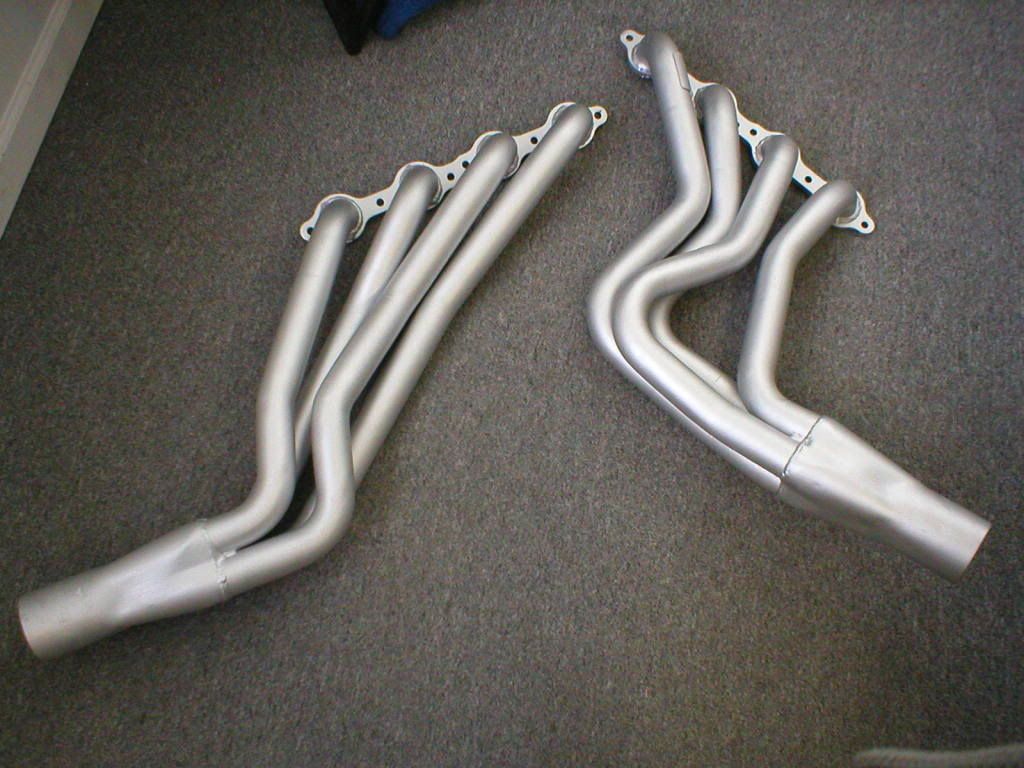
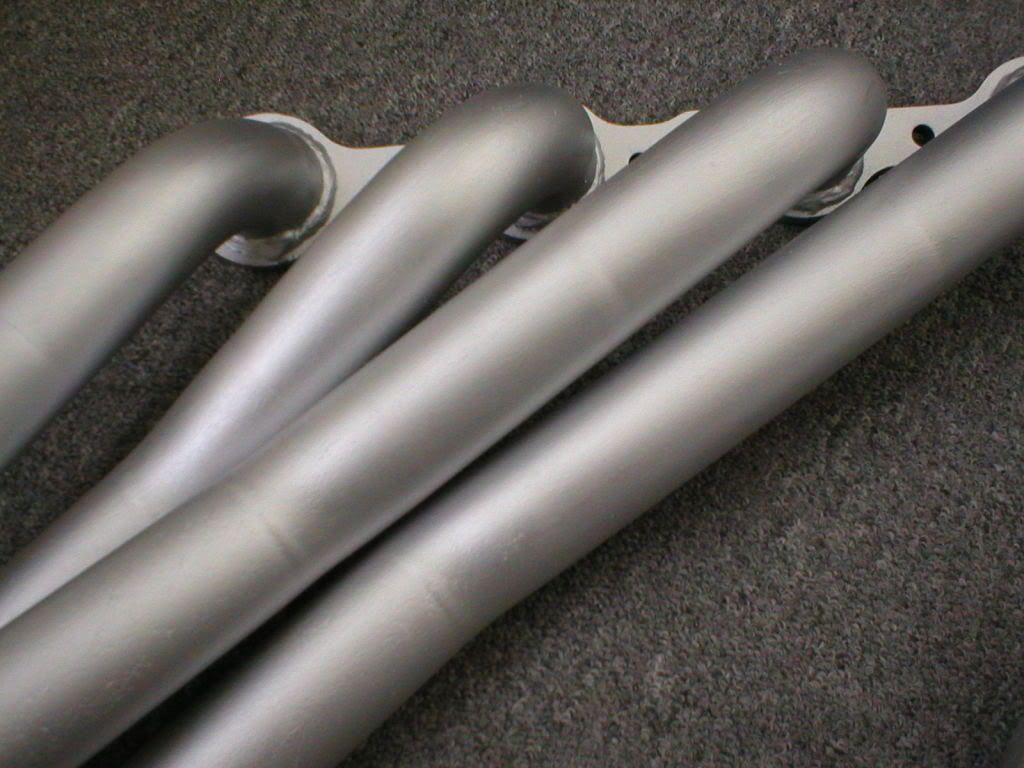
Here are a few pics of the headers freshly coated with some POR 20, I was very impressed how well it took to the headers even on the first coat. I just hope it lasts a couple of years.

 Doing less with more

Comment
-
That looks really good nice jobComment
-
So were those headers originally ceramic coated? Did you just sand blast them and paint them with the POR or what?2015 Silverado
Originally posted by JoeliusZ28Comment
-
They originally had no coating and were used, I first coated them about 3 years ago with some aircraft grade coating and then again redid them now with POR 20 because ceramic coating for $250 is ridiculious to me when I have $325 into the headers and y-pipe to begine with.Doing less with more
Comment
-
Now that your's are done do mine! sigpic
99 Camaro Z28 A4Comment
-
looks good jeff, I know your choppin at the bit to get this up and running.sigpic
1998 Trans Am Convertible A4 - WS6 hood, WS6 air lid, WS6 rims, drilled/slotted rotors.Comment
-
those headers look great!2011 Ford Raptor SuperCrew
SVT Beadlock Wheels
Roush Intake, Corsa Exhaust
20" and 40" Light Bars
2000 Camaro Z28
Stripped Down Drag Car Build
Project 1999 Camaro Z28
2009 G8 GT Stryker Blue Metallic-SHEGONE
Crate LS3, LS9 Cam, LSA Supercharger, Metco Solid Isolator
RotoFab Intake, HSRK, Camaro Trans Pan
ZL1 HX, ZL1 Fuel Pump, CTS-V Lid, LSA Injectors
Pat G - 93 Octane Tune
Kooks 1-7/8" Longtubes, High Flow Cats, X Pipe, Solo AxleBacks
CTS-V Calipers, Brembo Pads
H&R Lowering Springs, Whiteline Bushings, FE3 Struts/Shocks, Camaro 20" Wheels
HIDs, LED Conversion, Atari Gauges, Tint, Roof Carbon Fiber Wrapped, Innovative Wideband
2.55 Lingenfelter Pulley and Injectors waiting to go on!
sigpicComment
-
hey on those headers, how did you apply that coating? I need something on my malibu headers the uncoatedness does not look to great after two years
1978 Chevy Malibu Classic: 350 Crate Swap, Turbo 350 Transmission, Flowtech Full length Headers, Flowmaster 40's Mufflers, Tru-Dual Exhaust, Goodmark 2in Cowl Hood, Northern Autoparts Racing Aluminum Radiator, Jasper Pearl Paint Job, Billet Specialities Vintec Wheels
1994 Chevy Camaro: Sold
Former Projectcamaro Member
Comment
-
I was going to spray them but actually ended up brushing the coating on due to time and not having a gun here ect. I figured even if they had brush strokes in them in the end no one is gonna see them but they turned out great and I have a lot left over so I could do a few sets easily.Doing less with more
Comment
-
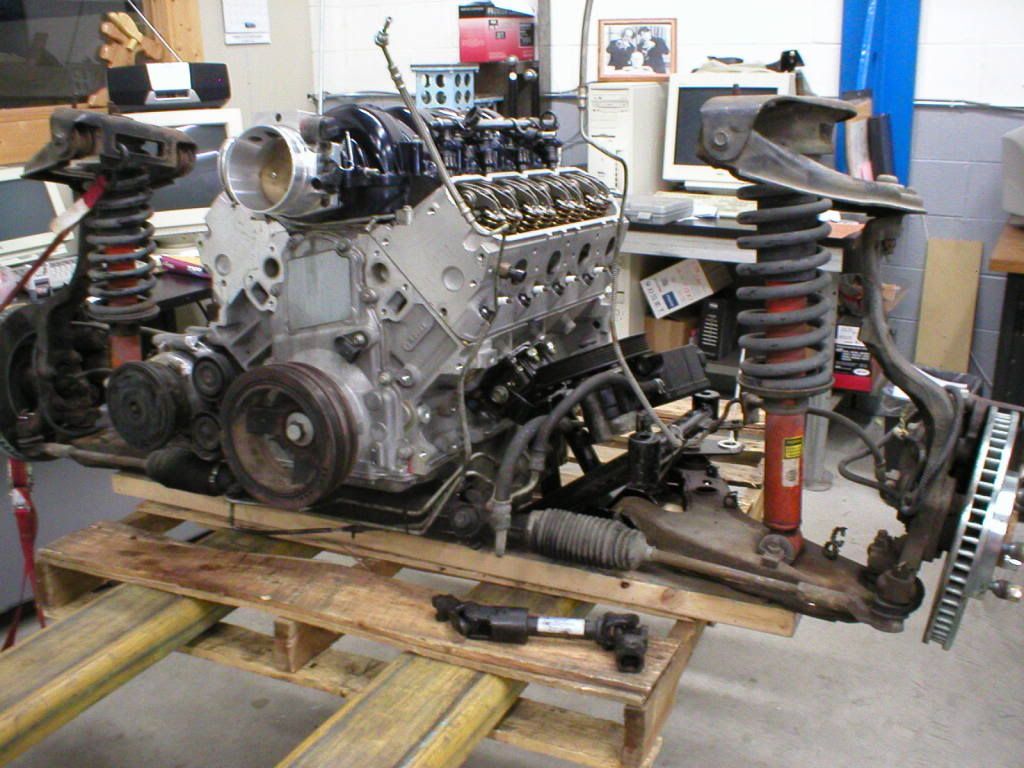
Finally got the Motor back on the K-member today We had a little trouble lining up the bolts through the motor mounts but a little bit of patience and some prying here and there we got them in and torqued down. Then I tackeled the remaining accessories and really filled up the front of the motor. Next time I'll finish sorting out the wiring harness and making all the connections and than it should be time to mate it to the waiting trans and get it back home.
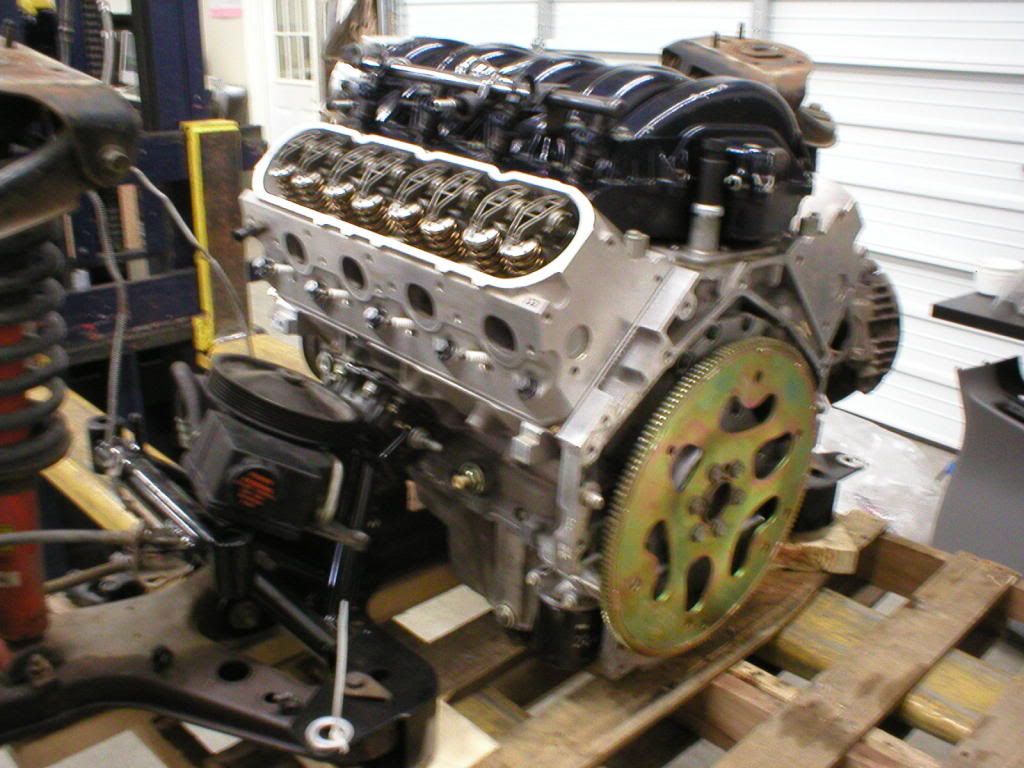
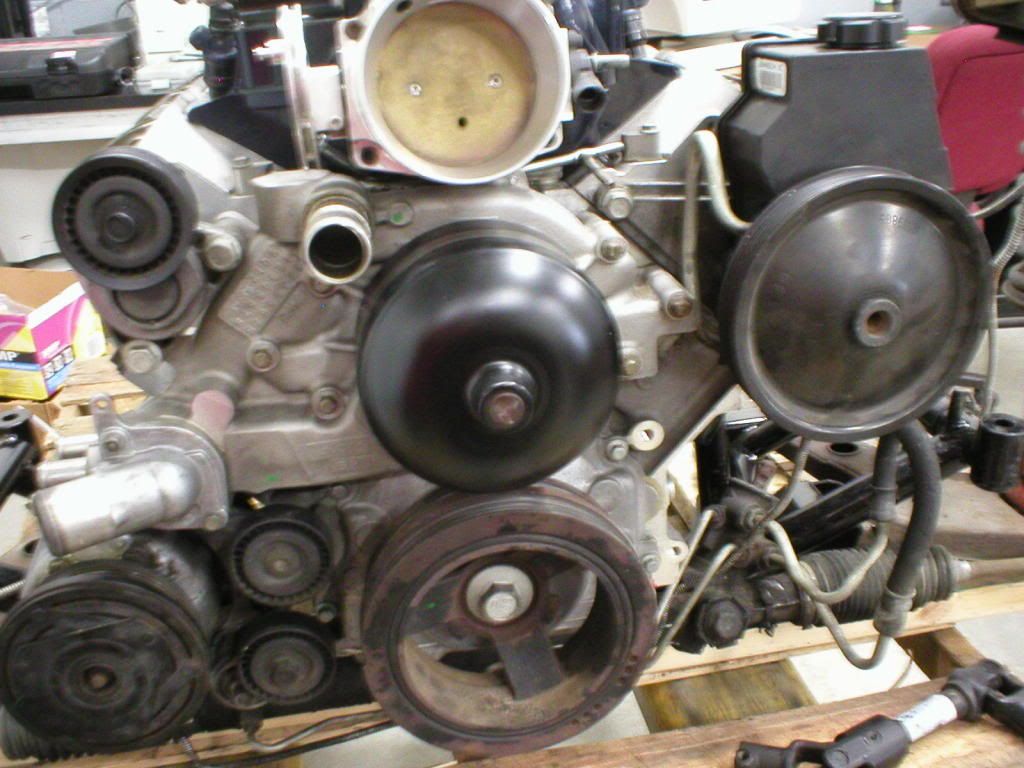
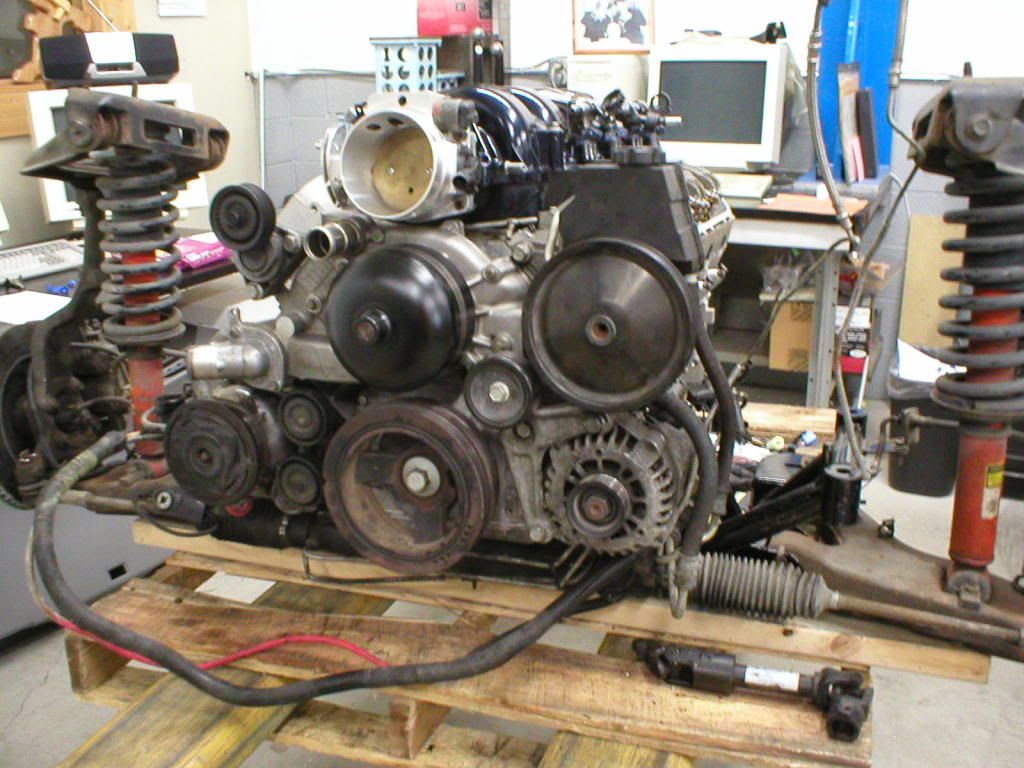 Doing less with more
Comment
-
Looks great Jeff. I'm gonna be home this weekend so if you have some time to work on it and need a hand I'll be there!
Comment
-
Wow - is that how the accessories are stock? That's awesome that they put the alternator down there - that's a $500 bracket for the LT1 gang.- Brian Meissen
Owner, MiFBody.com
Administrator, LTxTech.com

1994 Camaro LT1 Transplant - 357ci LT1, cammed, stalled, and driven.
2022 Camaro LT1 - "Cherry Bomb 2"Michigan FBody Meet & Greet Car Show 2022
June 4th, 2022 - 9am to 3pm!!!
The HUB Stadium, Auburn Hills, MIComment
-
$500?!?!?
God, you could probably have it CNC'd for cheaper if you knew someone...Gone but not forgotten: 1986 Chevrolet Camaro IROC-Z
"You shall ride eternal. Shiny and chrome."Comment


Comment