Welcome to the Michigan FBody Association website.
The Michigan FBody Association is a centralized website for FBody enthusiasts to discuss what's going on in the Michigan area. MiFbody.com was created to allow for an easy one-stop place to find out what's going on in Michigan as far as FBody events, to find out what clubs are available in your immediate area, and for an easy place to post classifieds for items you want to sell! Our goal was to create a more close-knit community of FBody enthusiasts in the state of Michigan, and to bring Camaro and Firebird enthusiasts alike together for some amazing FBody events!
The most important thing to know about the Michigan FBody Association is that we are NOT a club! The Michigan FBody Association is open to everyone, and is a community. Thus, we will have get togethers, casual cruises, events, and such like that, but this is not an exclusive club and it's 100% free to join this site! So what are you waiting for? Register now!
If you have any problems with the registration process or your account login, please contact us!
Holy cow man, thanks for sharing! I can only imagine how it was to be there in person - a lot of history there for sure!!
I guess I never realized the GP dated back to that bodystyle - I always thought it started with the one after it - I thought those were Catalinas at first (obviously they used the Catalina body for those GPs, based on my immediate light reading)
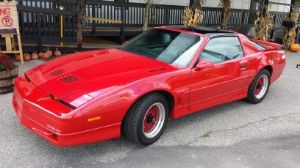
Gone but not forgotten: 1986 Chevrolet Camaro IROC-Z
Yes, shared bodies, different trim and hard parts (I suppose...not an expert). I think the Ventura is the same thing....trim level on an existing car. If you go back up to post 860, mid post there's a BEAUTIFUL black Ventura, with owner sitting next to it in a director's chair.
I didn't realize the rear wiper went back that far (last photo above). That's '48 I think it was.
The story the owner told was that for a few years post-WWII, new car prices were govt. controlled, to try and keep inflation at bay. But that applied to the base car. Dealers could charge more for accessories, so they tended to load the cars up with everything they could find. Don't know if that's true or not, but it makes a good story.
And the upper mount lands perfectly in place as well.
What's the big deal you ask? In a world where SO MANY "drop-in" "direct fit" parts do neither, I was very pleased with how good this part was. It is a touch thinner in the core than the original, but has 4 more rows of tubes. So I would suspect the cooling potential to be equal.
Screws bagged and tagged.
Cleaned up.
Ready for prime time.
Pipes did indeed align perfectly.
A quick sanity check that the new hoses are the shapes they should be.
A bit of whimsy...my original radiator date code.
An ebay date stamp with the right date ranges.
Comparing the stamp to the original tank...font, spacing, size, all damn close if not perfect.
A little puddle of white enamel paint on a paper plate.
Trying to avoid excess paint on the stamper, I placed a sheet of paper towel into the paint, and let it soak through.
These are never perfect from the factory, and my repro is a lot "wetter" than the factory markings, but it's good enough for who it's for. With other planned engine compartment modification, this car will never be in concours judging. My intent is to maintain a factory look, or theme, where reasonably possible, but not sweating it if I cannot.
Touched up water pump pulley with freshened up bolts installed to more easily clean/polish the belt surface.
Snug 'em down.
Ready for action.
Cleaning up the fan...yuck!
Better.
Back home.
Connected, and secured with a factory style zip-tie. Again, original style when I can get it, or when it makes sense to me.
Original hose clamps. Tried to clean and de-rust these, but it was turning into a project I didn't want to waste time on. I KNOW I ordered replacements of these through Inline Tube, but I'll be danged if I can find them now. So I ordered another set.
With the diverter valve gone, these need to be dealt with.
A little dielectric grease packed into the terminals/connector body, and wrapped in proper (non-adhesive) harness tape.
Zip tied to an adjoining harness to keep them away from the exhaust.
This piece of foam for the heater core...I had tried to do it as one piece, but with a 90** bend, that short leg would not stay stuck down. So I made it two pieces.
Installed (after much wrestling).
Oh yeah...previous tech had broken out upper mounting hole...forgot I wanted to get a replacement cover and a few missing fasteners. I'll have to fix what I have for now to keep the momentum going.
Cut down a black plastic washer to help fill the hole. My last one too...went to buy more at the local hardware store, and they had nothing like it (just nylon). Don't know where I got this originally.
Hole drilled (sort of guessed at the location...we'll see how that works out) and epoxied into place, inside and out.
 Tweet
Tweet




Comment