 Tweet
Tweet
Like many of you, my t-tops have been leaking BADLY when it rains. Mine was leaking from the joint between the back of the driver side t-top and the B-pillar, and it would drip down onto the driver side rear foot well and onto/down the driver seat belt. It would literally puddle in the rear footwell.
It leaked so badly in fact that I once actually stopped at a fast food place just to get a cup so that I could scoop out water from the driver side rear footwell and I got MANY cup fulls.. Finally fed up, I decided to do something about it. In summary, I took it apart and RTVed the crap out of it! Good news is it worked beautifully!
Anyway, here's what I did. Hopefully it helps some of you out too:
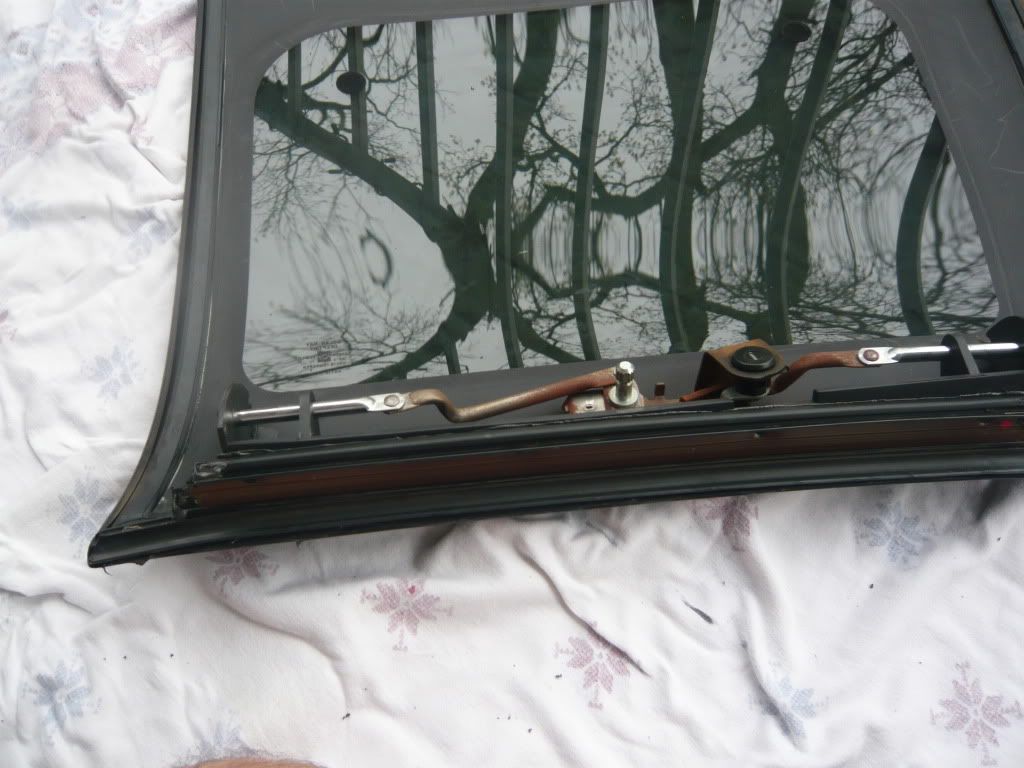
(1) Fully disassemble the t-top
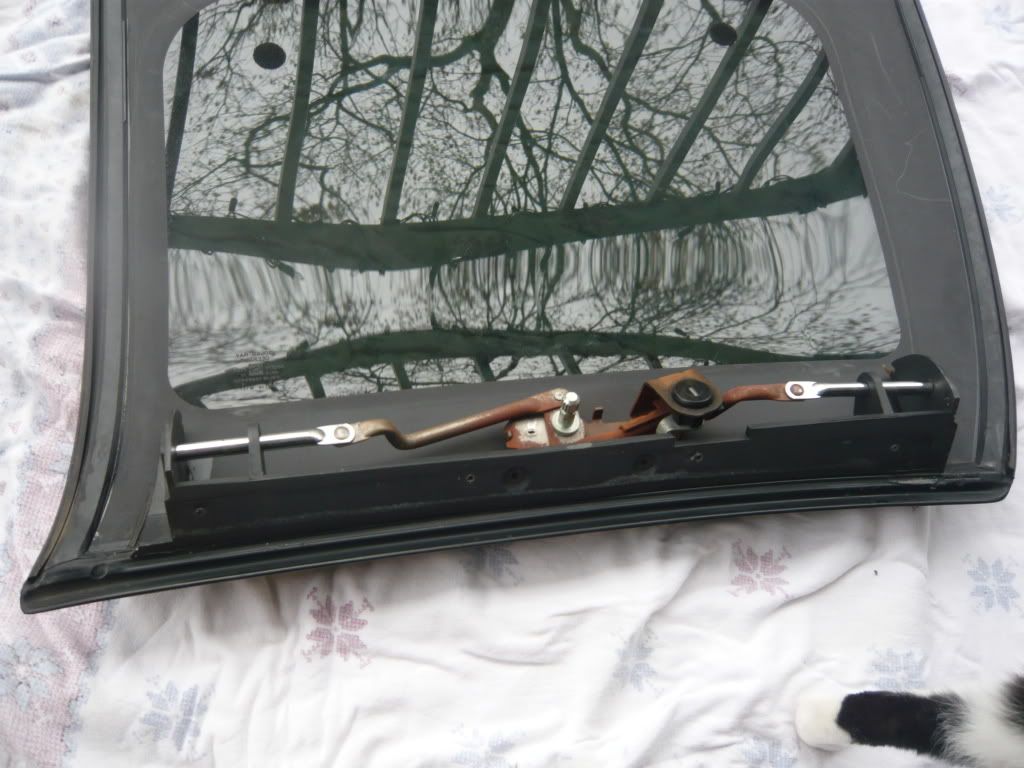
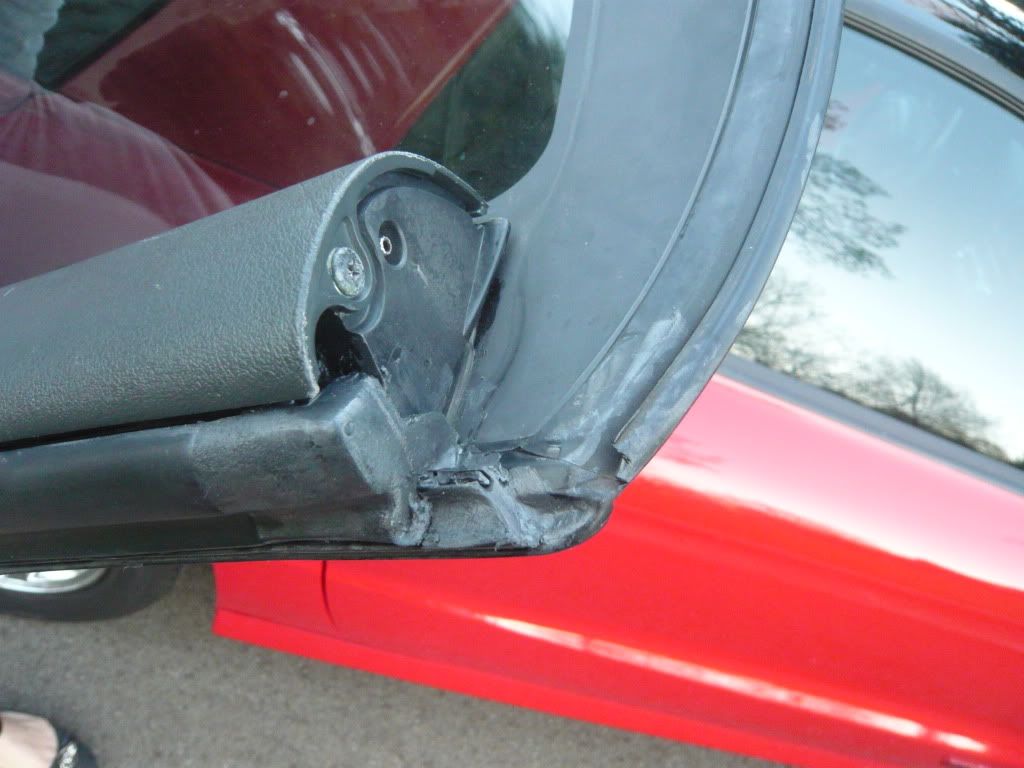
(2) A part of the seal was torn, so I just finished the job by fulling pulling this part off. It is replaced with RTV anyway
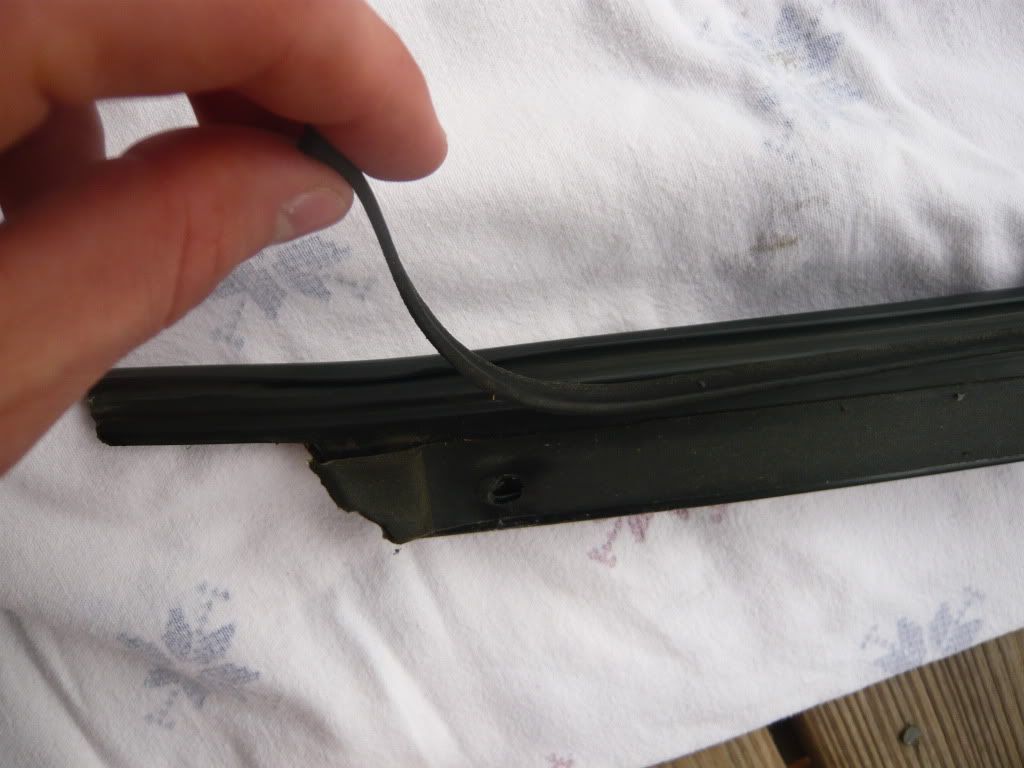
*Also, see the lower left corner how the large flat seal material is pulling away from the metal? I put RTV between the seal and the metal to help hold it in place when everything was bolted back together so water couldn't travel there.
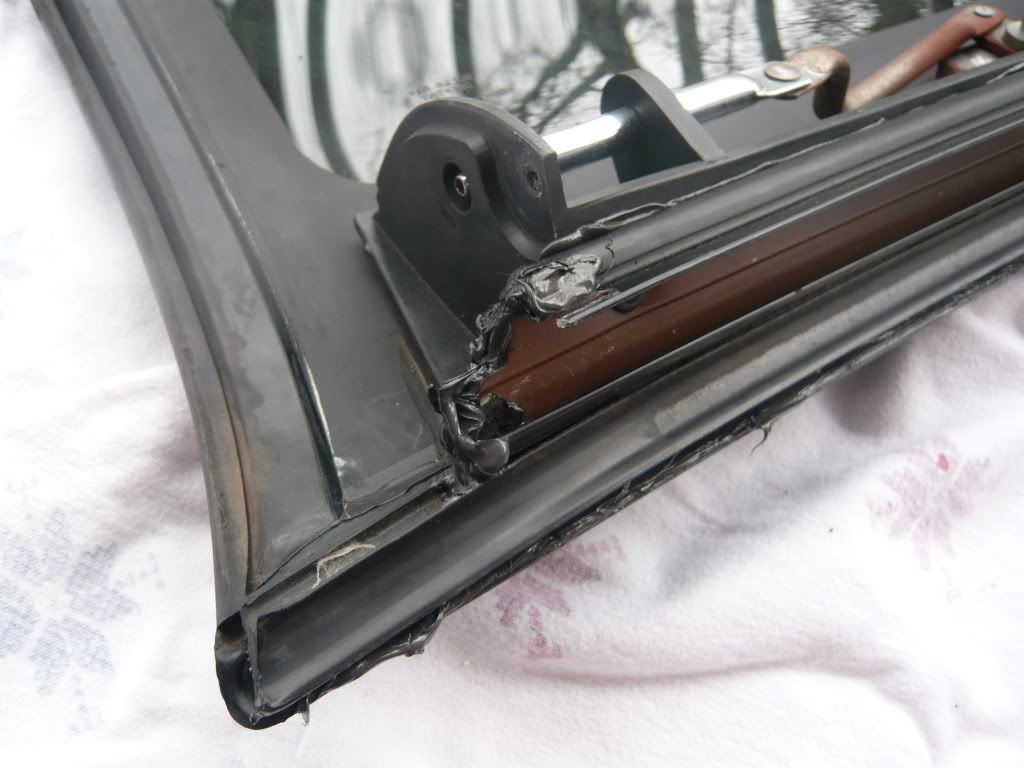
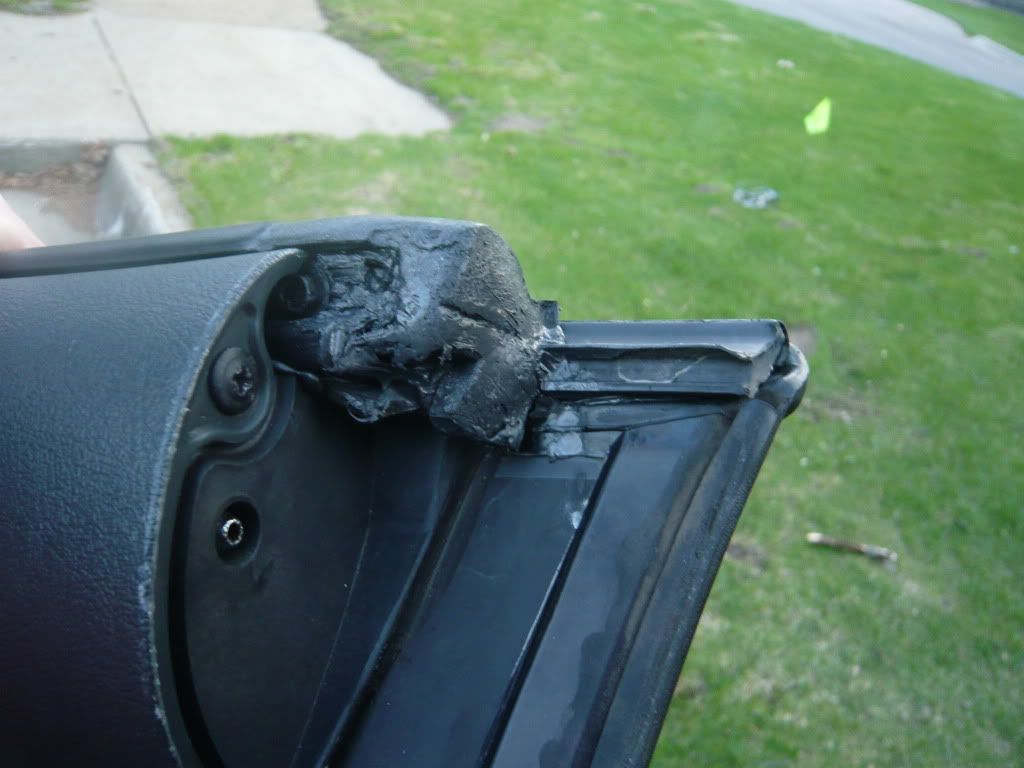
(3) RTV the whole perimeter where metal piece contacts the t-top frame.
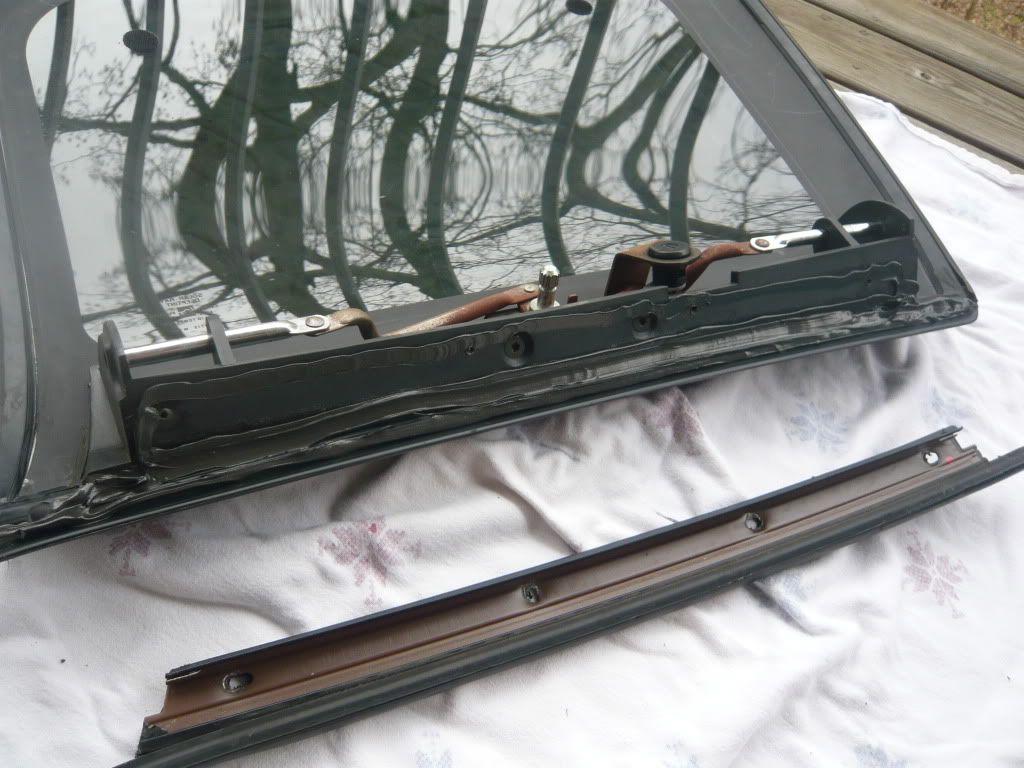
Make sure to get the whole bottom edge fully covered in RTV as this is the area that replaced the seal that we tore off in step 2. Remember, water doesn't like RTV so use it liberally
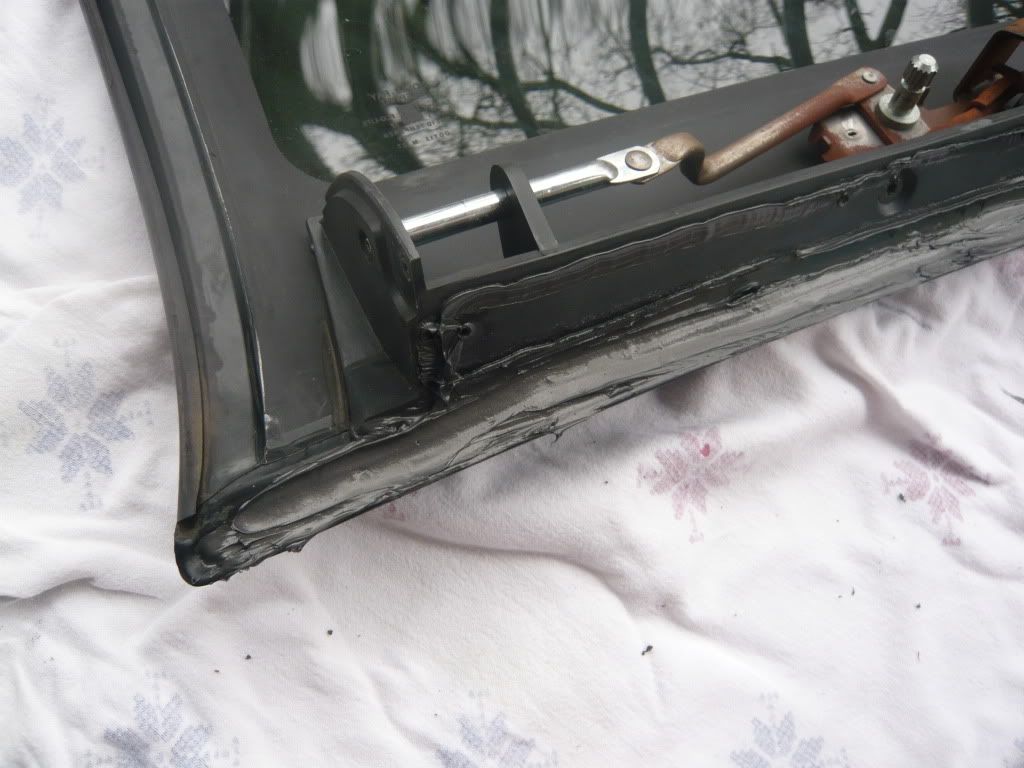
(4) Before bolting down the metal piece, I RTVed the end seams where the different parts meet so ensure no leakage from there.

Then bolt it back in place.
(5) Next I put RTV on all the edges of the "side seal" where it slides into the metal piece so ensure that the edges had a good seal. It was very difficult to slide the "side seal" back into the metal piece with the RTV, but keep at it and you'll get it in there, as well as get RTV all over your hands and the seal. You want to start feeding it into the channels on the metal part by starting at one end and just pushing it through, little by little. You can't properly seat it by just putting it on from the side. This is hard to explain but you'll see what I mean if you try it.
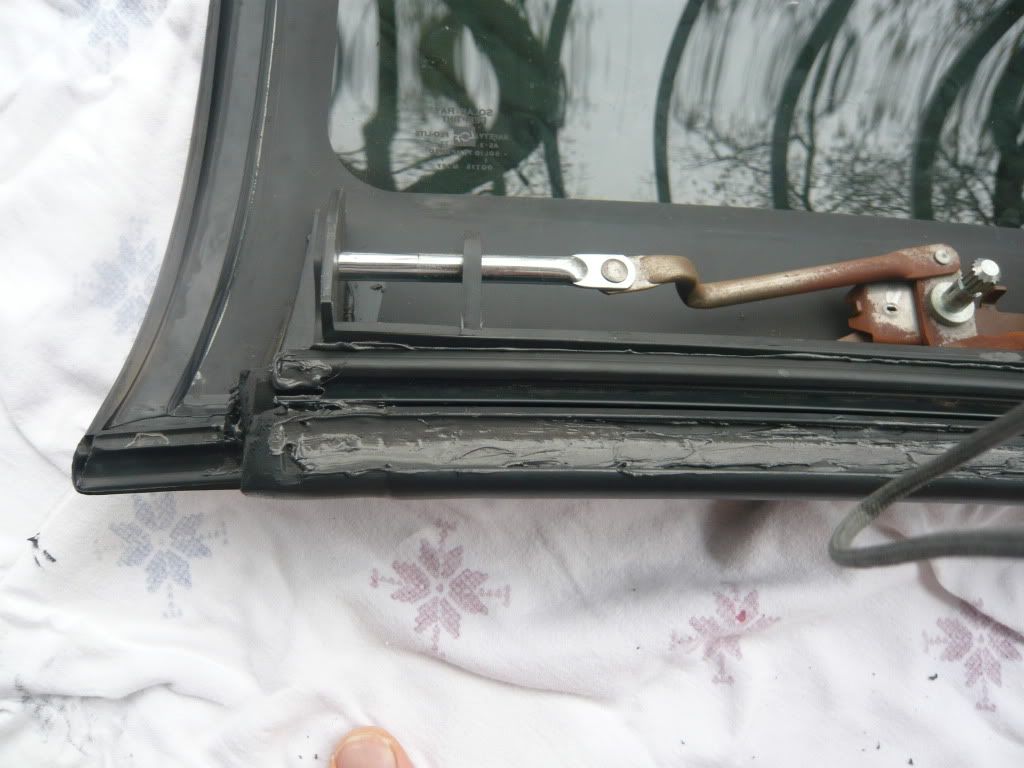
Once its back in place, I used brake cleaner on a rag and it removed all the random RTV that I got on the exterior of the seal so it looked nice again.
(6) At this point, just scrape off any excessive RTV that you don't want there. Don't take any off of the front and rear edge because that extra RTV has a purpose in step 7. While you have the cover off - grease your t-top latch mechanisms! Now put the plastic cover and handle back on.
(7) Get two pieces of plastic wrap and put them at the front and rear of the t-top, then re-install the t-top onto your car. This allows the excess RTV at the ends to cure on the perfect form to hold onto the mating parts.
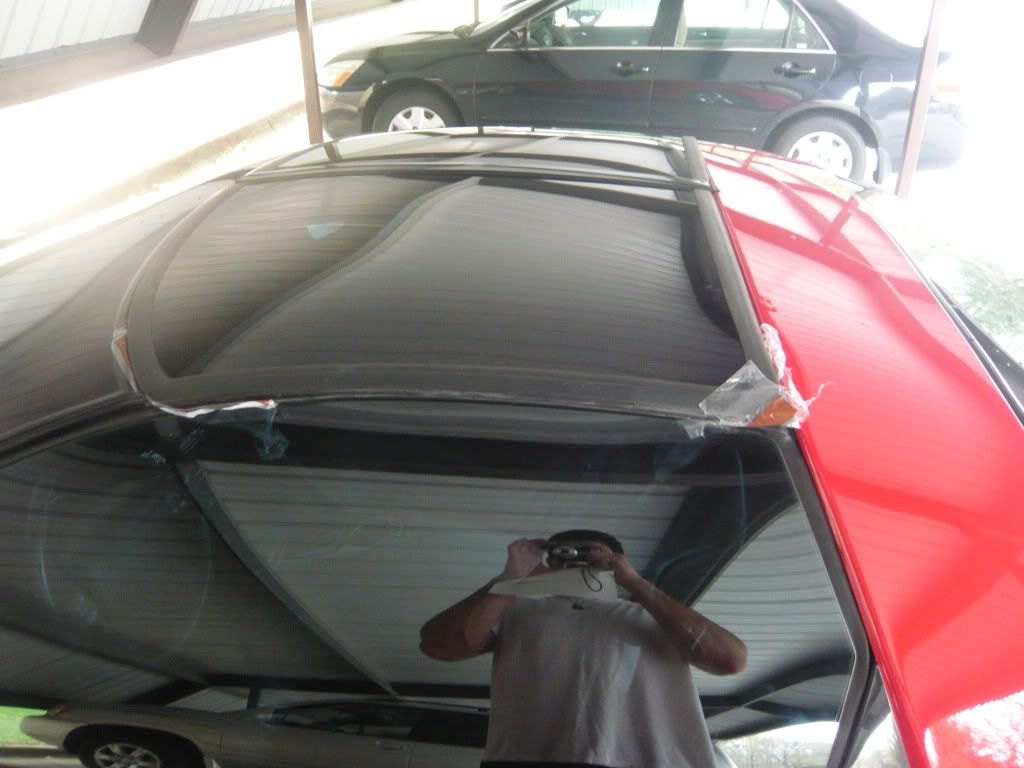
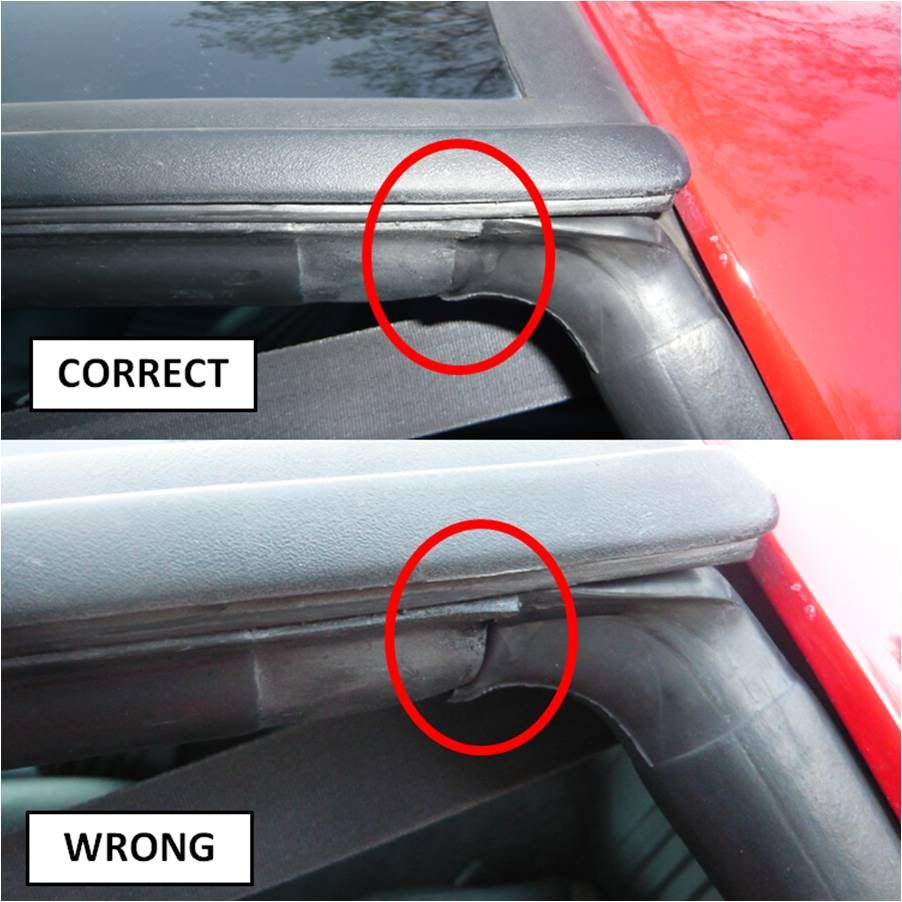
(8) After RTV has cured, remove plastic and enjoy! You now have protection against the elements once again! I also made sure to have the t-top seal sit properly inside the mating seal's lip (see pic below). This is important to having a good seal, but didn't make a difference before I fixed the actual t-top seal with the RTV as outlined above. I also put RTV on all surfaces of the end of the side seal and then wiped it off, thinking that the RTV would fill in any small voids or pinholes in the seal to help make it water tight again.
Yesterday we had really hard rain all morning and I was very pleased to find my carpet was completely dry. :engarde:
Some of you may be worried about it looking bad with having used all that RTV but it doesn't. If you just scrape off the excess and use brake cleaner on a rag to wipe off excess traces where you don't want it, you can't even tell this was done. There may be "more professional" ways of fixing this, but it only took me 20 minutes and a tube of RTV which I find much more acceptable than buying new seals for a few hundred bucks. And like I said, you can't even tell I did this.
Best of luck! Hope someone finds this helpful.
It leaked so badly in fact that I once actually stopped at a fast food place just to get a cup so that I could scoop out water from the driver side rear footwell and I got MANY cup fulls.. Finally fed up, I decided to do something about it. In summary, I took it apart and RTVed the crap out of it! Good news is it worked beautifully!
Anyway, here's what I did. Hopefully it helps some of you out too:
(1) Fully disassemble the t-top
(2) A part of the seal was torn, so I just finished the job by fulling pulling this part off. It is replaced with RTV anyway
*Also, see the lower left corner how the large flat seal material is pulling away from the metal? I put RTV between the seal and the metal to help hold it in place when everything was bolted back together so water couldn't travel there.
(3) RTV the whole perimeter where metal piece contacts the t-top frame.
Make sure to get the whole bottom edge fully covered in RTV as this is the area that replaced the seal that we tore off in step 2. Remember, water doesn't like RTV so use it liberally
(4) Before bolting down the metal piece, I RTVed the end seams where the different parts meet so ensure no leakage from there.
Then bolt it back in place.
(5) Next I put RTV on all the edges of the "side seal" where it slides into the metal piece so ensure that the edges had a good seal. It was very difficult to slide the "side seal" back into the metal piece with the RTV, but keep at it and you'll get it in there, as well as get RTV all over your hands and the seal. You want to start feeding it into the channels on the metal part by starting at one end and just pushing it through, little by little. You can't properly seat it by just putting it on from the side. This is hard to explain but you'll see what I mean if you try it.
Once its back in place, I used brake cleaner on a rag and it removed all the random RTV that I got on the exterior of the seal so it looked nice again.
(6) At this point, just scrape off any excessive RTV that you don't want there. Don't take any off of the front and rear edge because that extra RTV has a purpose in step 7. While you have the cover off - grease your t-top latch mechanisms! Now put the plastic cover and handle back on.
(7) Get two pieces of plastic wrap and put them at the front and rear of the t-top, then re-install the t-top onto your car. This allows the excess RTV at the ends to cure on the perfect form to hold onto the mating parts.
(8) After RTV has cured, remove plastic and enjoy! You now have protection against the elements once again! I also made sure to have the t-top seal sit properly inside the mating seal's lip (see pic below). This is important to having a good seal, but didn't make a difference before I fixed the actual t-top seal with the RTV as outlined above. I also put RTV on all surfaces of the end of the side seal and then wiped it off, thinking that the RTV would fill in any small voids or pinholes in the seal to help make it water tight again.
Yesterday we had really hard rain all morning and I was very pleased to find my carpet was completely dry. :engarde:
Some of you may be worried about it looking bad with having used all that RTV but it doesn't. If you just scrape off the excess and use brake cleaner on a rag to wipe off excess traces where you don't want it, you can't even tell this was done. There may be "more professional" ways of fixing this, but it only took me 20 minutes and a tube of RTV which I find much more acceptable than buying new seals for a few hundred bucks. And like I said, you can't even tell I did this.
Best of luck! Hope someone finds this helpful.


Comment