 Tweet
Tweet
it is currently painted NBM but the paint has a lot of chips so I'm either gonna repaint it or have it powdercoated NBM.
-
Doing less with more

-
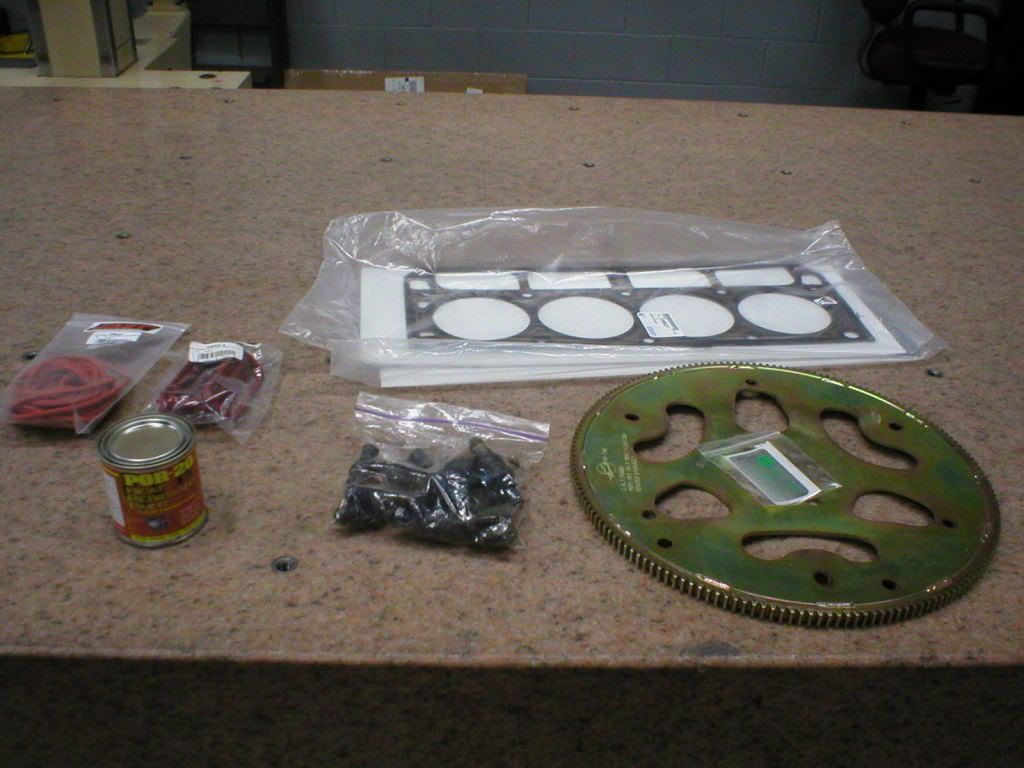
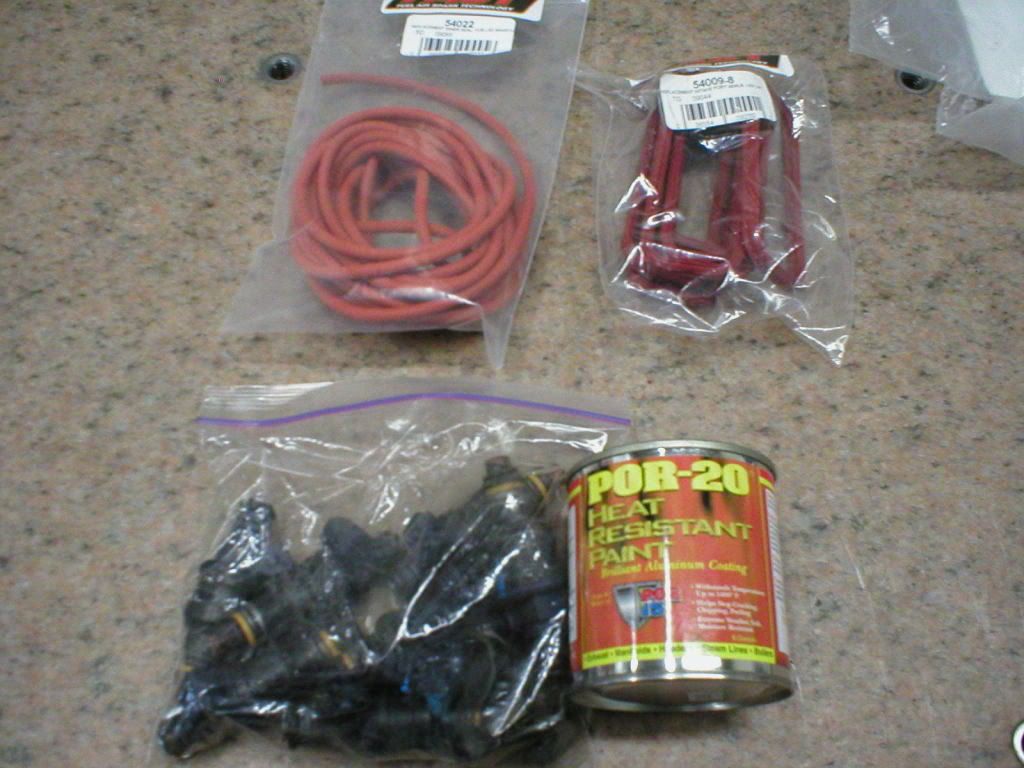
Got some mail today.

 Doing less with more
Comment
-
Looks good Mr Sarr! - Brian Meissen
Owner, MiFBody.com
Administrator, LTxTech.com

1994 Camaro LT1 Transplant - 357ci LT1, cammed, stalled, and driven.
2022 Camaro LT1 - "Cherry Bomb 2"Michigan FBody Meet & Greet Car Show 2022
June 4th, 2022 - 9am to 3pm!!!
The HUB Stadium, Auburn Hills, MIComment
-
Shits weak.
Comment
-
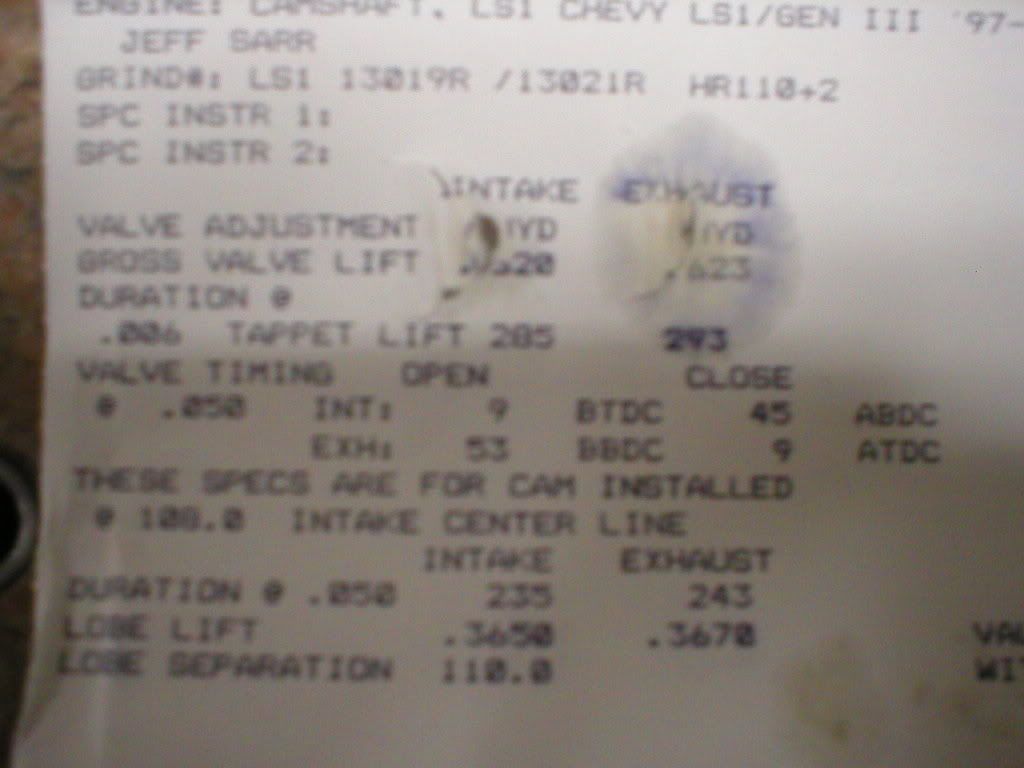
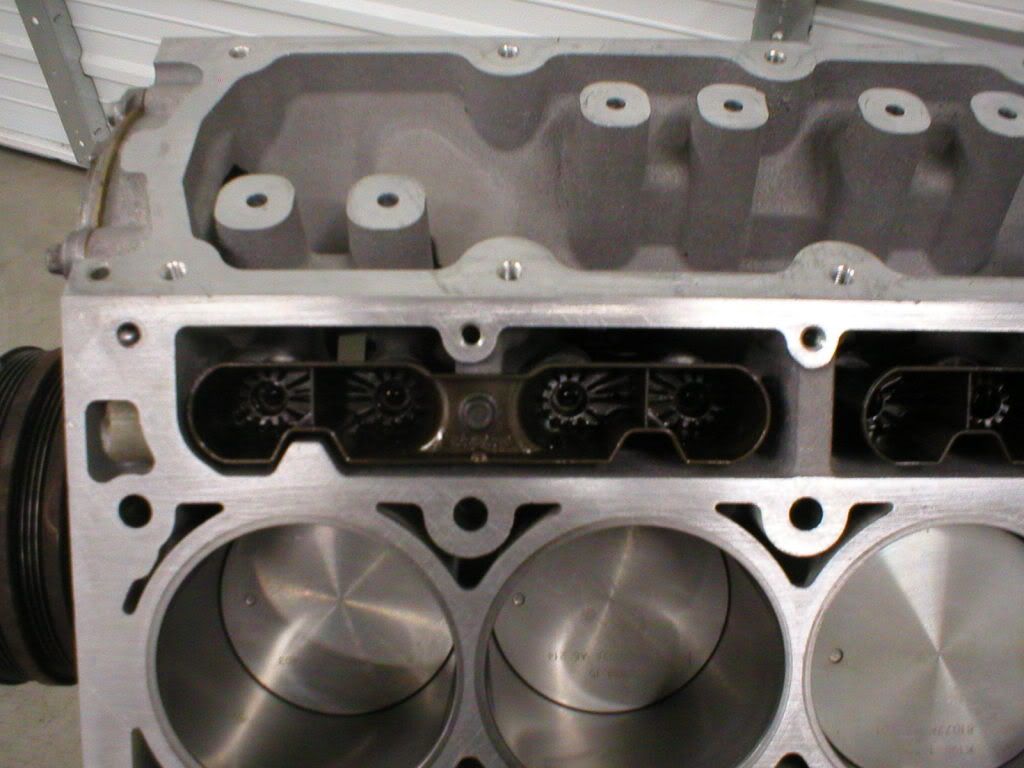
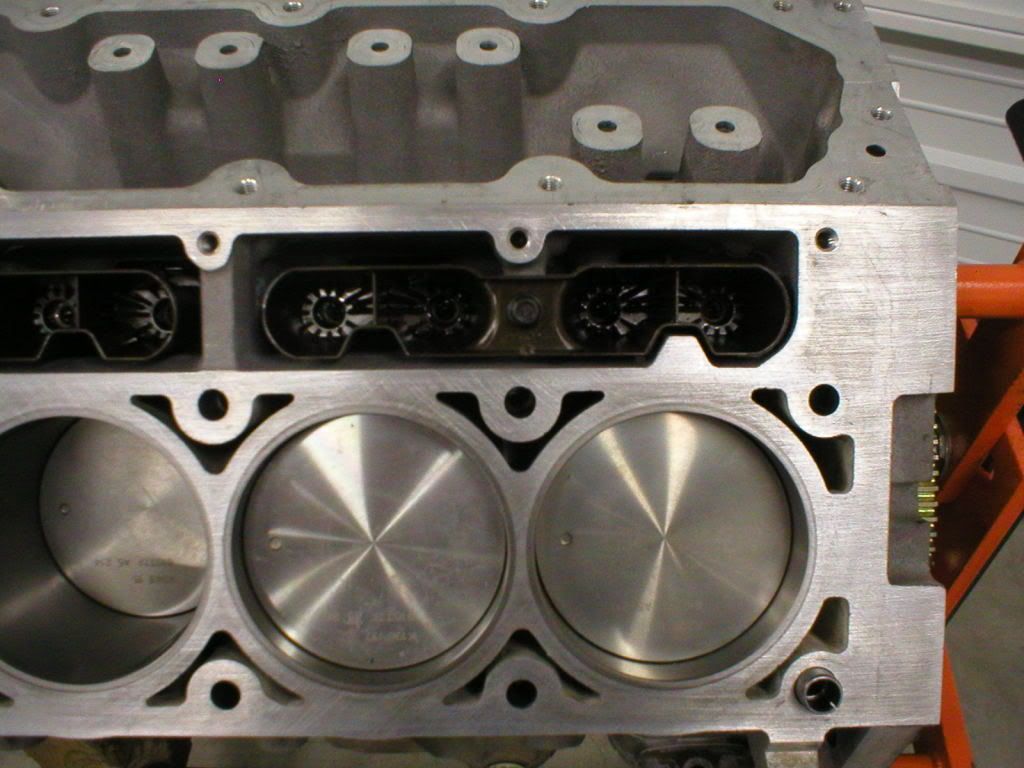
Yeah they spelled my name and the shop where they delivered it incorrectly, but I don't care because it made it here anyways I'm so excited that I can actually start working on it again. I also found out that when I had my injectors flowed that two of them were pretty bad, one of which was beyond horrible. Unfortunatly I didn't mark up the busted cylinder to know if that was the problem for sure but it very well could have been.
Doing less with more
I'm so excited that I can actually start working on it again. I also found out that when I had my injectors flowed that two of them were pretty bad, one of which was beyond horrible. Unfortunatly I didn't mark up the busted cylinder to know if that was the problem for sure but it very well could have been.
Doing less with more
Comment
-
I dont know much about the LS engine. But following stuff like this is a nice learning experience.
How much was your cam? My dad will most likely pass on the new camaro he was going to get and just go back to building his t/a
Comment
-
That cam cost me $405 but if you go with an off the shelf grind they are around $325-350Doing less with more
Comment
-
Wow, good thing that you had those injectors flow tested! Looks good, can't wait to see it all together at the M&G.
2011 Mustang GT
20" Satin Black AMRs with 305/35 & 275/35 MT Street Radials, Saleen Grille, CS Lower Valance, Roush Axleback, GT500 Spoiler, resonator delete
In Progress: Brembo 6-piston brake upgrade
Comment
-
It makes me feel like someone is actually reading this when you guys leave good compliments like that, glad you like what you see so far so here is some more.
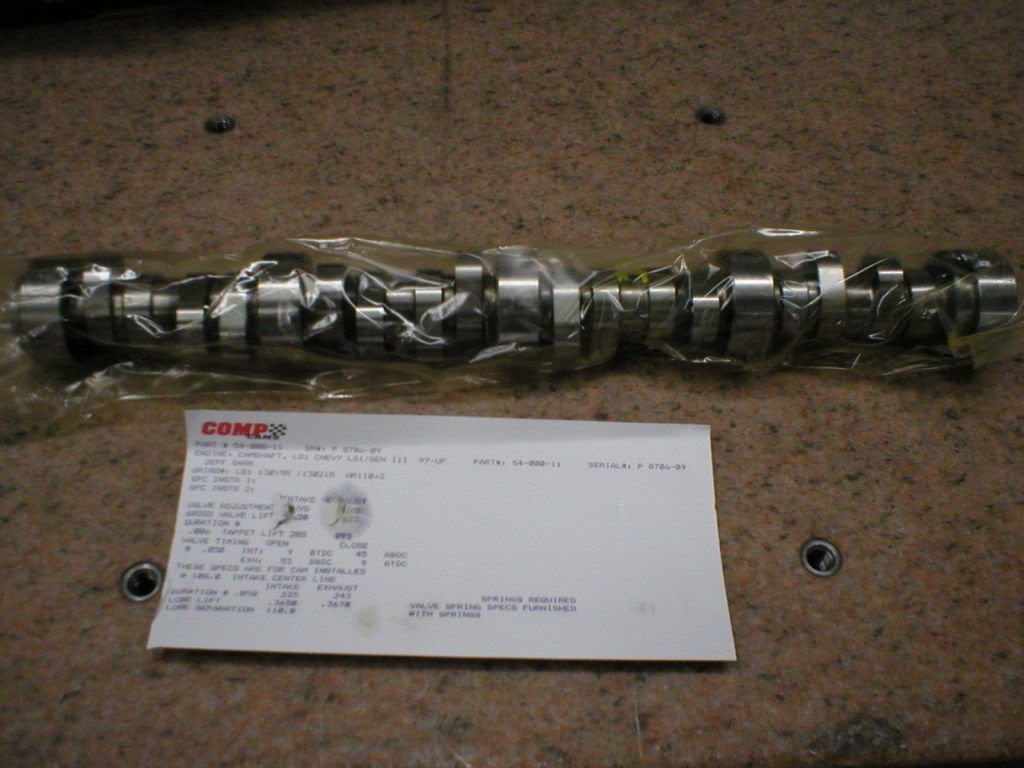
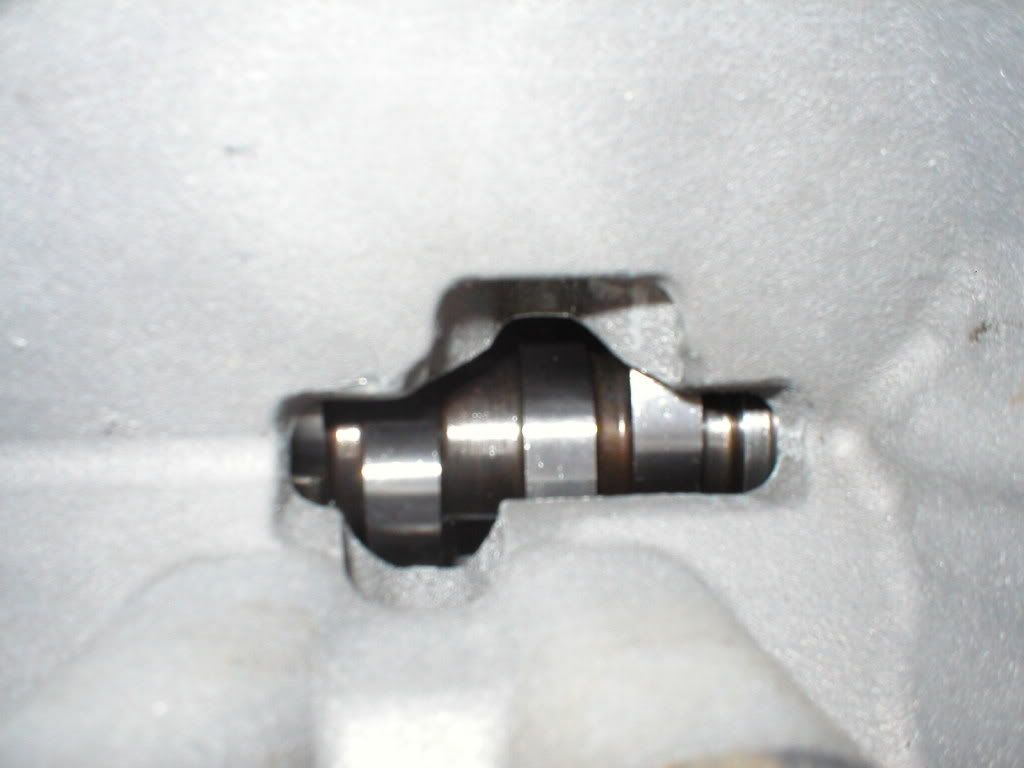
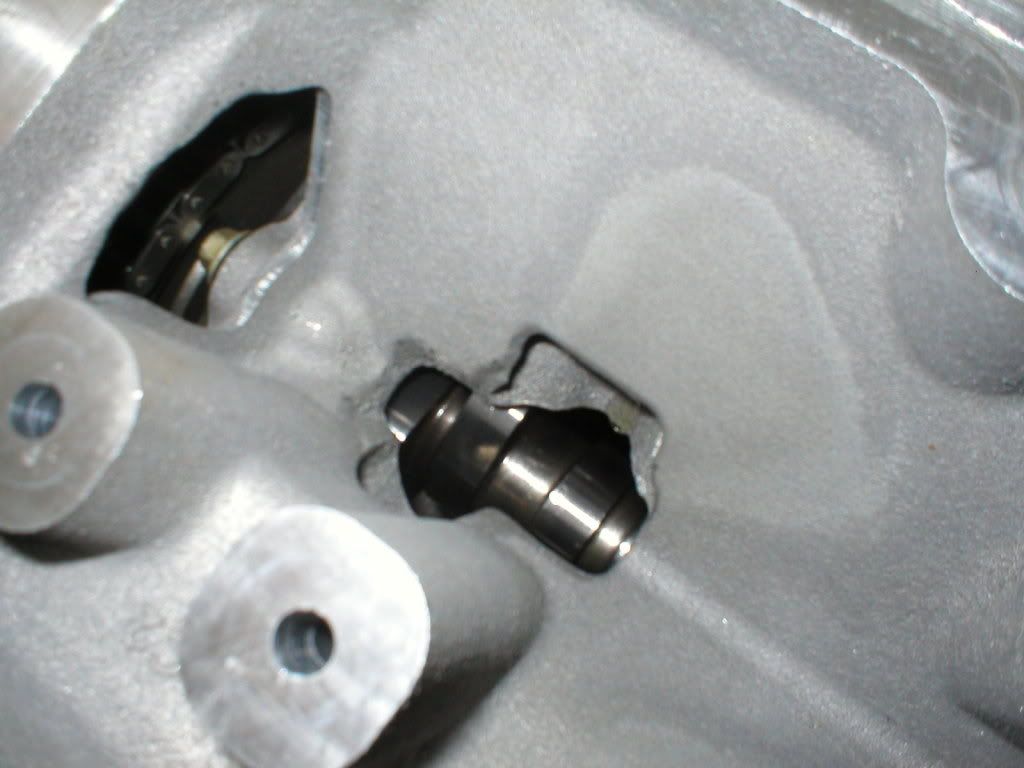
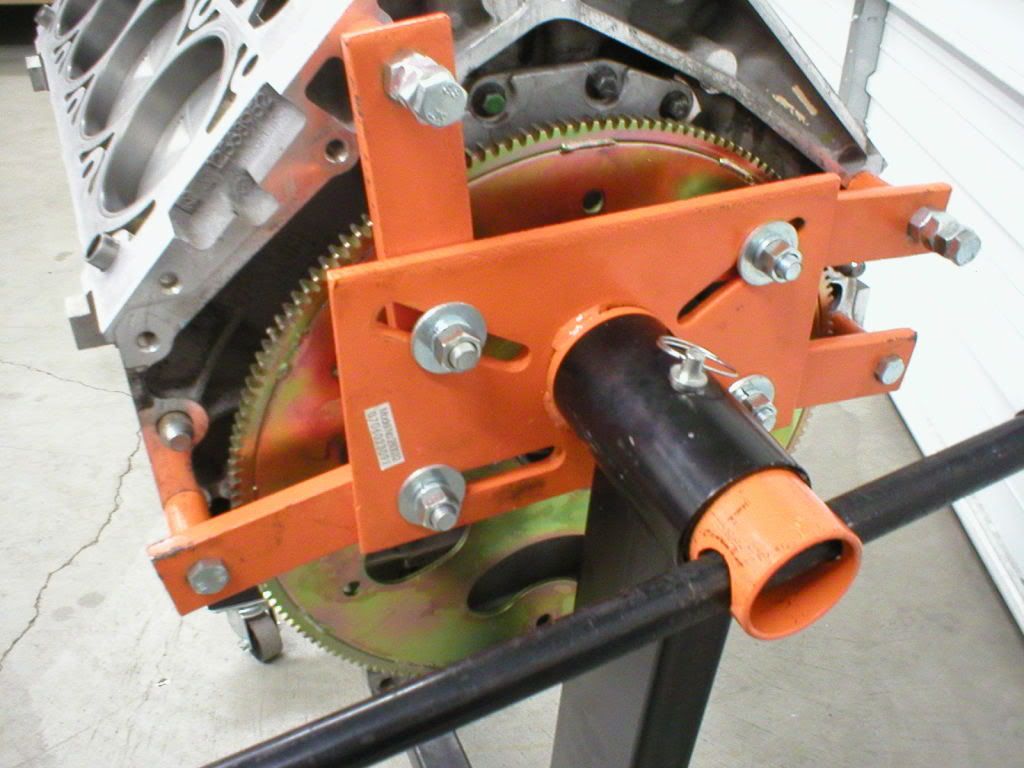
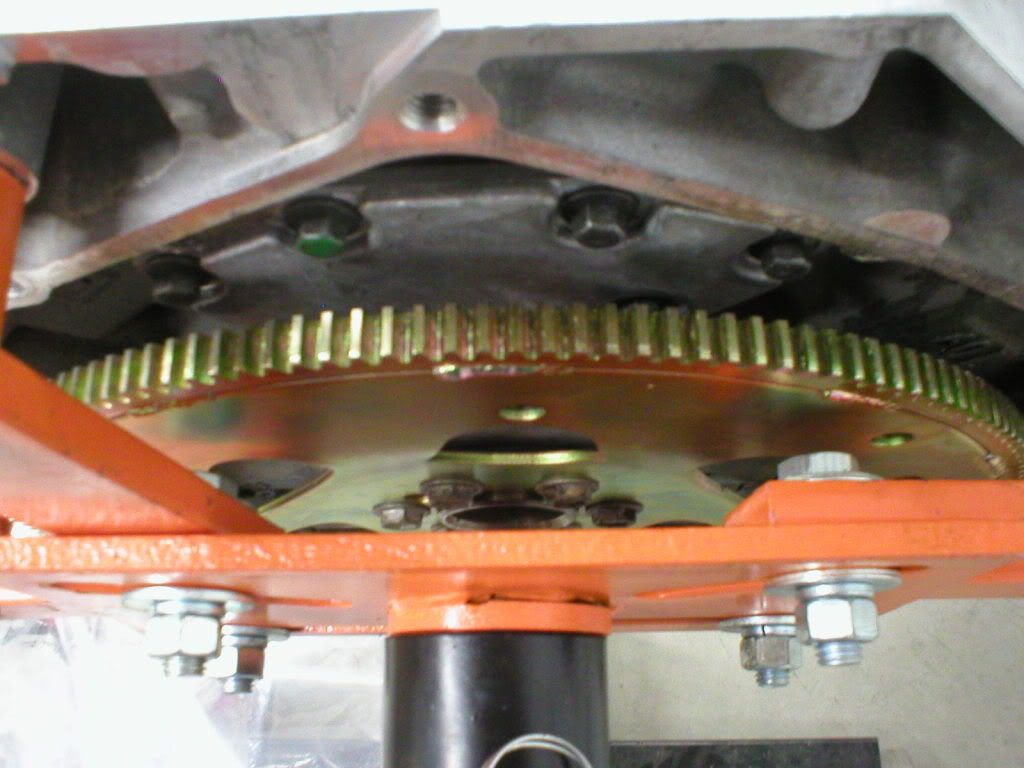
I got all my goodies and then proceeded to install my new cam, only to soon after find out that I didn't install the tensioner that the LS2 block has for the timing chain, this meant that I had to remove the oil pan and oil pump to gain access to the bolt holes After that while everything else was off I went ahead and installed the timing set and set the cam dot-to-dot. Now back to replacing the oil pump and pan again my dad takes a look at the motor and asks "Where does the oil dipstick go into this pan?" I proceeded to bash my head against a wall when I looked and noticed that the engine shop either put a small piece in the port or the guy that shipped the motor to me originally. Either way I once again removed the oil pan and luckly just tapped it right out, needless to say I can swap the pan in 5 minutes now but would rather not again.
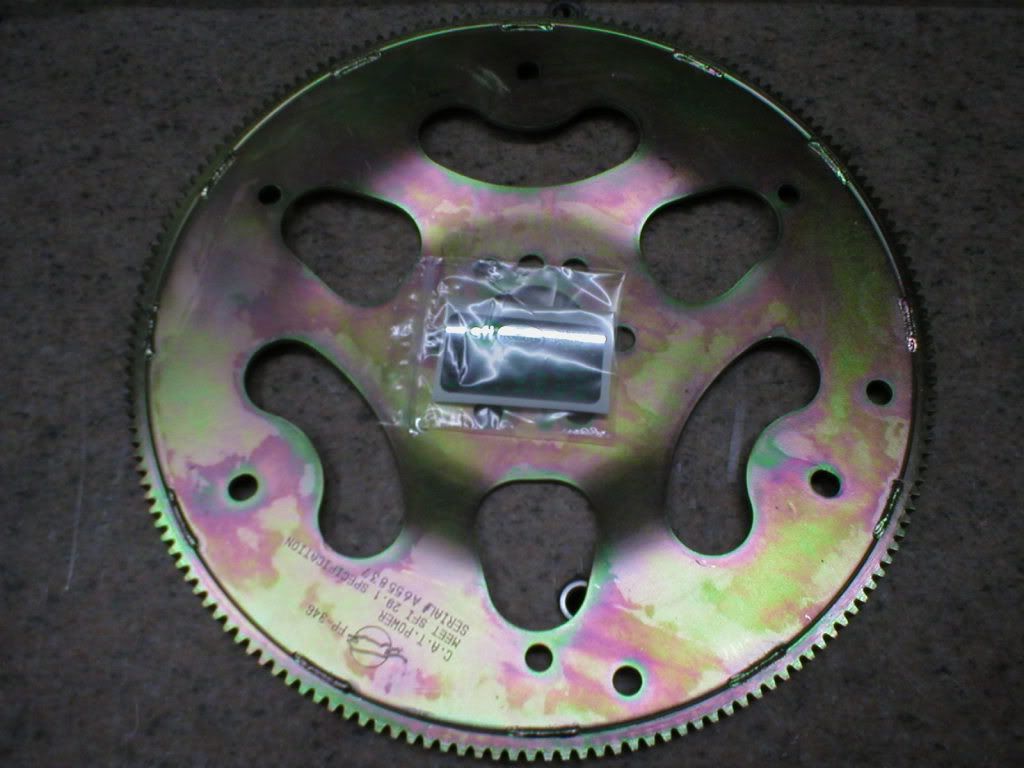
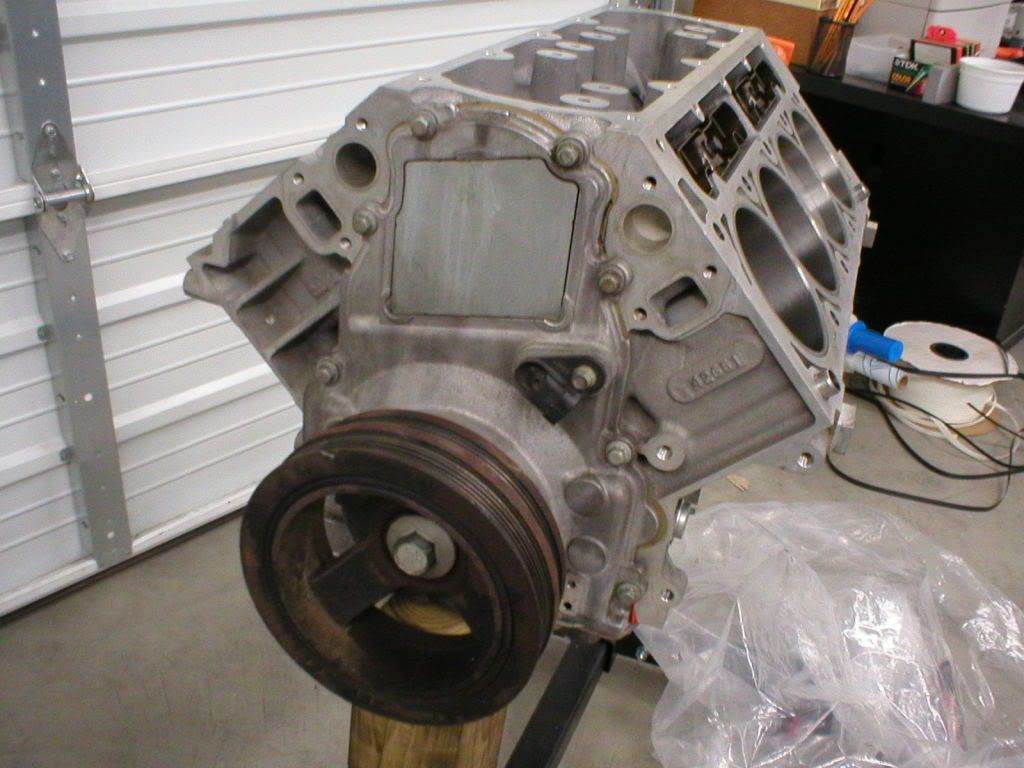
After all that fiasco I then proceeded to put the timing cover and harmonic balancer on as well as my new flexplate. After that I spent a few hours replacing my springs with testers and checking my pushrod length a few times over. Believe it or not my pushrods came out to the same length as the set I used previously had so thats a plus, unfortunatly I forgot to order some ARP moly lube so the heads won't go on until I get some but were making some good progress. I then installed the lifters after soaking them in some fresh oil and also slapped on the valley cover.
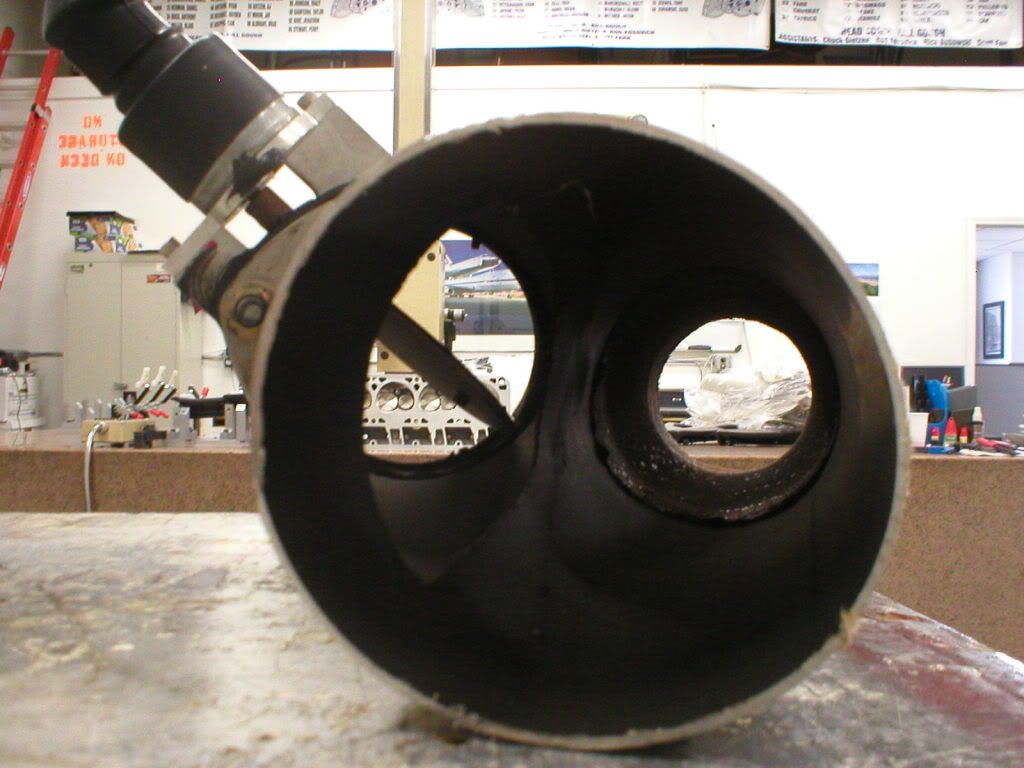
My next set of plans are to clean the headers and begin coating them with POR20 and also to reassemble my FAST intake manifold which I already started on by putting some new gasket sealer on the bottom half and reattaching that for now, tomorrow I will reinstall my new top half gaskets and put the throttle body and my polished fuel rails and injectors back on. Here are a few pics I snapped.
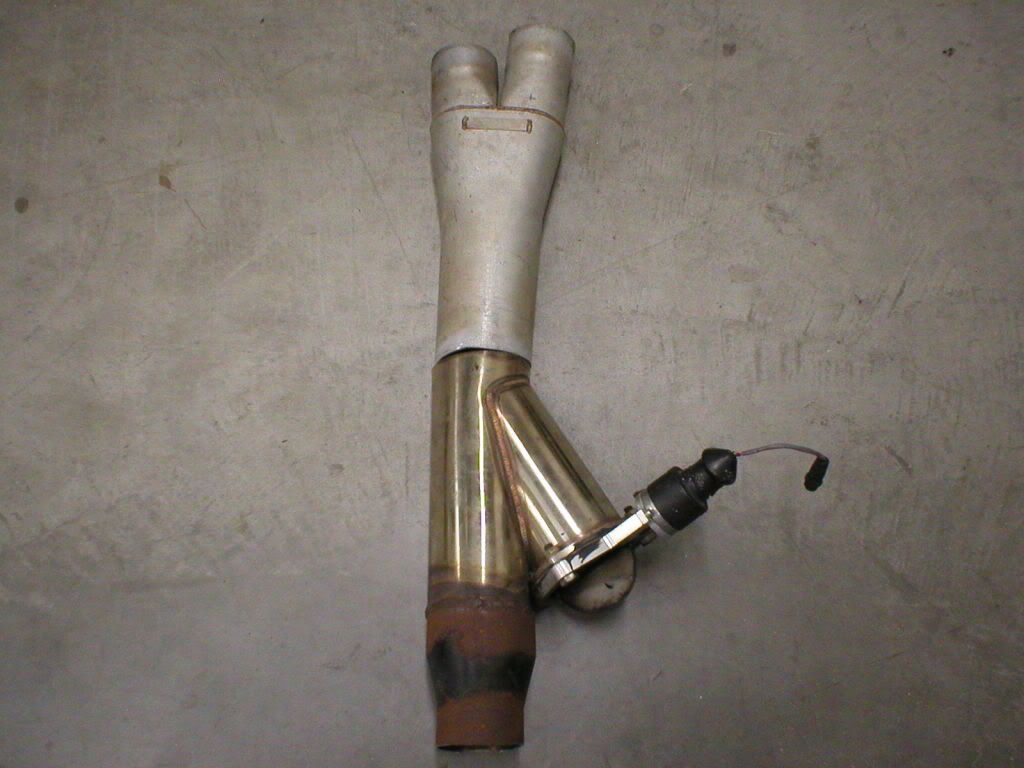
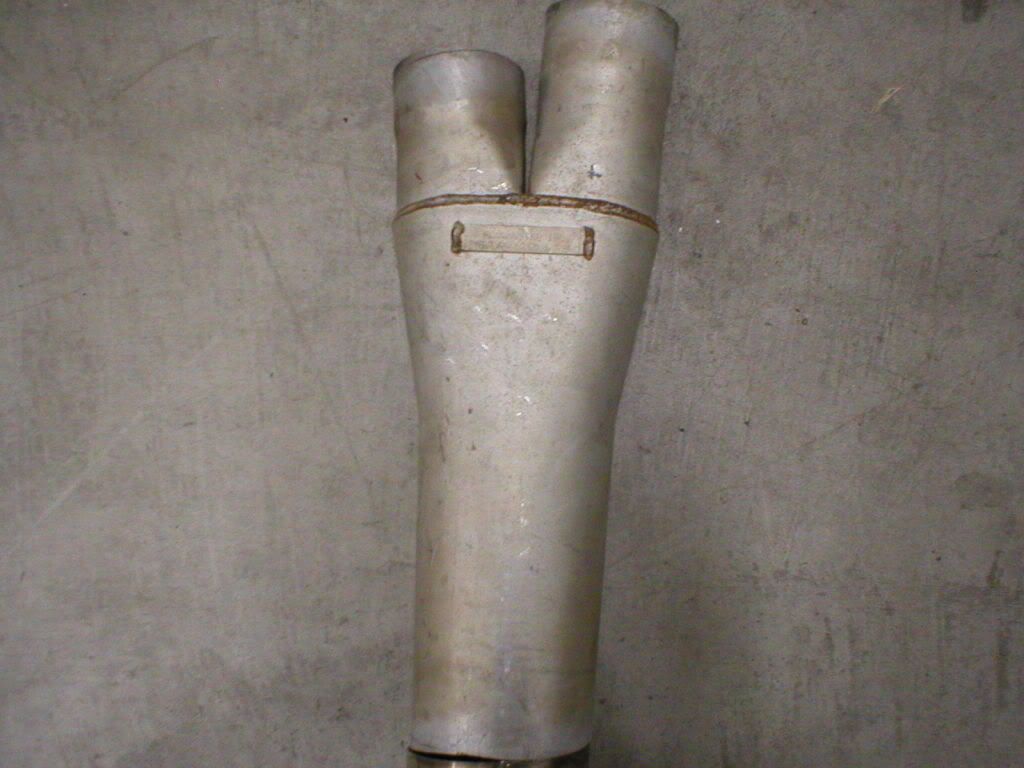
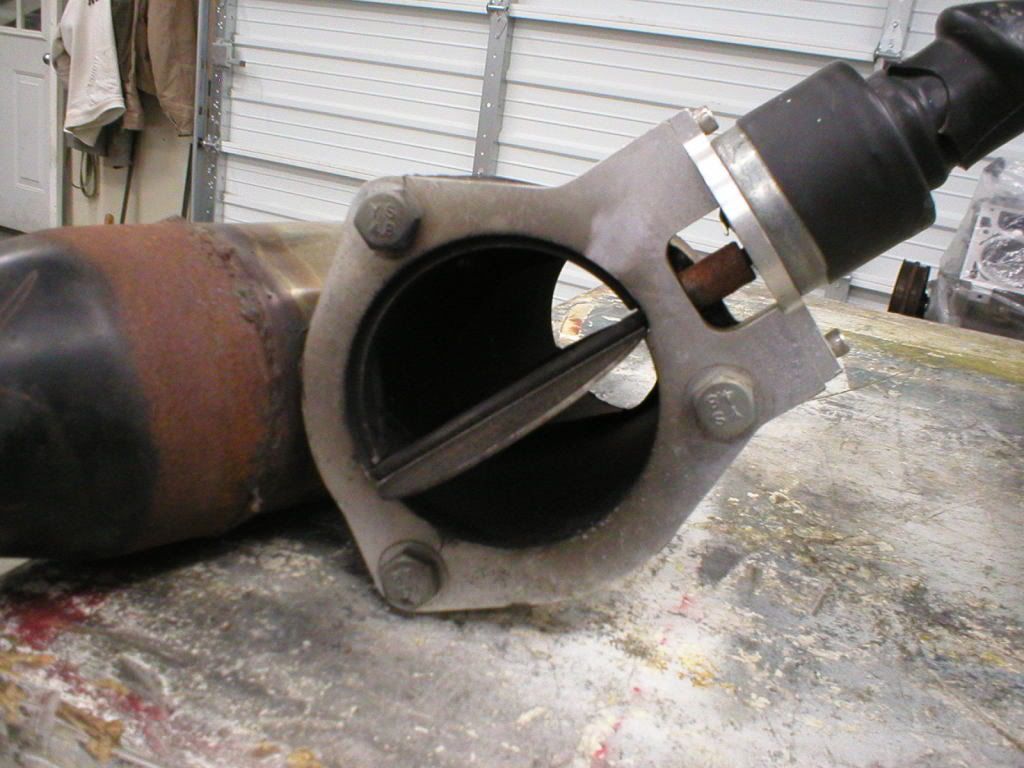
I also got a good deal on some of my finishing exhaust pieces, seeing as I'm actually going to be running a factory catback I have been wanting to install a flowmaster merge in my y-pipe for some time and to go with it a nice 4" stainless QTP electric cutout for when I want it loud
 Doing less with more
Comment
-
Looking good Jeffery.
Just go to the porn store and get some lube. No reason to wait on that ARP stuff
Comment
-
4" exhaust nice!2011 Ford Raptor SuperCrew
SVT Beadlock Wheels
Roush Intake, Corsa Exhaust
20" and 40" Light Bars
2000 Camaro Z28
Stripped Down Drag Car Build
Project 1999 Camaro Z28
2009 G8 GT Stryker Blue Metallic-SHEGONE
Crate LS3, LS9 Cam, LSA Supercharger, Metco Solid Isolator
RotoFab Intake, HSRK, Camaro Trans Pan
ZL1 HX, ZL1 Fuel Pump, CTS-V Lid, LSA Injectors
Pat G - 93 Octane Tune
Kooks 1-7/8" Longtubes, High Flow Cats, X Pipe, Solo AxleBacks
CTS-V Calipers, Brembo Pads
H&R Lowering Springs, Whiteline Bushings, FE3 Struts/Shocks, Camaro 20" Wheels
HIDs, LED Conversion, Atari Gauges, Tint, Roof Carbon Fiber Wrapped, Innovative Wideband
2.55 Lingenfelter Pulley and Injectors waiting to go on!
sigpicComment
-
2 steps forward, 1 step back, 2 steps forward, 1 step back, lol. Why are you running a stock catback? Sleeper? Looking really good!
2011 Mustang GT
20" Satin Black AMRs with 305/35 & 275/35 MT Street Radials, Saleen Grille, CS Lower Valance, Roush Axleback, GT500 Spoiler, resonator delete
In Progress: Brembo 6-piston brake upgrade
Comment
-
I believe its because H/C/I LS1 cars with large converters tend to get loud when you want to leave your house at 5amOriginally posted by my95z28 View Post
Comment
-
Looks really nice Jeff. Something about working on an engine that clean is exciting. sigpic
1998 Trans Am Convertible A4 - WS6 hood, WS6 air lid, WS6 rims, drilled/slotted rotors.Comment
-
Wow Jeff, very nice progress.
Thanks for the update! I look forward to the next!Gone but not forgotten: 1986 Chevrolet Camaro IROC-Z
"You shall ride eternal. Shiny and chrome."Comment


Comment