
 Tweet
Tweet
TenaciousZ Project Log
_____________________
Purchase Date: May 6th 2008
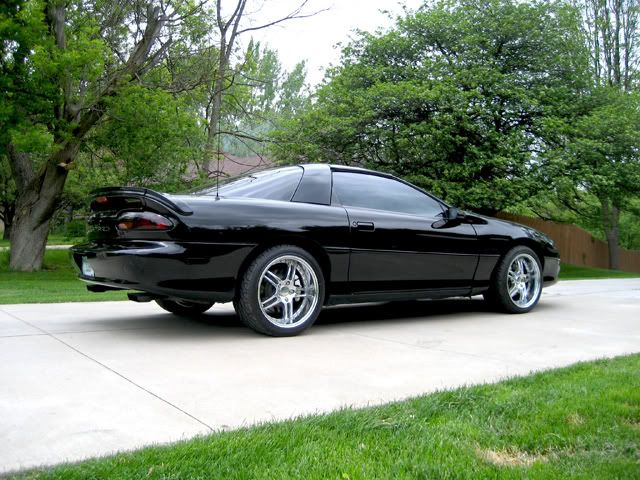
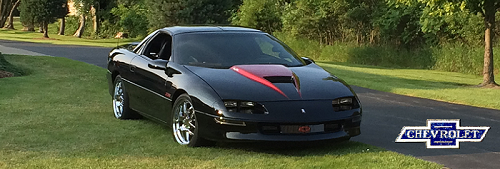
1998 Camaro Z28
46,000 Miles
Gray Leather Interior
All Power Options
T-Tops
6-Speed
18" Foose Lusso Wheels (2k Miles)
BFGoodrich g-Force T/A KDW 275/35ZR18's (2k Miles)
B&M Short Throw Shifter
SLP 85mm MAF Sensor
Infinity 12" Perfect Kappa 1,200 Watt Subs
1,000 Watt Memphis Amp
Pioneer Head Unit
Clear corners and side markers
Ultra-white headlight bulbs


____________________________
Interior Repainting
-Door handle area
-Main radio/ac bezel
-Headlight control trim
-Passenger side vent
-Both little vents on the a-pillars
-Dome light
-Dash pad with white vent area
-Speaker covers
Paint was stripped with oven cleaner and then painted with SEM Satin Black.
Before:


During:


After:


Annndddd a few of the dirty car


________________________________
Mod Session #1
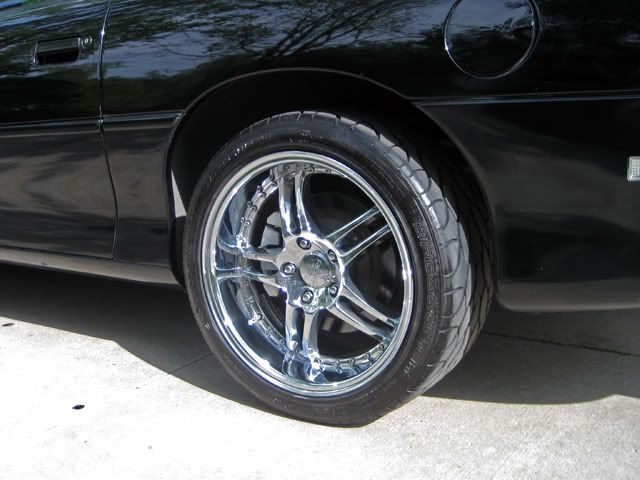
Ruff Racing R278 18x9.5" All Around
Carbon Fiber Nose Emblem


Also picked up a new nose emblem to match the black/chrome pattern:


________________________________
Mod Session #2
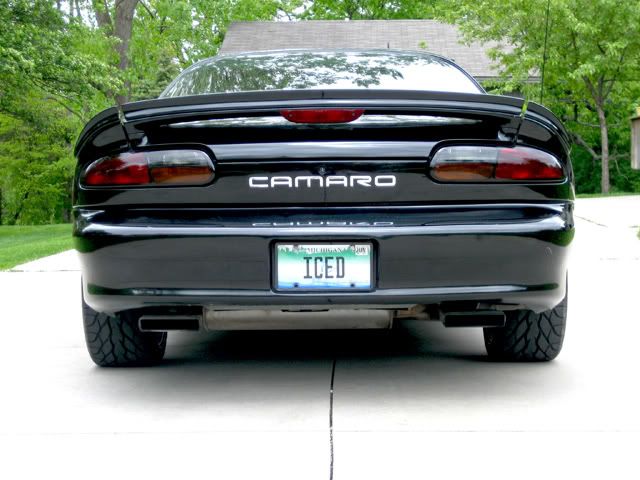
-Taillights darkened w/ one coat of nite shade
-Side markers blacked out
-Rear z28 debadged
-Rear "CAMARO" Inserts replaced w/ chrome
-Grill inserts painted chrome
-Plate clear cover and frame


________________________________
Exhaust Install
-Pacesetter Coated LTs
-Header reducers
-3" to 2.5" Clamps
-3 Summit Mandrel 2.5" U-Bends
-5ft of 2.5" Straight Pipe
-Dual DMH Electric Cutouts
-Flowtech Cutout Pipes
-"Y" Collector 2x2.5" to 3"
-Hooker Catback
With the cutouts open, it is a "true dual" system with an H style crossover just off of the headers. Right now its dumped right off the cutouts, but I have moroso bullets in the mail. With the cutouts closed it is routed through the hooker catback and out the tails.
Spent way too much time getting the passenger side manifold out and putting all of the EGR shit back together. Note to self: EGR delete imminent. Took two days to complete it, but I love it and it was well worth the time and effort.
Driver side cutout sits too low and needs to be adjusted but everything else fits very well and is tucked up nicely. No rattles though
Here are some pics and a sound clip.


Note: The welding pic was taken from around a corner, I wasn't staring at the flame
Note #2: Its good to have an experienced machinist/welder on hand when doing exhaust work.
Note #3: Dogs like to get in the way, but look cool while doing it.

Overall I really love the sound. Its VERY smooth during acceleration but still sounds aggressive with good volume. I dont like driving with the cutouts open without bullets because i think it sounds too "sharp," but we'll see how it sounds with some spiral flows. Updates to come after the bullet install.
__________________________
HID Install
8000k HID Kit from LEDVault


__________________________
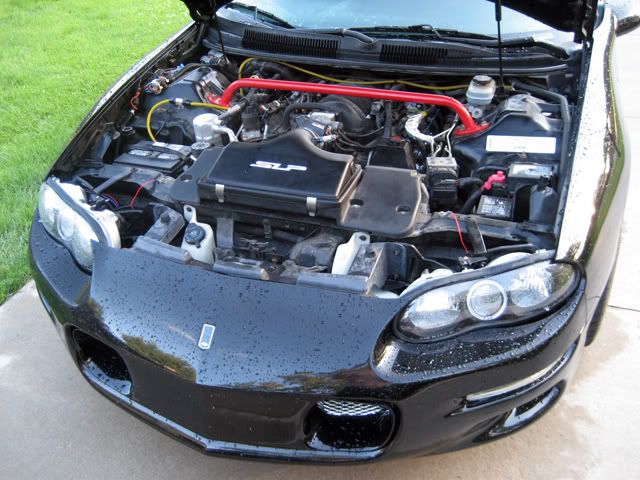
SLP Lid Install
Finally picked up the first piece of my intake moddage. IAT sensor was its usual
pain in the ass, but nothing a nice screwdriver couldnt handle. Took about 15
minutes and added a few horses.


________________________________
Photo: Parking Garage

________________________________
Halo Headlight Install
After battling with an ebay seller for 2 months about shipping my headlights, I decided just to order them from a website for a bit more cash. I love the black halos and think that they go really well with my cars theme. The halos themselves are wired into the parking lights. To finalize this install I am going to be disabling the corner lens bulbs and blacking out the lens itself.


________________________________
Shock Tower Brace Install
UMI STB - Red Powder Coated

________________________________
Hibernation
Resting before the spring installations, guarded by the big guy. January 8th 2009

This thread is a personal log of the work that i've done on my car.
_____________________
Purchase Date: May 6th 2008
1998 Camaro Z28
46,000 Miles
Gray Leather Interior
All Power Options
T-Tops
6-Speed
18" Foose Lusso Wheels (2k Miles)
BFGoodrich g-Force T/A KDW 275/35ZR18's (2k Miles)
B&M Short Throw Shifter
SLP 85mm MAF Sensor
Infinity 12" Perfect Kappa 1,200 Watt Subs
1,000 Watt Memphis Amp
Pioneer Head Unit
Clear corners and side markers
Ultra-white headlight bulbs
____________________________
Interior Repainting
-Door handle area
-Main radio/ac bezel
-Headlight control trim
-Passenger side vent
-Both little vents on the a-pillars
-Dome light
-Dash pad with white vent area
-Speaker covers
Paint was stripped with oven cleaner and then painted with SEM Satin Black.
Before:
During:
After:
Annndddd a few of the dirty car
________________________________
Mod Session #1
Ruff Racing R278 18x9.5" All Around
Carbon Fiber Nose Emblem
Also picked up a new nose emblem to match the black/chrome pattern:
________________________________
Mod Session #2
-Taillights darkened w/ one coat of nite shade
-Side markers blacked out
-Rear z28 debadged
-Rear "CAMARO" Inserts replaced w/ chrome
-Grill inserts painted chrome
-Plate clear cover and frame
________________________________
Exhaust Install
-Pacesetter Coated LTs
-Header reducers
-3" to 2.5" Clamps
-3 Summit Mandrel 2.5" U-Bends
-5ft of 2.5" Straight Pipe
-Dual DMH Electric Cutouts
-Flowtech Cutout Pipes
-"Y" Collector 2x2.5" to 3"
-Hooker Catback
With the cutouts open, it is a "true dual" system with an H style crossover just off of the headers. Right now its dumped right off the cutouts, but I have moroso bullets in the mail. With the cutouts closed it is routed through the hooker catback and out the tails.
Spent way too much time getting the passenger side manifold out and putting all of the EGR shit back together. Note to self: EGR delete imminent. Took two days to complete it, but I love it and it was well worth the time and effort.
Driver side cutout sits too low and needs to be adjusted but everything else fits very well and is tucked up nicely. No rattles though
Here are some pics and a sound clip.
Note: The welding pic was taken from around a corner, I wasn't staring at the flame
Note #2: Its good to have an experienced machinist/welder on hand when doing exhaust work.
Note #3: Dogs like to get in the way, but look cool while doing it.
Overall I really love the sound. Its VERY smooth during acceleration but still sounds aggressive with good volume. I dont like driving with the cutouts open without bullets because i think it sounds too "sharp," but we'll see how it sounds with some spiral flows. Updates to come after the bullet install.
__________________________
HID Install
8000k HID Kit from LEDVault
__________________________
SLP Lid Install
Finally picked up the first piece of my intake moddage. IAT sensor was its usual
pain in the ass, but nothing a nice screwdriver couldnt handle. Took about 15
minutes and added a few horses.
________________________________
Photo: Parking Garage
________________________________
Halo Headlight Install
After battling with an ebay seller for 2 months about shipping my headlights, I decided just to order them from a website for a bit more cash. I love the black halos and think that they go really well with my cars theme. The halos themselves are wired into the parking lights. To finalize this install I am going to be disabling the corner lens bulbs and blacking out the lens itself.
________________________________
Shock Tower Brace Install
UMI STB - Red Powder Coated
________________________________
Hibernation
Resting before the spring installations, guarded by the big guy. January 8th 2009


Comment