 Tweet
Tweet
After looking @ Fquick cars and some GREAT pictures I decided to hunt some tips down. I was doing some research from various websites and decided to share with everyone else. But all into one MEGA segment. Big Props for these guys making their tips. They really do know there stuff.
Note: Alot of the pics came from their tips/website. Some of them came from my own google search for examples.
FIRST AND MOST IMPORTANT
MAKE SURE YOUR CAR IS WASHED AND CLEAN
*************************
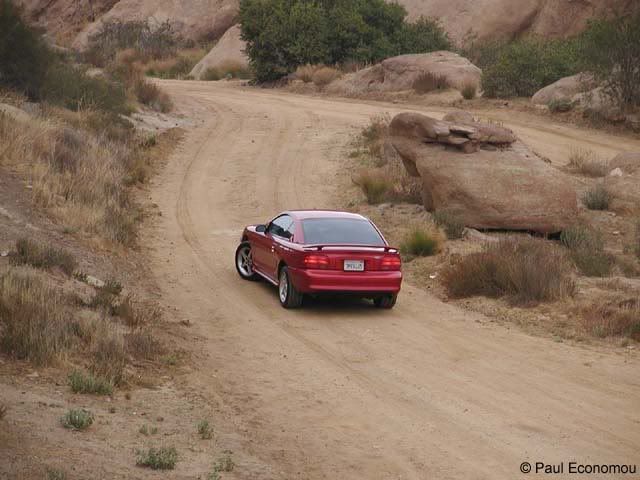
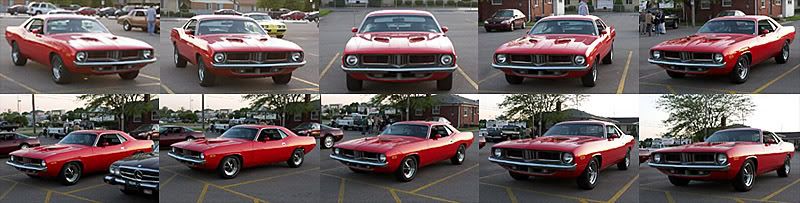
The Rule of Thirds. This isn't a very important factor in basic photography of your car, but once you get relatively advanced, you can put this into practice and get some interesting results. The rule of thirds goes against common logic that would make someone think the picture is best if the main subject is in the very middle of the picture, but in some cases, by doing this it causes the picture to lack tension and movement, which is what grabs most peoples' attention. The way to apply this would be to imagine lines dividing the picture up into thirds, vertically and horizontally. By placing the main object on one of these intersections, depending on the picture it can give you the picture a completely different feeling.
Centered Picture
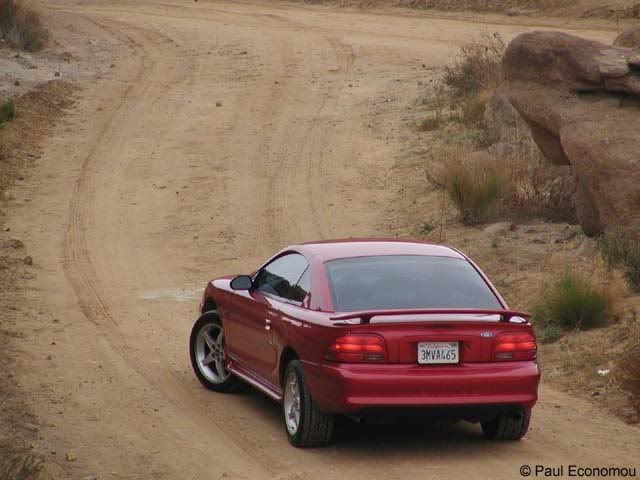
Zoomed and "moved" car into the bottom right intersection of lines. I don't think zooming in helped, but needless to say, the overall quality of the picture was improved.
*************************
Reflections from trees and other objects are bad, to reduce these use a Circular Polarizing filter (assuming your camera is autofocus), and don't park your car under trees.
*************************
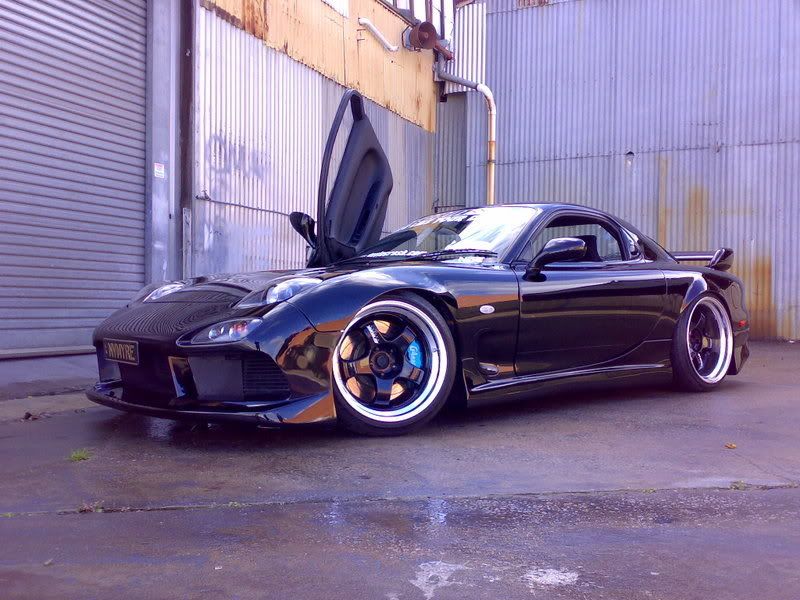
Turn your wheels towards the camera. Some people forget to turn the wheels towards the camera, and end up turning them away. People would much rather see your wheels than your tires, I'm sure. Be sure not to turn your wheels too much, just a little bit is fine.
Here is an example of what not to do
And what you want to do

*************************
If you park your car in a parking lot, Ideally avoid painted lines, as they will be a distracting part of the foreground and background.
YES

NO

*************************
Take pictures at the highest JPEG resolution possible. Don't make the same mistake I did and take your favorite picture ever, then realize its only a 640x480 sized picture that would barely make a quality 5x7 sized print.
*************************
Avoid Bright overhead sunlight, it will cause harsh glare and harsh shadows. If you do end up having to shoot in bright overhead sunlight, use a Lens Shade, and a UV Filter/Circular Polarizing filter if at all possible. Also, use fill flash to fill in the shadows that are cast by the overhead sun.
*************************
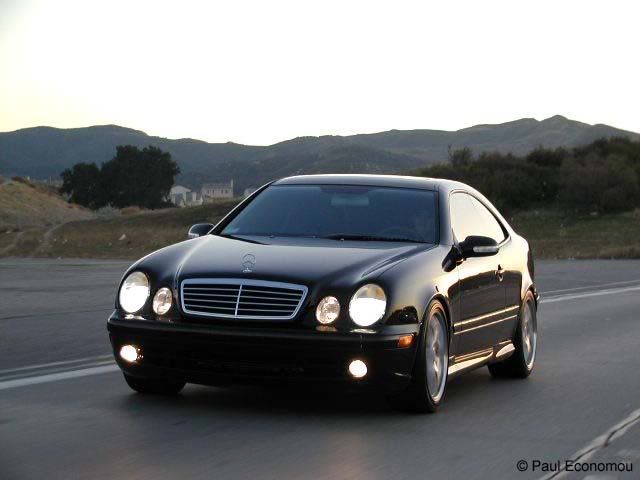
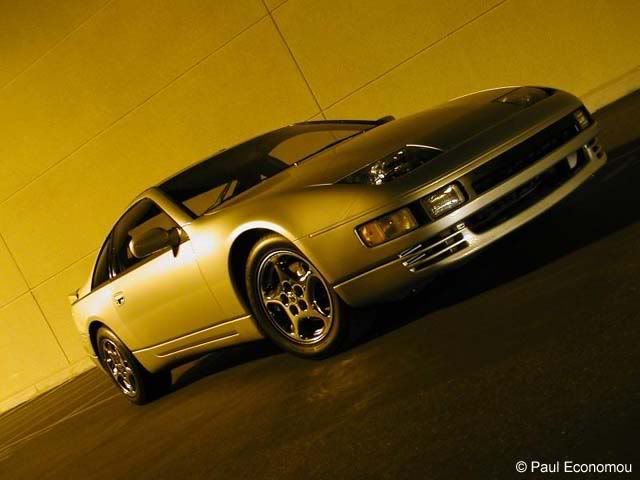
While you can certainly shoot your car at any time, the best light is typically found just after sunrise, or just before sunset. As the sun "travels across the sky" the lighting direction changes relative to your subject. Not only does the lighting direction change throughout the day, but the color changes as well, from cool before sunrise to warm just after sunrise to neutral at midday to warmer near sunset to cooler after sunset. Night shots of cars can also be very dramatic, particularly if you have the vehicle in a setting with interesting lighting (neon lights, gas station, lighted signs, etc.)
*************************
When you're shooting, try turning the parking lights on, maybe even the headlights if it's just before dusk, just to add a little drama to your photos

*************************
Panning. Panning takes practice, a steady hand, and a capable camera using the proper settings. The results show a blurred background, blurred wheels, and it gives of the feeling of the car really moving. Generally, you don't want your shutter speed to be any faster than 1/125 when doing this, with an F stop F8.0 or more. Depending on how much zoom you're using and the lighting. Using a tripod or a monopod will allow you to use slower shutter speeds which will in turn give more blurring effects. What you do, is follow the car with the camera as it moves down the road or track. While following the car, keep taking pictures, the more pictures you take the better chance you have of getting a good shot. Experimenting and practice is all I can suggest with this.
A less than perfect example of using panning:

*************************
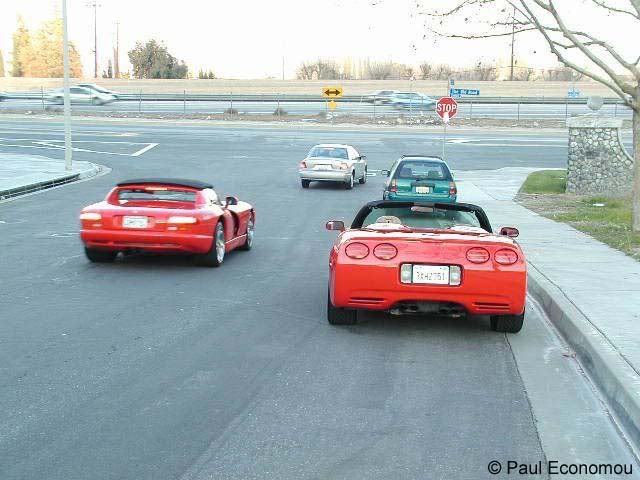
Shooting from another moving car. This is a great, and relatively easy way to get some very cool pictures. The way I've done this is ride shotgun in one car, hang out the window, and fire away, it will take multiple shots to get a nice clear picture because most roads are bumpy, and wind is also a factor. Other things you could do would shoot from an open rear window, hatch, sunroof, convertible top, etc. at slow speeds. The same ideas for backgrounds of a car standing still apply to this technique. Try to get a flattering background if at all possible, if not possible, fret not, you'll still probably get some great shots. If its possible to catch the car turning on a banked turn, that will also help.
*************************
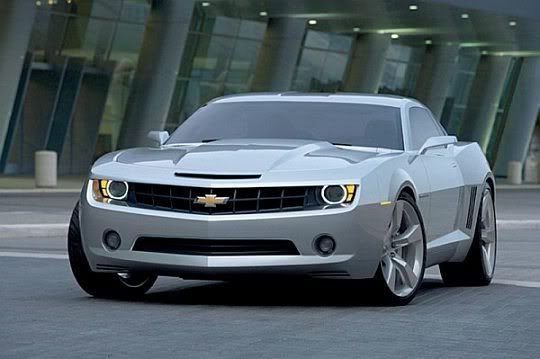
An extreme, or different angle can give an aggressive and mean look to a car if that's the goal. Not only does it do that, but it also can help with the background. By getting lower, or at eye level with the car, you can get rid of certain distracting objects. There are a few different angles that you can take your pictures at to give the pictures different feelings.
A. The eye level angle. As previously stated, not only can this help get rid of distracting background objects, but it helps by giving off an aggressive look to the car, and it doesn't look like you just ran outside, walked up to the car and started shooting away, you actually put out the effort to kneel down and get the shot.

Example of a bad eye level picture, not a perfect example, but you can see that if I got lower it would have created more appealing results.

*************************
Extreme tilted angles. A tilted angle is tough to get right, if you tilt it too far, it becomes more of a distraction and takes away from the pictures quality, and if you tilt it too little, it just looks like you messed up while taking the picture. If you can get this angle down right, it will definitely make for some pretty cool pictures and it sometimes gives it an effect of motion, as if the car were to drive right off the page
*************************
Shoot from above the car. If you have access to a tall ladder, rocks to climb, taller buildings, or even a two story house, this can provide a different point of view, and its usually very cool.

*************************
Shoot from the ground. Sometimes, shooting while setting the camera on the ground is good. It gives similar results to shooting at eye level, but if theres a bump, or change in elevation you can use that in the bottom of the frame to provide interesting foreground for the picture, and it can also be used to provide a contrast to the rest of the colors in the picture.

*************************
Grazing, or Driving?
One of the most common problems I see with photos sent in by readers is a car on grass. Cars belong on pavement, not grass. Cattle belong on grass. Pavement is the natural environment for a car unless you've taken an agricultural excursion by late braking at the hairpin turn. Gravel is another no-no. Try finding a large, open paved area to shoot your car. Even a road with minimal traffic or limited access will work, but a parking lot will do just fine. If you want to be a stickler like me, look for pavement without lines painted on it. The one exception for the pavement rule is for off-road vehicles. A 4x4 will look cool perched atop a big pile of rocks, but don't try this with a car. Try to put your car in its ideal environment (such as a drag car on the drag strip or a road racer on a road course).
Examples of what not to do

Examples of what to do
*************************
Quick Shooting Guidelines. There are only two things to remember here: the camera has to be held steady, and to make sure the car is in focus from front to back, the camera needs to be set at an aperture (f-stop) of f-8 or higher. The higher, numerically, the f-stop (f-8, f-16, etc.), the more depth of field (sharpness from front to back on an object) you have. A higher (numerically) f-stop means a slower shutter speed, which necessitates a tripod to hold the camera steady. Think of it like rear gear ratios: The higher the gears, numerically, (say 4.56), the slower the final speed (top end mph slows down). The higher the f-stop (f-19), the slower the shutter speed (1/30th of a second). And incidentally, the "ClickClick" you hear when you push your camera's "trigger" is the shutter opening and closing (shutter speed), exposing the film to what you see through the viewer and putting the picture on the film.
Finally, don't think you can hand-hold a camera at a slow shutter speed (1/45th of a second or slower) and get crisp photos--a tripod is a must. Even if you don't breath and are rock-steady, your heart beats around 60 times per minute, and a heart beat will vibrate your hands just enough to make the photo a little "soft" on the edges and blur sharp details. Think what the caffeine shakes from a can of cola will do!
Most magazines prefer color slides on 100 speed film. This gives us the best image quality, and we can reproduce right off the film, rather than relying on the quality of your local One Hour Photo Emporium's print.
*************************
Bracketing.The final thing pros do is "bracket" their pictures. This means taking the picture at the shutter speed and f-stop the camera indicates for the proper exposure, and then moving either the f-stop or the shutter speed (not both) one setting lower and one setting higher than the camera's settings indicate for the exposure. Sometimes the lower or higher exposure than the one indicated is more desirable, because you can see some details better, or the color of the car is better.
If the f-stop is the critical element in the photo (getting the car in focus from end-to-end), bracket by adjusting the shutter speed. If the speed is important (trying to freeze a race car), adjust the f-stop.
*************************
- Advantages to "Wait for the late light".
The car will look it's best.
- Disadvantages:
The perfect light may only last for 5 minutes, & usually comes after you've put the cam away. So keep shooting!
The best light may only last for 10-15 minutes
*************************
Lighting is probably the most common problem with our photos. That is not to say that you don't have enough light. The point is you need the right light on the right things in the photo. You need the ENTIRE subject well lit in most cases. Because YOU know the detail back in the darkness of the interior, that doesn't mean that the viewer seeing the photos will see it. You have to remind yourself that the viewer has NEVER seen your car. If you are shooting through an open door you REALLY need to lighten up the interior. If you are using a flash, the light can bounce off the door or quarter right back at the camera. You can run drop lights in from the other door and place them under the seat shining up. Of course you don't want to actually see where the light is coming from, just soft glow. And for sure you don't want to see the lights them selves. I have found that a florescent light works well for this. So, you have a nice sunny day? That is the worst time to shoot. You want an overcast so as to avoid shadows. If you do have bright sun, shoot when the sun is directly overhead to reduce shadows.
Just remember, the viewer needs help. He doesn't know that shadow on the rockers is covering in the bottom of the car. To him it looks like the car is a foot higher off the ground. The viewer has NEVER seen your car.
Use the flash more, set it to manual to kill those shadows. If the sun is shinning you won't over power it with your flash. The flash will illuminate the areas from the angle that YOU (read that the viewer) will be see the car. The sun is up looking down so from that angle it is well lit, BUT, you won't be seeing it from that angle. You need to be sure it is illuminated from the angle that YOU are seeing it through the viewfinder.
Cars are huge, curved mirrors that reflect everything in sight. This can be an advantage if you don’t have the opportunity to get them in a studio where you can light with flats. Check out the studio here:
http://www.stage3.com/webrootfolder/...tudioinfo.html
We used huge 15' X 30' frames (on casters) covered with cloth to reflect into the sides of the car. Some were hung as overhead flats. These were lit with 20K lights. Smaller, highlighting reflections were lit with 750's.
Maybe a bit of direct light was used on just the tires to bring the tread up to the overall level of light, or we’d put a bit into the wheels/hubcaps to give them a little “pop”. Hint: don't clean the tread - the dust helps here. Other than that, we almost never used direct light on the car.
Wait for the late light, WALK AROUND & LOOK at what the light is doing! (I shouldn't have to say that, right?)
*************************
Carefully position/rotate your car so that you've got evenly-distributed sunlight over ALL the surfaces of your car facing your camera (the grille, the "chin," the tires, the sides). The (dawn or dusk) sun should be directly behind you, warming your backside and illuminating ALL of the surfaces of your car facing the camera; once again, just to make sure you've got it: with the (very early or very late) sun at your back, shoot the SUNLIT side(s) of your car, not, repeat NOT the shadow side(s). If you're shooting, say, a typical "3/4-view" shot, then not only the side of the car, but the grille, the "chin" and the tire tread should be illuminated by the sun. Are we clear on that? Color photography is about LIGHT, NOT SHADOW. And if you're going to shoot different views of your car (rear, head-on/front, etc.), then STAY WHERE YOU ARE WITH THE SUN AT YOUR BACK and have a colleague "rotate" your car into the next desired position
YES/NO


*************************
Practice makes perfect. Take LOTS of pics!!! I'll shoot one, move a little shoot another one, maybe change camera setting, shoot another one and so on. For a Photo Shoot I will shoot maybe 75 shots of your car just to get the 2 or 3 really good ones. I might shoot 1000 in a weekend just to get 10 or 12 cool ones.
*************************
When is Manual Focus Better than Auto Focus?
Let me start by saying there is no right or wrong time to use either manual or auto focusing - both can produce great results in almost all circumstances - however there are a few times when you might find it easier to switch to manual focusing:
1. Macro Work
When doing macro photography I almost exclusively switch to manual focusing.
The narrow depth of field in these shots mean that you need to be incredibly precise with focusing and being just a smidgeon out or having your camera choose to focus on the wrong part of your subject can completely ruin a shot.
To use it you’ll also probably want to use a tripod to eliminate any movement of the camera which can make focusing either in manual or auto mode frustrating.
Manual focusing puts the control completely in your hands when shooting in this very precise setting.
2. Low Light
Shooting in dimly lit environments can be difficult for some cameras and lenses when it comes to focusing.
You’ll know when your camera is struggling in Auto mode when every time you go to take a shot the lens will whirl from one end of it’s focusing options to the other and back again before deciding on where to focus.
This can really lengthen your shooting process and make taking quick candid shots quite frustrating.
Switch to manual mode and you can quickly find your focusing point and get the shot you’re after.
3. Portraits
When shooting portraits focus needs to be precise.
The majority of your shots of people will need to have their eyes in perfect focus (although in the example to the left it’s the lips) and so switching to manual focus will give you complete control to enable this to save you from having to line up the focusing points on your camera on the eyes, press halfway down and then frame your shot.
Manual focusing in portrait work helps to ensure the viewer of the image is drawn to the part of the face that you want them to notice.
4. Shooting Through Glass/Wire Fences
If you’ve ever shot through anything like a window or a mess/wire fence you’ll know how cameras will often get confused on where to focus your shot.
Whether it’s shooting out of a plane window, taking a shot of an image at a museum or photographing animals through fences at the zoo - you might find your camera is confused.
Manual focusing will avoid this completely and allow you to get things just right - focusing upon the subject behind that glass or fence. If you do this in conjunction with a large aperture (which decreases depth of field) and get in close to the fence or glass you might well eliminate it completely from being noticeable in your shot.
5. Action Photography
Shooting fast moving subjects (like racing cars, planes, bikes, running animals etc) can be a frustrating experience when shooting with auto focus.
Even the continuous focusing modes can get left behind or confusing if you’re not panning with your subject smoothly.
One way to overcome this is to switch to manual focusing and pre focus on a point that the subject will move through - and shooting at that point. You need to get your timing just right - but you’ll find that it’ll often give better results than relying upon auto focus modes (particularly if you shoot in continuous shooting/burst mode).
*************************
Distracting Backgrounds
Unfortunately, if the background isn't right, the viewer will have lost paying attention to the main subject and it will draw the eyes to the background, away from the car. Try to find a background that either compliments the car, or just adds to the car, without completely distracting you from it.
Example of a Distracting Background, overly dramatic, I know, but you get the point, your eyes automatically start checking out the background and ignoring the subject(s).
Example of what To do, this shot was taken at the exact same spot, just moved and took advantage of the tree and stone wall that was next to the car, and used optical zoom to clear out most of the distracting background objects

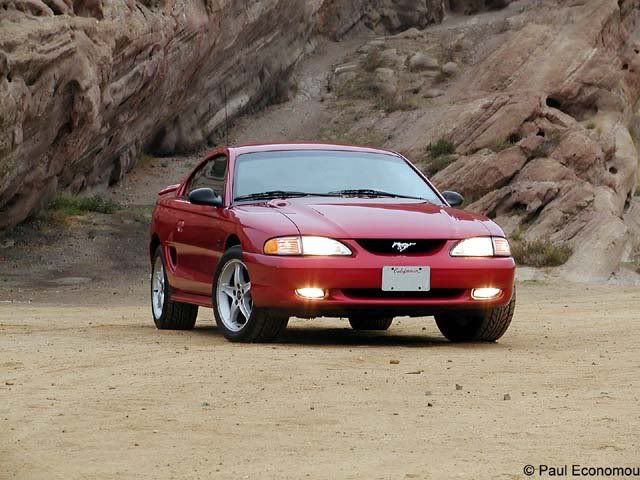
Example of a nice scenic landscape used as a background, nothing very distracting, a nice clean backdrop:
*************************
So you have a wife or girlfriend. And want them to model with your car? We encourage you to do it. Nothing better than a crowd pleaser. Everyman loves when they have a beautiful girl on or modeling next to there car. If your doing a photoshoot. You mid as well add some of these shots to your collection.


*************************
Homework
Shooting in manual focus mode is a skill that you need to learn and practice. While you will have more time to get it right when shooting still objects - it can become more difficult when shooting moving subjects - so practice.
This week set aside an hour or two with your camera to shoot only in manual focus mode. Practice on a variety of subjects including some moving ones. While your practice session might not produce great results the skill that you learn will be useful to have.
If I missed something and you have a helpful tip, please share and I will add it to the list
With that being said. Print this off and keep it in the car!
Note: Alot of the pics came from their tips/website. Some of them came from my own google search for examples.
FIRST AND MOST IMPORTANT
MAKE SURE YOUR CAR IS WASHED AND CLEAN
*************************
The Rule of Thirds. This isn't a very important factor in basic photography of your car, but once you get relatively advanced, you can put this into practice and get some interesting results. The rule of thirds goes against common logic that would make someone think the picture is best if the main subject is in the very middle of the picture, but in some cases, by doing this it causes the picture to lack tension and movement, which is what grabs most peoples' attention. The way to apply this would be to imagine lines dividing the picture up into thirds, vertically and horizontally. By placing the main object on one of these intersections, depending on the picture it can give you the picture a completely different feeling.
Centered Picture
Zoomed and "moved" car into the bottom right intersection of lines. I don't think zooming in helped, but needless to say, the overall quality of the picture was improved.
*************************
Reflections from trees and other objects are bad, to reduce these use a Circular Polarizing filter (assuming your camera is autofocus), and don't park your car under trees.
*************************
Turn your wheels towards the camera. Some people forget to turn the wheels towards the camera, and end up turning them away. People would much rather see your wheels than your tires, I'm sure. Be sure not to turn your wheels too much, just a little bit is fine.
Here is an example of what not to do
And what you want to do
*************************
If you park your car in a parking lot, Ideally avoid painted lines, as they will be a distracting part of the foreground and background.
YES
NO
*************************
Take pictures at the highest JPEG resolution possible. Don't make the same mistake I did and take your favorite picture ever, then realize its only a 640x480 sized picture that would barely make a quality 5x7 sized print.
*************************
Avoid Bright overhead sunlight, it will cause harsh glare and harsh shadows. If you do end up having to shoot in bright overhead sunlight, use a Lens Shade, and a UV Filter/Circular Polarizing filter if at all possible. Also, use fill flash to fill in the shadows that are cast by the overhead sun.
*************************
While you can certainly shoot your car at any time, the best light is typically found just after sunrise, or just before sunset. As the sun "travels across the sky" the lighting direction changes relative to your subject. Not only does the lighting direction change throughout the day, but the color changes as well, from cool before sunrise to warm just after sunrise to neutral at midday to warmer near sunset to cooler after sunset. Night shots of cars can also be very dramatic, particularly if you have the vehicle in a setting with interesting lighting (neon lights, gas station, lighted signs, etc.)
*************************
When you're shooting, try turning the parking lights on, maybe even the headlights if it's just before dusk, just to add a little drama to your photos
*************************
Panning. Panning takes practice, a steady hand, and a capable camera using the proper settings. The results show a blurred background, blurred wheels, and it gives of the feeling of the car really moving. Generally, you don't want your shutter speed to be any faster than 1/125 when doing this, with an F stop F8.0 or more. Depending on how much zoom you're using and the lighting. Using a tripod or a monopod will allow you to use slower shutter speeds which will in turn give more blurring effects. What you do, is follow the car with the camera as it moves down the road or track. While following the car, keep taking pictures, the more pictures you take the better chance you have of getting a good shot. Experimenting and practice is all I can suggest with this.
A less than perfect example of using panning:
*************************
Shooting from another moving car. This is a great, and relatively easy way to get some very cool pictures. The way I've done this is ride shotgun in one car, hang out the window, and fire away, it will take multiple shots to get a nice clear picture because most roads are bumpy, and wind is also a factor. Other things you could do would shoot from an open rear window, hatch, sunroof, convertible top, etc. at slow speeds. The same ideas for backgrounds of a car standing still apply to this technique. Try to get a flattering background if at all possible, if not possible, fret not, you'll still probably get some great shots. If its possible to catch the car turning on a banked turn, that will also help.
*************************
An extreme, or different angle can give an aggressive and mean look to a car if that's the goal. Not only does it do that, but it also can help with the background. By getting lower, or at eye level with the car, you can get rid of certain distracting objects. There are a few different angles that you can take your pictures at to give the pictures different feelings.
A. The eye level angle. As previously stated, not only can this help get rid of distracting background objects, but it helps by giving off an aggressive look to the car, and it doesn't look like you just ran outside, walked up to the car and started shooting away, you actually put out the effort to kneel down and get the shot.
Example of a bad eye level picture, not a perfect example, but you can see that if I got lower it would have created more appealing results.
*************************
Extreme tilted angles. A tilted angle is tough to get right, if you tilt it too far, it becomes more of a distraction and takes away from the pictures quality, and if you tilt it too little, it just looks like you messed up while taking the picture. If you can get this angle down right, it will definitely make for some pretty cool pictures and it sometimes gives it an effect of motion, as if the car were to drive right off the page
*************************
Shoot from above the car. If you have access to a tall ladder, rocks to climb, taller buildings, or even a two story house, this can provide a different point of view, and its usually very cool.
*************************
Shoot from the ground. Sometimes, shooting while setting the camera on the ground is good. It gives similar results to shooting at eye level, but if theres a bump, or change in elevation you can use that in the bottom of the frame to provide interesting foreground for the picture, and it can also be used to provide a contrast to the rest of the colors in the picture.
*************************
Grazing, or Driving?
One of the most common problems I see with photos sent in by readers is a car on grass. Cars belong on pavement, not grass. Cattle belong on grass. Pavement is the natural environment for a car unless you've taken an agricultural excursion by late braking at the hairpin turn. Gravel is another no-no. Try finding a large, open paved area to shoot your car. Even a road with minimal traffic or limited access will work, but a parking lot will do just fine. If you want to be a stickler like me, look for pavement without lines painted on it. The one exception for the pavement rule is for off-road vehicles. A 4x4 will look cool perched atop a big pile of rocks, but don't try this with a car. Try to put your car in its ideal environment (such as a drag car on the drag strip or a road racer on a road course).
Examples of what not to do
Examples of what to do
*************************
Quick Shooting Guidelines. There are only two things to remember here: the camera has to be held steady, and to make sure the car is in focus from front to back, the camera needs to be set at an aperture (f-stop) of f-8 or higher. The higher, numerically, the f-stop (f-8, f-16, etc.), the more depth of field (sharpness from front to back on an object) you have. A higher (numerically) f-stop means a slower shutter speed, which necessitates a tripod to hold the camera steady. Think of it like rear gear ratios: The higher the gears, numerically, (say 4.56), the slower the final speed (top end mph slows down). The higher the f-stop (f-19), the slower the shutter speed (1/30th of a second). And incidentally, the "ClickClick" you hear when you push your camera's "trigger" is the shutter opening and closing (shutter speed), exposing the film to what you see through the viewer and putting the picture on the film.
Finally, don't think you can hand-hold a camera at a slow shutter speed (1/45th of a second or slower) and get crisp photos--a tripod is a must. Even if you don't breath and are rock-steady, your heart beats around 60 times per minute, and a heart beat will vibrate your hands just enough to make the photo a little "soft" on the edges and blur sharp details. Think what the caffeine shakes from a can of cola will do!
Most magazines prefer color slides on 100 speed film. This gives us the best image quality, and we can reproduce right off the film, rather than relying on the quality of your local One Hour Photo Emporium's print.
*************************
Bracketing.The final thing pros do is "bracket" their pictures. This means taking the picture at the shutter speed and f-stop the camera indicates for the proper exposure, and then moving either the f-stop or the shutter speed (not both) one setting lower and one setting higher than the camera's settings indicate for the exposure. Sometimes the lower or higher exposure than the one indicated is more desirable, because you can see some details better, or the color of the car is better.
If the f-stop is the critical element in the photo (getting the car in focus from end-to-end), bracket by adjusting the shutter speed. If the speed is important (trying to freeze a race car), adjust the f-stop.
*************************
- Advantages to "Wait for the late light".
The car will look it's best.
- Disadvantages:
The perfect light may only last for 5 minutes, & usually comes after you've put the cam away. So keep shooting!
The best light may only last for 10-15 minutes
*************************
Lighting is probably the most common problem with our photos. That is not to say that you don't have enough light. The point is you need the right light on the right things in the photo. You need the ENTIRE subject well lit in most cases. Because YOU know the detail back in the darkness of the interior, that doesn't mean that the viewer seeing the photos will see it. You have to remind yourself that the viewer has NEVER seen your car. If you are shooting through an open door you REALLY need to lighten up the interior. If you are using a flash, the light can bounce off the door or quarter right back at the camera. You can run drop lights in from the other door and place them under the seat shining up. Of course you don't want to actually see where the light is coming from, just soft glow. And for sure you don't want to see the lights them selves. I have found that a florescent light works well for this. So, you have a nice sunny day? That is the worst time to shoot. You want an overcast so as to avoid shadows. If you do have bright sun, shoot when the sun is directly overhead to reduce shadows.
Just remember, the viewer needs help. He doesn't know that shadow on the rockers is covering in the bottom of the car. To him it looks like the car is a foot higher off the ground. The viewer has NEVER seen your car.
Use the flash more, set it to manual to kill those shadows. If the sun is shinning you won't over power it with your flash. The flash will illuminate the areas from the angle that YOU (read that the viewer) will be see the car. The sun is up looking down so from that angle it is well lit, BUT, you won't be seeing it from that angle. You need to be sure it is illuminated from the angle that YOU are seeing it through the viewfinder.
Cars are huge, curved mirrors that reflect everything in sight. This can be an advantage if you don’t have the opportunity to get them in a studio where you can light with flats. Check out the studio here:
http://www.stage3.com/webrootfolder/...tudioinfo.html
We used huge 15' X 30' frames (on casters) covered with cloth to reflect into the sides of the car. Some were hung as overhead flats. These were lit with 20K lights. Smaller, highlighting reflections were lit with 750's.
Maybe a bit of direct light was used on just the tires to bring the tread up to the overall level of light, or we’d put a bit into the wheels/hubcaps to give them a little “pop”. Hint: don't clean the tread - the dust helps here. Other than that, we almost never used direct light on the car.
Wait for the late light, WALK AROUND & LOOK at what the light is doing! (I shouldn't have to say that, right?)
*************************
Carefully position/rotate your car so that you've got evenly-distributed sunlight over ALL the surfaces of your car facing your camera (the grille, the "chin," the tires, the sides). The (dawn or dusk) sun should be directly behind you, warming your backside and illuminating ALL of the surfaces of your car facing the camera; once again, just to make sure you've got it: with the (very early or very late) sun at your back, shoot the SUNLIT side(s) of your car, not, repeat NOT the shadow side(s). If you're shooting, say, a typical "3/4-view" shot, then not only the side of the car, but the grille, the "chin" and the tire tread should be illuminated by the sun. Are we clear on that? Color photography is about LIGHT, NOT SHADOW. And if you're going to shoot different views of your car (rear, head-on/front, etc.), then STAY WHERE YOU ARE WITH THE SUN AT YOUR BACK and have a colleague "rotate" your car into the next desired position
YES/NO
*************************
Practice makes perfect. Take LOTS of pics!!! I'll shoot one, move a little shoot another one, maybe change camera setting, shoot another one and so on. For a Photo Shoot I will shoot maybe 75 shots of your car just to get the 2 or 3 really good ones. I might shoot 1000 in a weekend just to get 10 or 12 cool ones.
*************************
When is Manual Focus Better than Auto Focus?
Let me start by saying there is no right or wrong time to use either manual or auto focusing - both can produce great results in almost all circumstances - however there are a few times when you might find it easier to switch to manual focusing:
1. Macro Work
When doing macro photography I almost exclusively switch to manual focusing.
The narrow depth of field in these shots mean that you need to be incredibly precise with focusing and being just a smidgeon out or having your camera choose to focus on the wrong part of your subject can completely ruin a shot.
To use it you’ll also probably want to use a tripod to eliminate any movement of the camera which can make focusing either in manual or auto mode frustrating.
Manual focusing puts the control completely in your hands when shooting in this very precise setting.
2. Low Light
Shooting in dimly lit environments can be difficult for some cameras and lenses when it comes to focusing.
You’ll know when your camera is struggling in Auto mode when every time you go to take a shot the lens will whirl from one end of it’s focusing options to the other and back again before deciding on where to focus.
This can really lengthen your shooting process and make taking quick candid shots quite frustrating.
Switch to manual mode and you can quickly find your focusing point and get the shot you’re after.
3. Portraits
When shooting portraits focus needs to be precise.
The majority of your shots of people will need to have their eyes in perfect focus (although in the example to the left it’s the lips) and so switching to manual focus will give you complete control to enable this to save you from having to line up the focusing points on your camera on the eyes, press halfway down and then frame your shot.
Manual focusing in portrait work helps to ensure the viewer of the image is drawn to the part of the face that you want them to notice.
4. Shooting Through Glass/Wire Fences
If you’ve ever shot through anything like a window or a mess/wire fence you’ll know how cameras will often get confused on where to focus your shot.
Whether it’s shooting out of a plane window, taking a shot of an image at a museum or photographing animals through fences at the zoo - you might find your camera is confused.
Manual focusing will avoid this completely and allow you to get things just right - focusing upon the subject behind that glass or fence. If you do this in conjunction with a large aperture (which decreases depth of field) and get in close to the fence or glass you might well eliminate it completely from being noticeable in your shot.
5. Action Photography
Shooting fast moving subjects (like racing cars, planes, bikes, running animals etc) can be a frustrating experience when shooting with auto focus.
Even the continuous focusing modes can get left behind or confusing if you’re not panning with your subject smoothly.
One way to overcome this is to switch to manual focusing and pre focus on a point that the subject will move through - and shooting at that point. You need to get your timing just right - but you’ll find that it’ll often give better results than relying upon auto focus modes (particularly if you shoot in continuous shooting/burst mode).
*************************
Distracting Backgrounds
Unfortunately, if the background isn't right, the viewer will have lost paying attention to the main subject and it will draw the eyes to the background, away from the car. Try to find a background that either compliments the car, or just adds to the car, without completely distracting you from it.
Example of a Distracting Background, overly dramatic, I know, but you get the point, your eyes automatically start checking out the background and ignoring the subject(s).
Example of what To do, this shot was taken at the exact same spot, just moved and took advantage of the tree and stone wall that was next to the car, and used optical zoom to clear out most of the distracting background objects
Example of a nice scenic landscape used as a background, nothing very distracting, a nice clean backdrop:
*************************
So you have a wife or girlfriend. And want them to model with your car? We encourage you to do it. Nothing better than a crowd pleaser. Everyman loves when they have a beautiful girl on or modeling next to there car. If your doing a photoshoot. You mid as well add some of these shots to your collection.
*************************
Homework
Shooting in manual focus mode is a skill that you need to learn and practice. While you will have more time to get it right when shooting still objects - it can become more difficult when shooting moving subjects - so practice.
This week set aside an hour or two with your camera to shoot only in manual focus mode. Practice on a variety of subjects including some moving ones. While your practice session might not produce great results the skill that you learn will be useful to have.
If I missed something and you have a helpful tip, please share and I will add it to the list
With that being said. Print this off and keep it in the car!


 Cant wait to use all the new features..my one I have no is fine..but is like 2-3 years old
  time to update


Comment