Announcement

Collapse
No announcement yet.

Painted Calipers & New Pads Install (8hrs)

Collapse
X
Collapse
Who has read this thread:
 
  • Filter
  • Time
  • Show
Clear All
new posts

  • Painted Calipers & New Pads Install (8hrs)

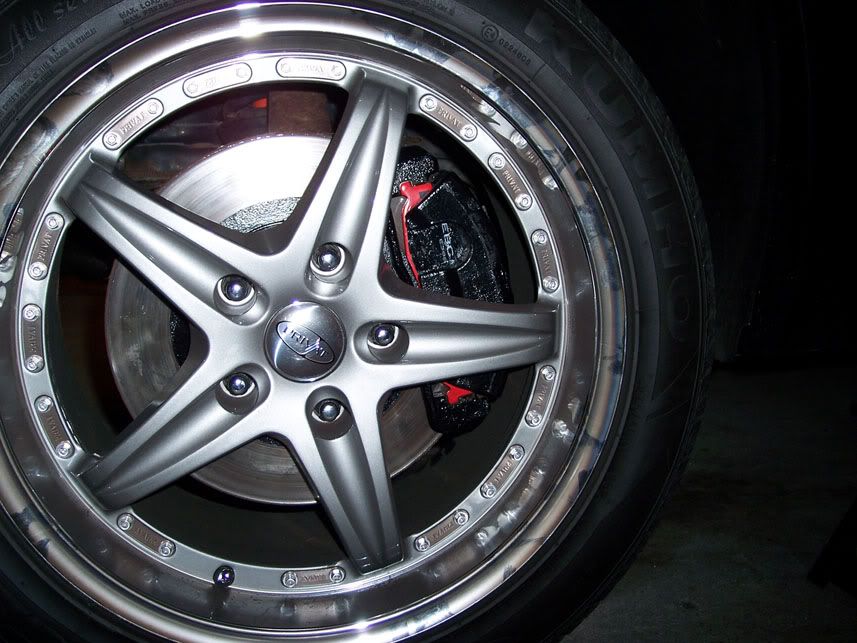
    finally got to work on installing my pads myself .. waited a little too long, wasn't hard like i thought it would be. still took me a while to figure it all out though. figured since i had both ends of the car up on jackstands with the calipers off that i might as well go and paint them! i had purchased a duplicolor caliper painting kit about a year prior but never used it.

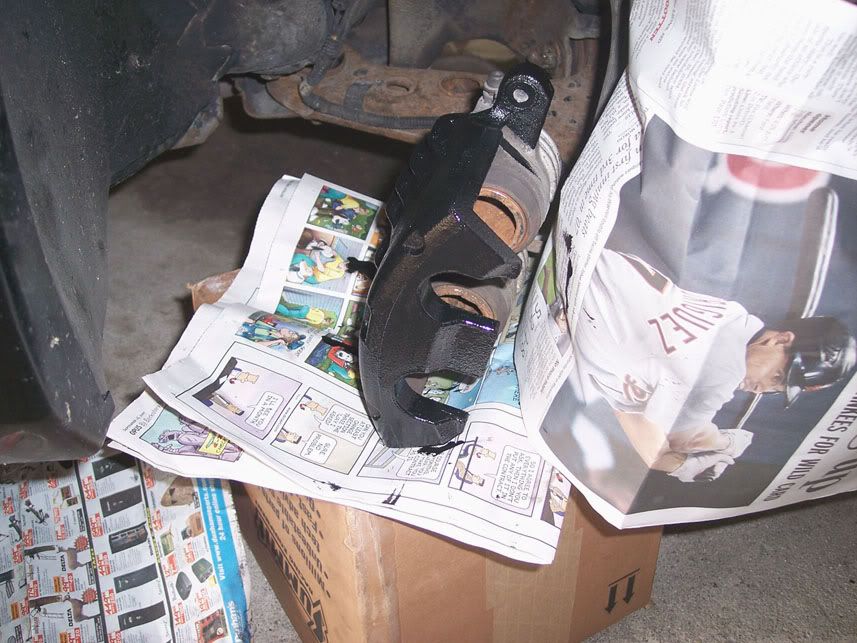
    so i got it out and went to work. first i sprayed the cleaner then tried some dry sanding to get as much rust off as i could then went to painting. did a few layers of paint, then taped everything off (got a little crazy, took like 20 mins a side) then went with like 3-4 layers of clearcoat per corner. hopefully it holds up because what a load of work!

    unfortunately as nice as these look now the rest of the car is still filthy including the wheels, and i didn't want to wash it yet and get everything wet until the pads were broken in and i was sure the paint could cure right as well.

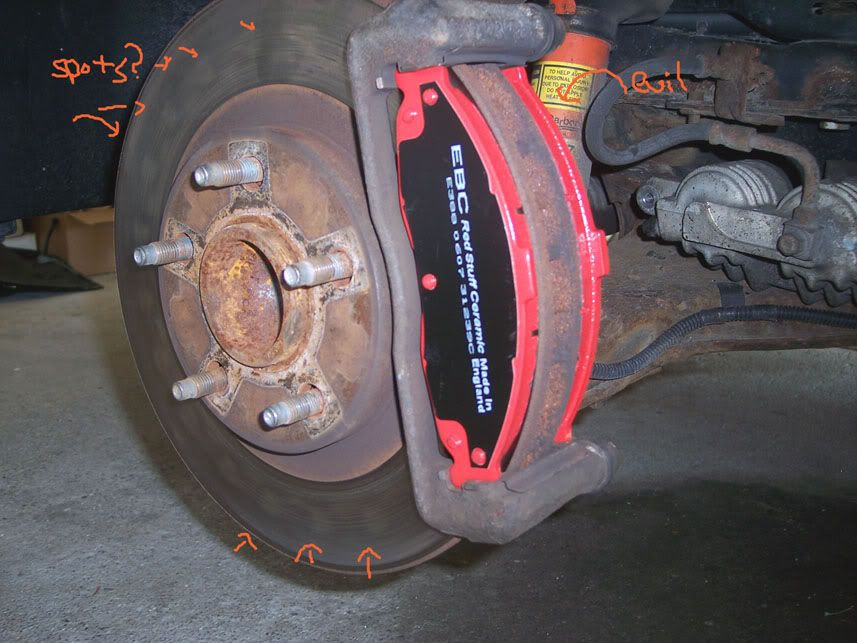
    also, i noticed inside the caliper pistons they had alot of rust and rusted pieces were cracking off and falling out.. it also left a nice imprint on the back of one of the pads. is this something that is normal? or is it from water entering the piston when it shouldn't of. also had some strange 'smear' marks on the rotors, tried wiping them off but it didn't go away.

    well heres the pics, enjoy!

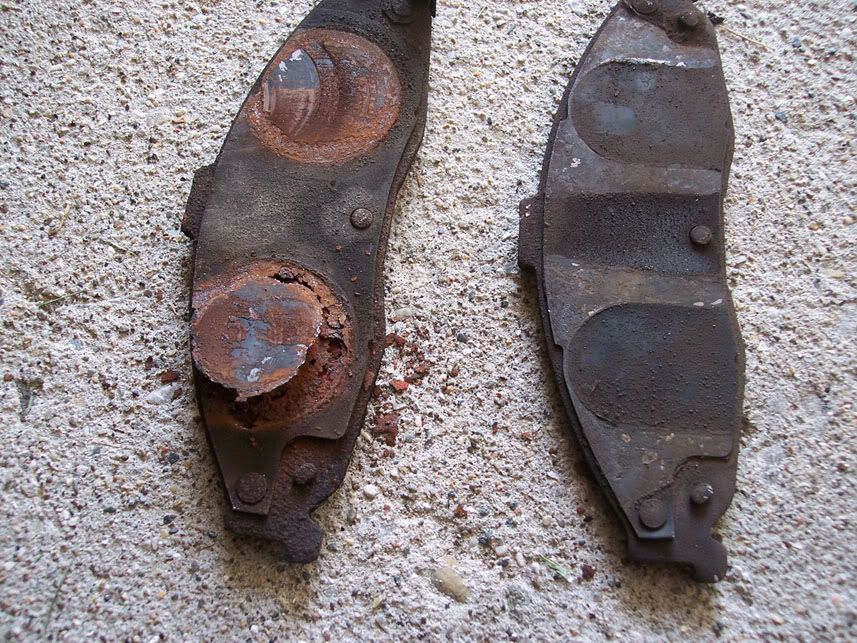
    hawk ceramics.. good while they lasted


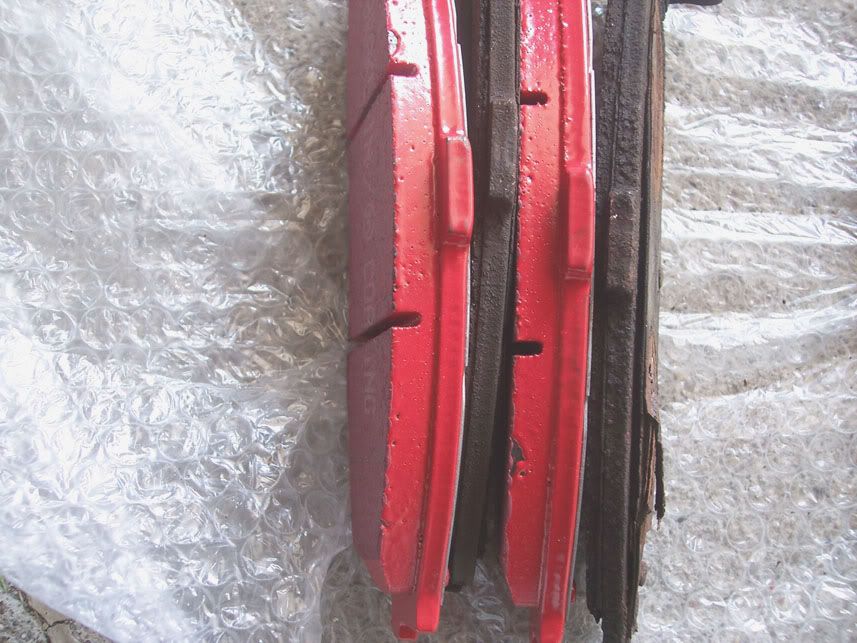
    new ebc redstuff vs old.


    test fit.. pointing out the strange spots, and the evil stock shocks with 127k


    getting the calipers painted (by brush)


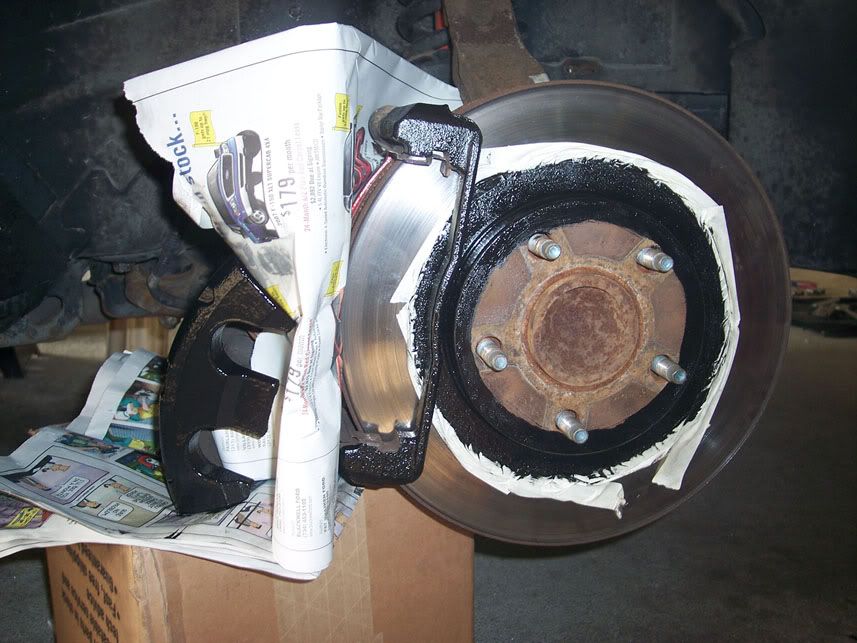
    painting caliper bracket and rotors


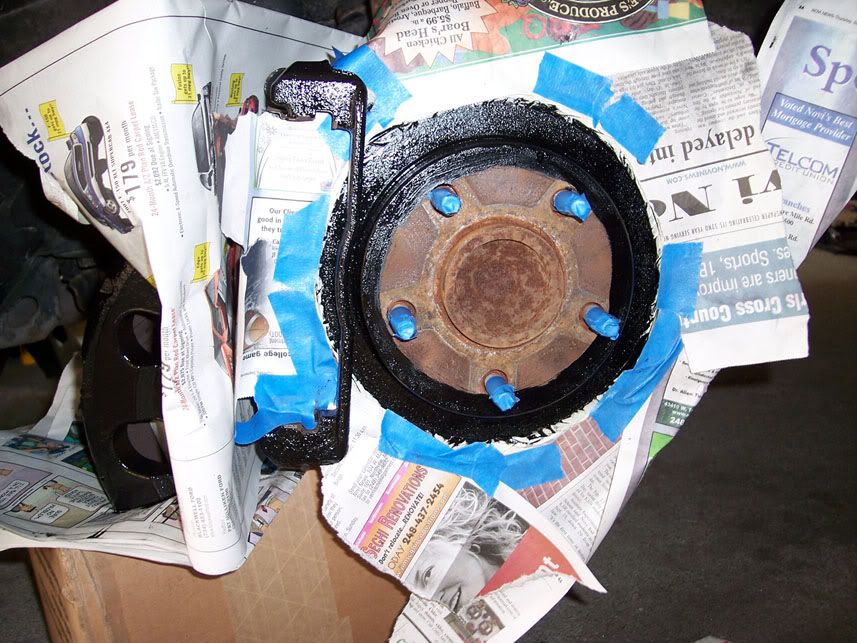
    getting ready for the clearcoat
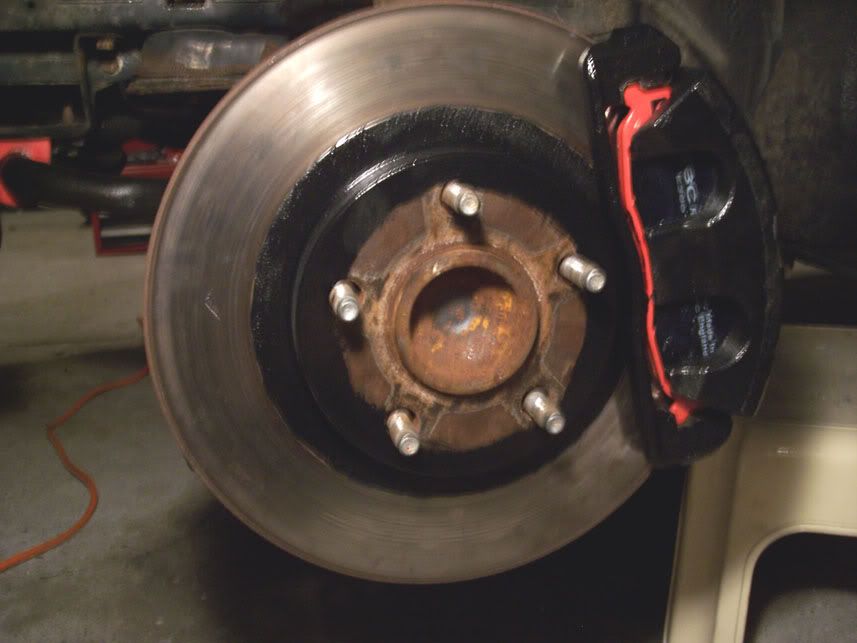
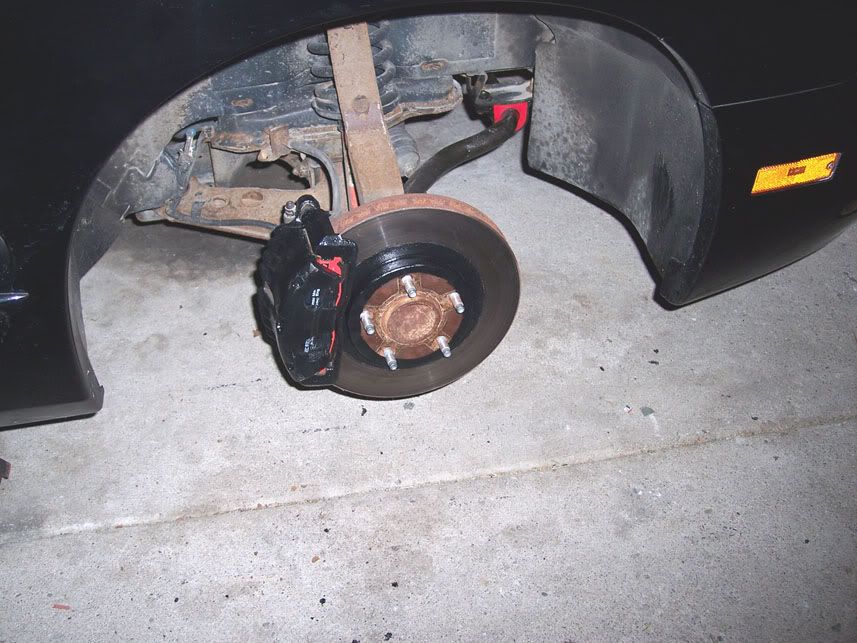

    finished product


    2000 Firebird A4 black hardtop
    intake/exhaust, fuel/ignition, pcm retune, rims/tires
    ~Phil

  • #2
    nice work looks good!

    Comment


    • #3
      I don't know if it's your camera or what but I don't think it looks all that good.

      Comment


      • #4
        Originally posted by SouLTeRRoR View Post
        I don't know if it's your camera or what but I don't think it looks all that good.
        I think it's because he used a paint on kit instead of a spray with a high gloss clear.

        I think it's cool you finally used your kit and painted dem beeaches up!

        1999 Pontiac Trans Am - LS1 - M6 - ITSSLOW - 12.998@109.59 - SOLD
        1994 Chevrolet Camaro
        - 3.4L - M5 - ITSSLWR - 16.558@85.38
        2003 Chevrolet Blazer
        2005 Yamaha R6
        2001 Yamaha YZ426F

        Comment


        • #5
          I used the brush on duplicolor kit on my car and it doesn't look as rough as that does. My paint was very thin and runny. It was actually hard to get it to stick and I had to do about 3 coats to get good coverage. I didn't clear mine.

          _____________________________________________
          Wade
          2002 Camaro SS T Top Black M6 SLP 345HP
          1985 Camaro IROC Z28 T Top Silver 305TPI Auto
          2003 S10 Blazer 2 door 2wd 4.3 auto lowered 3" daily driver

          Comment


          • #6
            well paint sat on the shelf for a year so i dunno if that was the problem. the camera flash makes the 'orange-peel' look show up alot worse than in person. clearcoat was duplicolor spray can
            2000 Firebird A4 black hardtop
            intake/exhaust, fuel/ignition, pcm retune, rims/tires
            ~Phil

            Comment


            • #7
              Any pics before you sprayed the clear on it? Just wonder if that's why it looks so orange-peely. You should do the spindle too! Mine was too ugly to leave as it was when I was getting my car ready for Autorama so I painted the spindle up with the same caliper paint.

              _____________________________________________
              Wade
              2002 Camaro SS T Top Black M6 SLP 345HP
              1985 Camaro IROC Z28 T Top Silver 305TPI Auto
              2003 S10 Blazer 2 door 2wd 4.3 auto lowered 3" daily driver

              Comment


              • #8
                i believe the 4th didnt have clear yet.. and the 5th doesn't because i didnt wanna spray clear on the rotors. the clear just made it shine nicer instead of looking a little more dull/dried out
                2000 Firebird A4 black hardtop
                intake/exhaust, fuel/ignition, pcm retune, rims/tires
                ~Phil

                Comment


                • #9
                  Looks fine to me...i would probably spray paint the pad so it matches the caliper.
                  2011 Ford Raptor SuperCrew
                  SVT Beadlock Wheels
                  Roush Intake, Corsa Exhaust
                  20" and 40" Light Bars

                  2000 Camaro Z28
                  Stripped Down Drag Car Build

                  Project 1999 Camaro Z28


                  2009 G8 GT Stryker Blue Metallic-SHEGONE
                  Crate LS3, LS9 Cam, LSA Supercharger, Metco Solid Isolator
                  RotoFab Intake, HSRK, Camaro Trans Pan
                  ZL1 HX, ZL1 Fuel Pump, CTS-V Lid, LSA Injectors
                  Pat G - 93 Octane Tune
                  Kooks 1-7/8" Longtubes, High Flow Cats, X Pipe, Solo AxleBacks
                  CTS-V Calipers, Brembo Pads
                  H&R Lowering Springs, Whiteline Bushings, FE3 Struts/Shocks, Camaro 20" Wheels
                  HIDs, LED Conversion, Atari Gauges, Tint, Roof Carbon Fiber Wrapped, Innovative Wideband

                  2.55 Lingenfelter Pulley and Injectors waiting to go on!
                  sigpic

                  Comment


                  • #10
                    looks better than mine

                    Comment

                    Working...
                    X