Welcome to the Michigan FBody Association website.
The Michigan FBody Association is a centralized website for FBody enthusiasts to discuss what's going on in the Michigan area. MiFbody.com was created to allow for an easy one-stop place to find out what's going on in Michigan as far as FBody events, to find out what clubs are available in your immediate area, and for an easy place to post classifieds for items you want to sell! Our goal was to create a more close-knit community of FBody enthusiasts in the state of Michigan, and to bring Camaro and Firebird enthusiasts alike together for some amazing FBody events!
The most important thing to know about the Michigan FBody Association is that we are NOT a club! The Michigan FBody Association is open to everyone, and is a community. Thus, we will have get togethers, casual cruises, events, and such like that, but this is not an exclusive club and it's 100% free to join this site! So what are you waiting for? Register now!
If you have any problems with the registration process or your account login, please contact us!
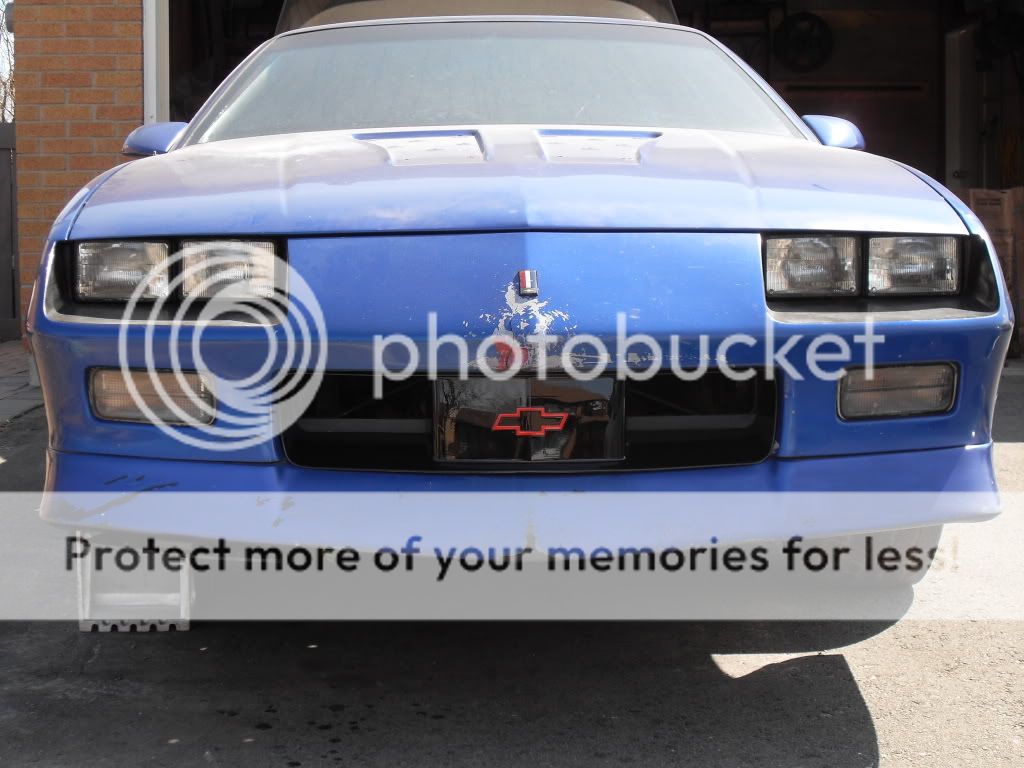
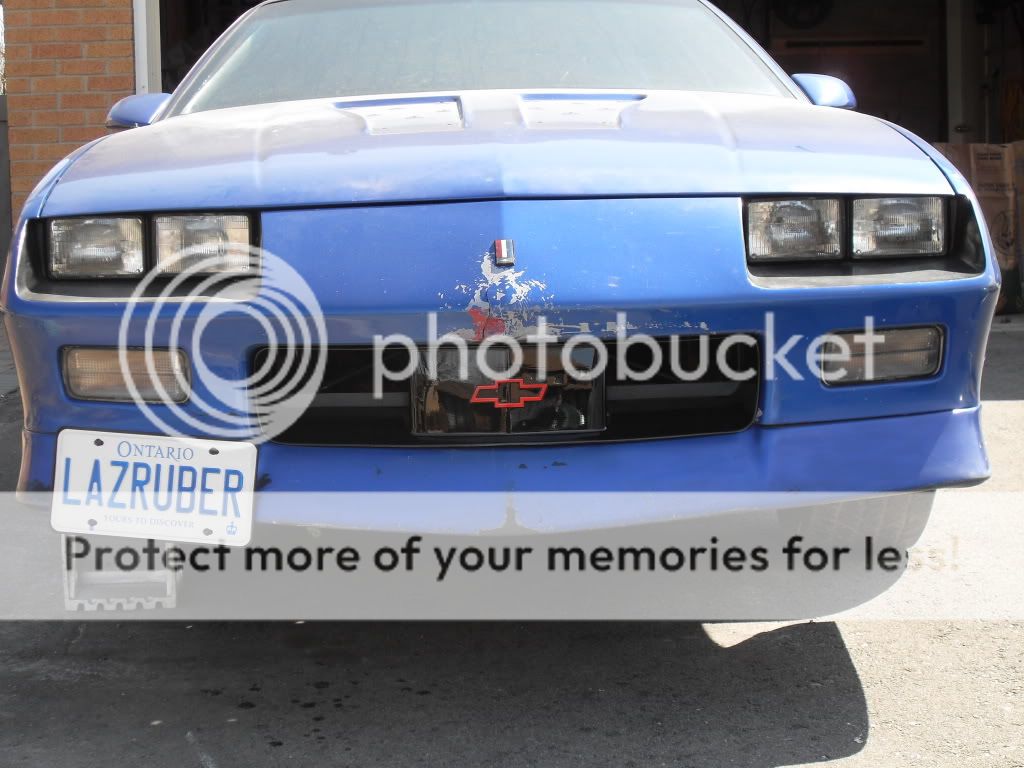
Installed the NOS Z28 grille (from hawksthirdgen) and the flip down license plate holder (from summit racing).
Going to paint the engine bay in the fall. At the same time the chin spoiler and new front bumper cover will get painted and installed.
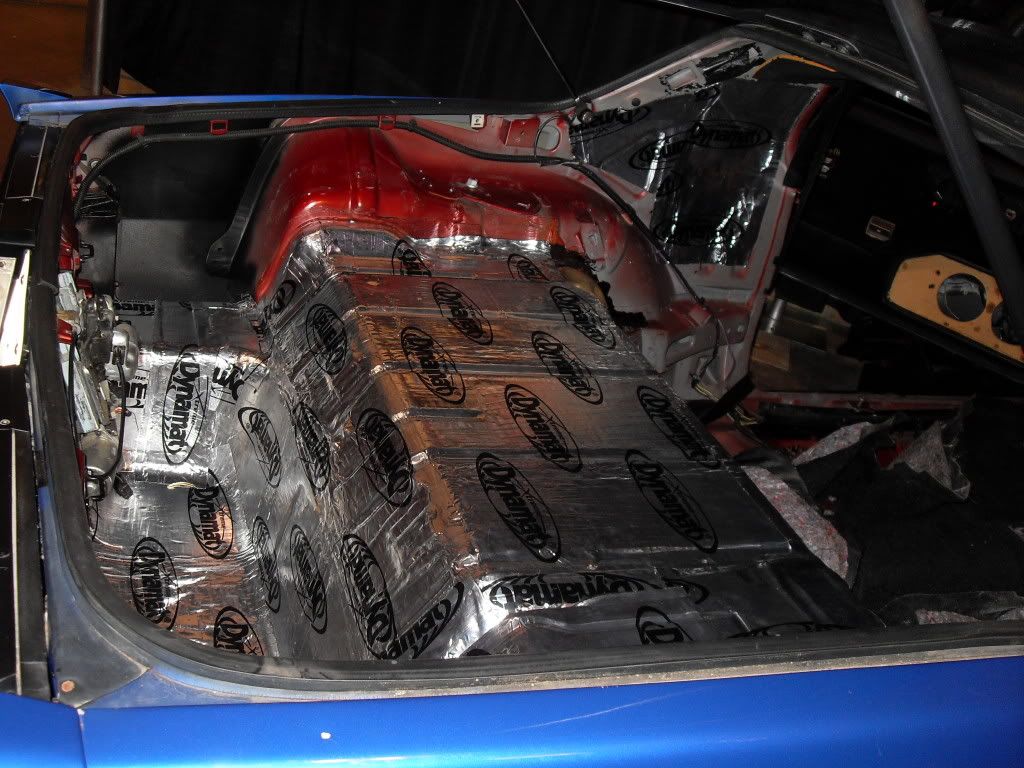
Well.....the car is leaving tomorrow to go to Motion Car Show in downtown toronto. We are doing a "live interior build" and trying to make the build interactive with the public. All the NOS parts I've been collecting for the past 18 or so months will be getting installed over the course of the 3 day show.
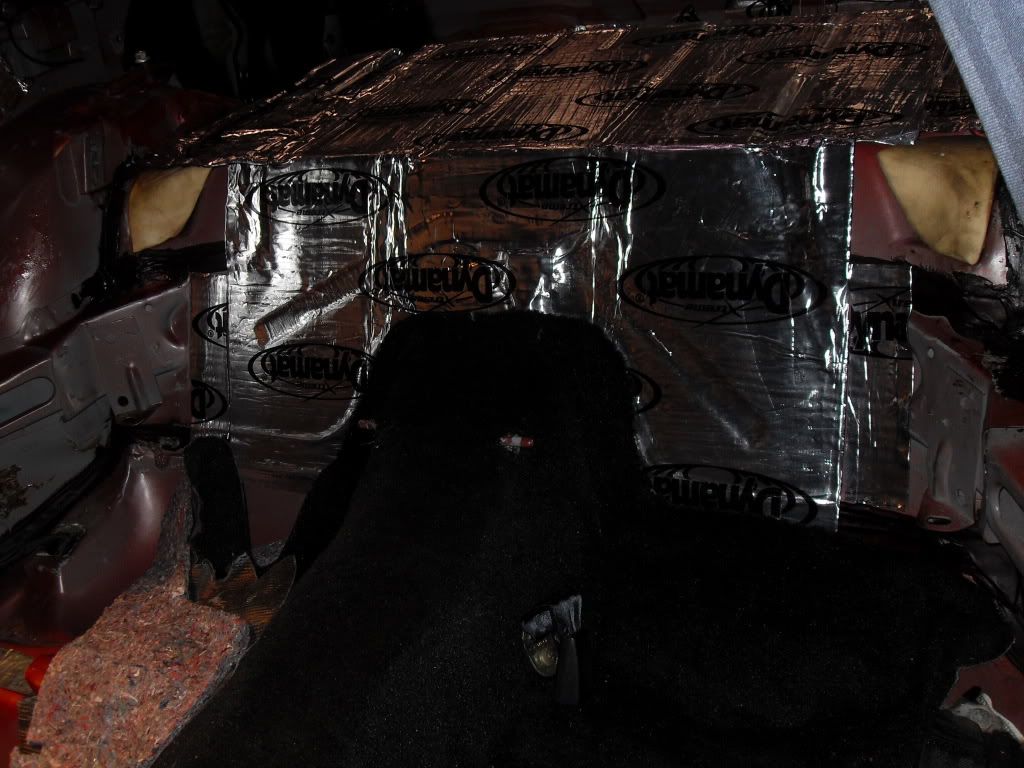
Friday will be the teardown. Everything will be taken out (stripped down to the metal) and the interior will get a layer of Dynamat Extreme (trunk area, floor and sides).
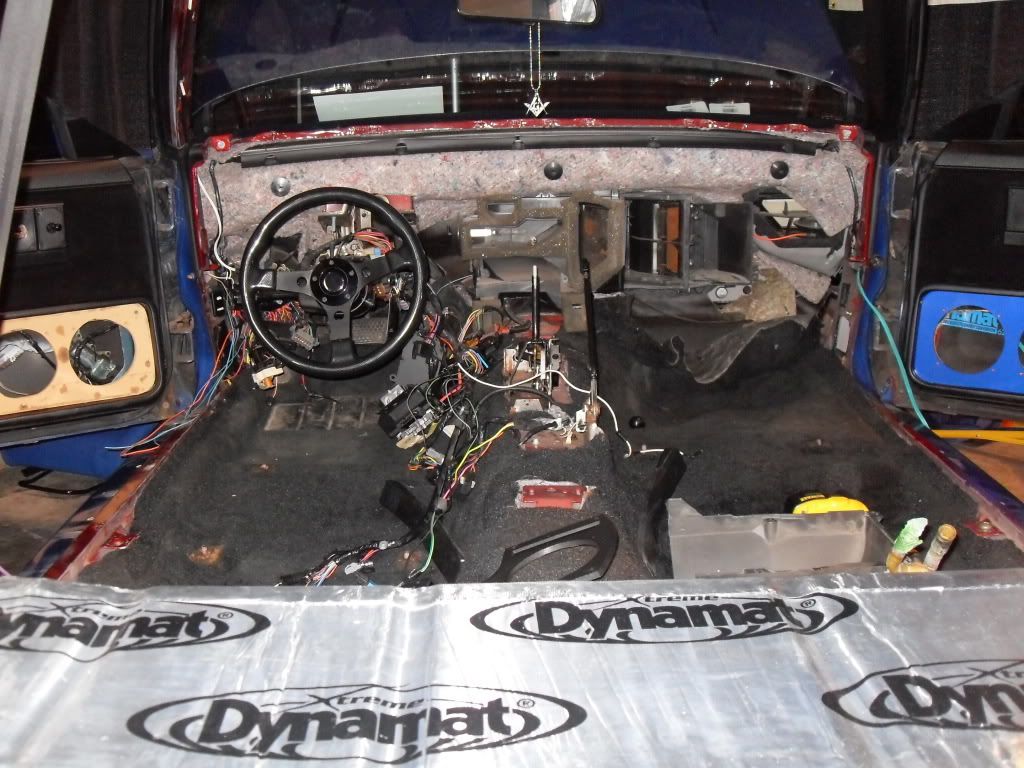
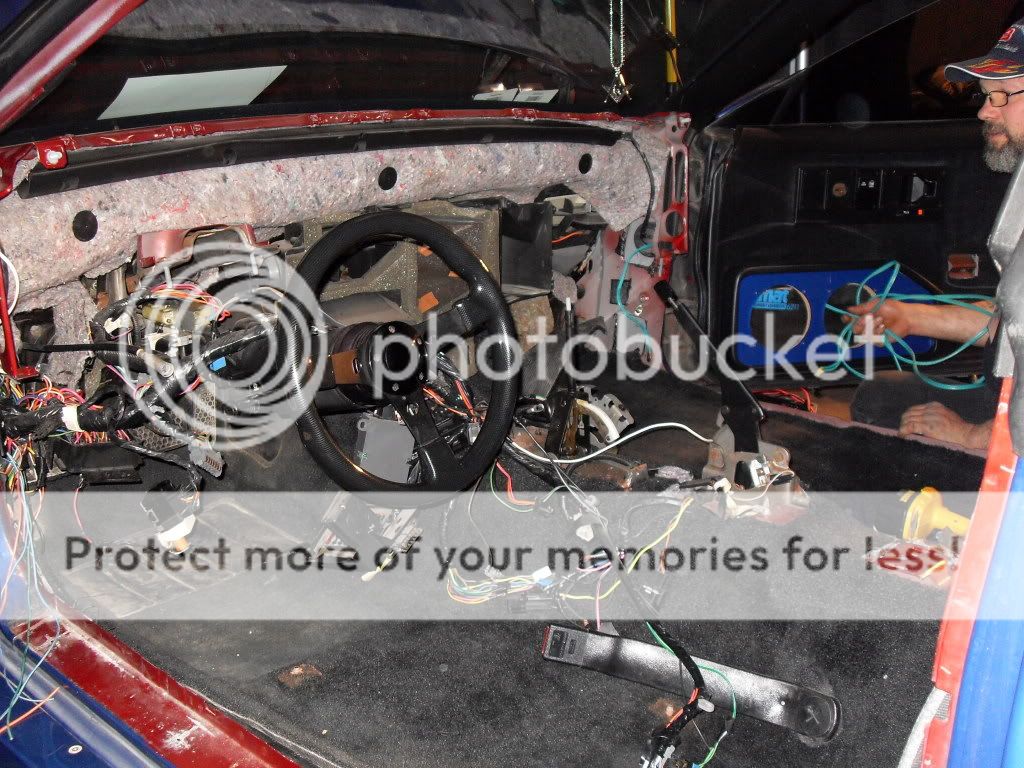
Saturday will see the dash removed (and replaced with a new one), heater core swapped out and some centre console wiring issues resolved. Also, the rear carpet will be swapped out for a new one and the front carpet reinstalled.
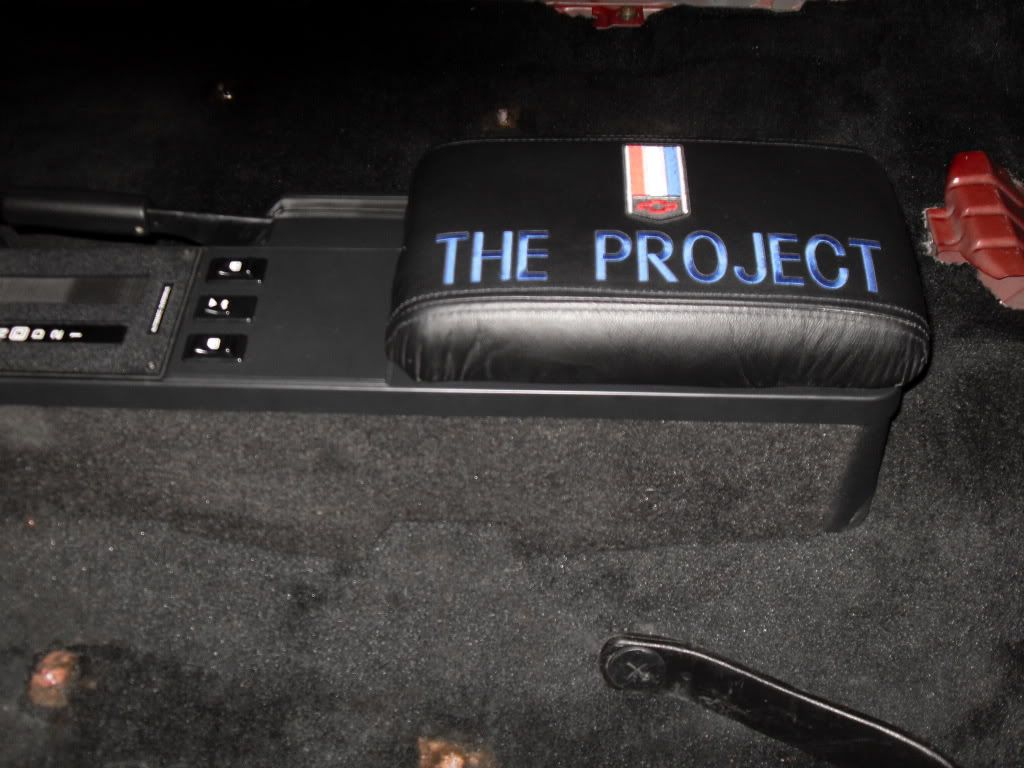
Sunday will be spent installing and NOS rear panels, NOS centre console, shifter plate, console lid and switches. New seats going in as will and finish up everything. At he end of the show it WILL be a new interior.
A few pics of all the NOS parts I've collected. I think it's safe to say that I doubt you will see this many NOS black parts together again. The only parts that are not NOS are the door sills and rear trunk panel. Everything else is NOS.
Last edited by The Project; March 25th, 2009, 07:23 AM.
Here are some pics from the "live build" so far...... On the way to the show Laying down the Dynamat Extreme on the back half of the car. 9 sheets (36 sq.ft.) were used. The front drivers and pass. floor were Dynamated as well Two layers were used over the pass floor hump to help with vibration and noise from the cats. Behind the rear seats got the treatment as well. Out comes the dash. We also took the opportunity to swap out the heater core and clean up the wiring (remove old electrical tape and retape the factory wires together) as well as a GOOD clean. New dash is in. All the parts (upper console, shifter plate, power window and hatch stitches, bezel, console lid) are NOS (brand new). We also changed the delay wiper arm and hazard button with new ones.
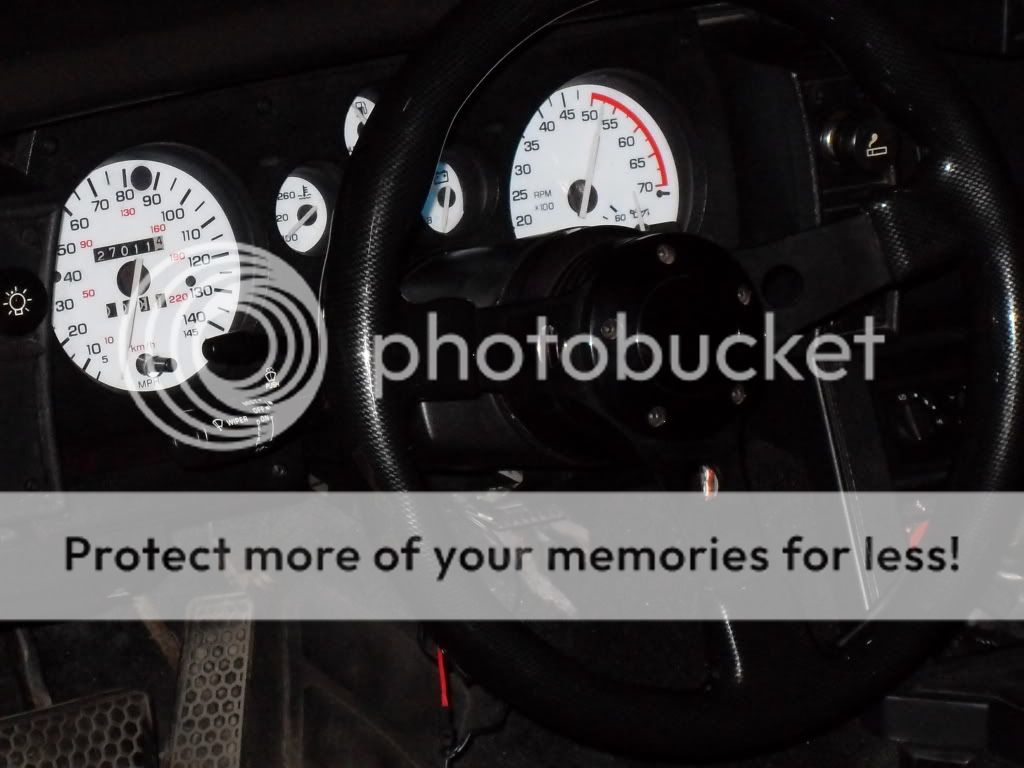
New white gauges
Powered up 8) Will post more pics when we finish the interior today. Would like to thank Dave (the white bandit) for helping with the Dynamat (it was very much appreciated) and Chris (Sunny) with the teardown. Also would like to thank Ross for helping the the heater core, wiring issues and electrical.
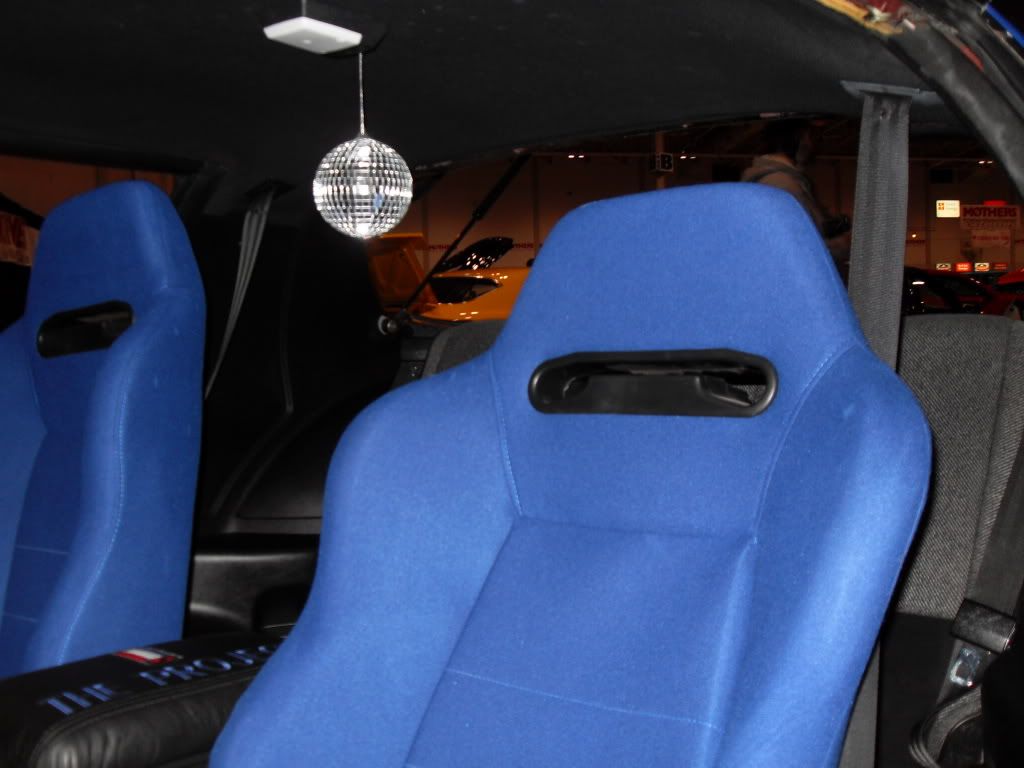
Here are the panels installed and seats roughed in (I still need to swap the seat tracks). A few panels didn't line up properly so I still need to massage them, install the clothes hooks and install the panels that go under the dash.
All in all we got a lot accomplished over the course of the show. Thanks to Steve S. and Dan for their help with the interior on Sunday
Thanks to Nick for the Disco ball. 8)
my buddy just put racing seats in his stang, and they are suprisingly extremely comfortable to sit in.
great build, always wanted to do this with a 3rd gen. they look amazing all cleaned up
Yes, these seats are increadibly comfortable. These are the wider ones (21"). I got a VERY good price on them and the clour matches. I'll probably recover them in a few years in black leather with suede inserts.
Next on the list is to get the engine bay, new front bumper cover and chin spoiler painted and installed. But first, I'll have to pull the front end and fenders off for paint.
Thanks.....Yes I built them a while back. Can't have too much midbass
I would love to do something like that in my 3rd gen cause I have to say the stock speaker placement in these cars suck! Was it hard to do, what materials did you use?
I would love to do something like that in my 3rd gen cause I have to say the stock speaker placement in these cars suck! Was it hard to do, what materials did you use?
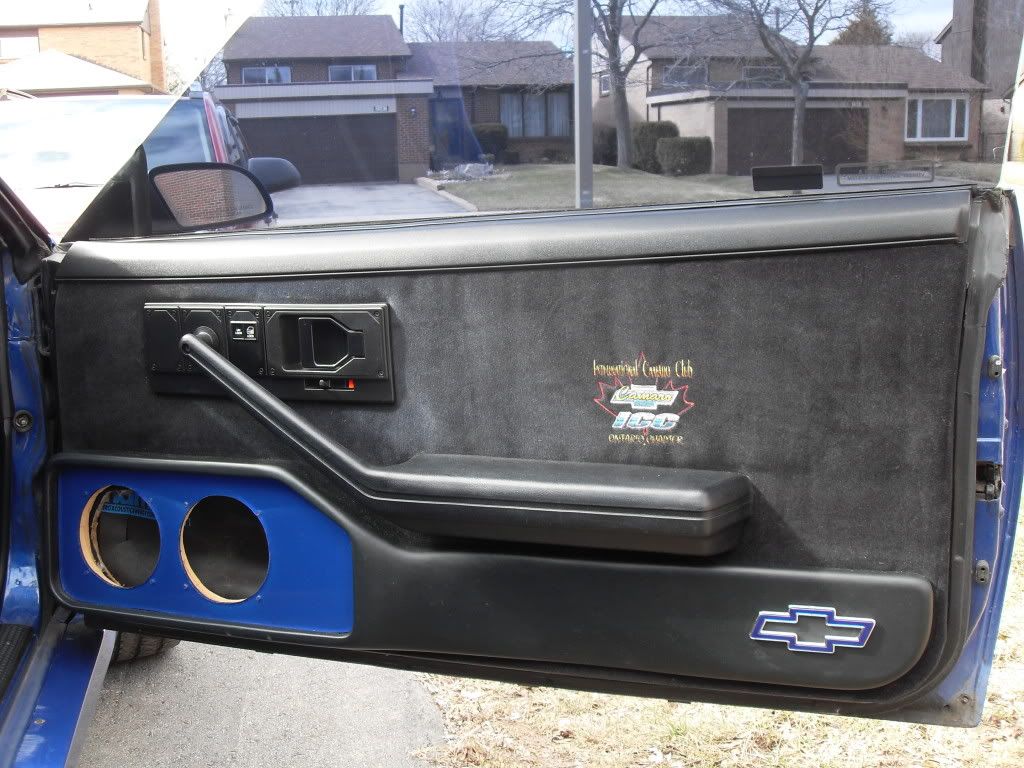
It was hard to get the contour right so the buildout does not hit the seat belt assm.
Most of the material is MDF wood. I used a orbital sander to smooth out all the edges (take your time or it won't look good). Some fibreglass was used to smooth out the slope from the speakers to the lower part of the buildout.
Just make sure you don't mind cutting holes in the door and dynamat infront of the power window motors.
It took me two tries to get it right. Heat up the vinyl to make sure all the curves are smooth. The buildout it screwed to the back of the door panel.
Here is a better pic of the door. What makes it look good is that the angle of the arm rest matches the buildout and the top of the buildout almost touches the bottom of the arm rest (very little space). The bowtie is from an 89 Cavalier.
Last edited by The Project; March 30th, 2009, 03:06 PM.
Thanks for the better picture of the entire door! I did not notice it went across the whole bottom like that before, I like that a lot! I have a bunch of 3/4 MDF left over from my sub box build I may give something like this a try! Thanks again
Decided to clean up and paint my new sway bars today. I picked up a 36mm hollow front sway bar on ebay a while back. It cost me more to ship it than to buyI also got a 22mm rear bar from a club member for free...gotta love that word. Anyway...the bars were a bit dirty so I packed them up and took them to the coin car wash. Hit the bars with some general degreaser/cleaner and $3.00 worth of powerwash. When I got them home I sprayed them with some Bright Red engine enamel spray paint I got for cheap ($5 each) at Waterdown Swap Meet in the spring. They both turned out great. Can't wait to get them next spring.
 Tweet
Tweet


 I have a new bumper to put on also.. but its yellow


Comment