 Tweet
Tweet
interesting
-
91 Trans am, 305, Lt1 cam, 24lb injectors, headers, SLP LM2, SW chassis, massive panhard, lowered, modded TPI, Tuned, 4.10s, Lincoln locked
85 Z28 406/th400?/3.42 4th gen disc rear/4th gen dash
00 Tahoe Z71........Stock
97 K1500 lt4 cam, 1.6s, MPFI, Solid axled, IROKs,------winter beater -
Here are few shots of the holders primered and brackets welded on. The other hole is for the attachment bolt that will secure the steel box to the battery tray below.


Test fit of the new UMI STB.


Just rolling with the dog pound..Comment
-
TIME FOR PAINT!!!!!!
Decided to cover the top part of the engine bay where the wipers sit and overlap the fenders to ensure full coverage.
Laying down the first coat.


Final Coat


Just rolling with the dog pound..Comment
-
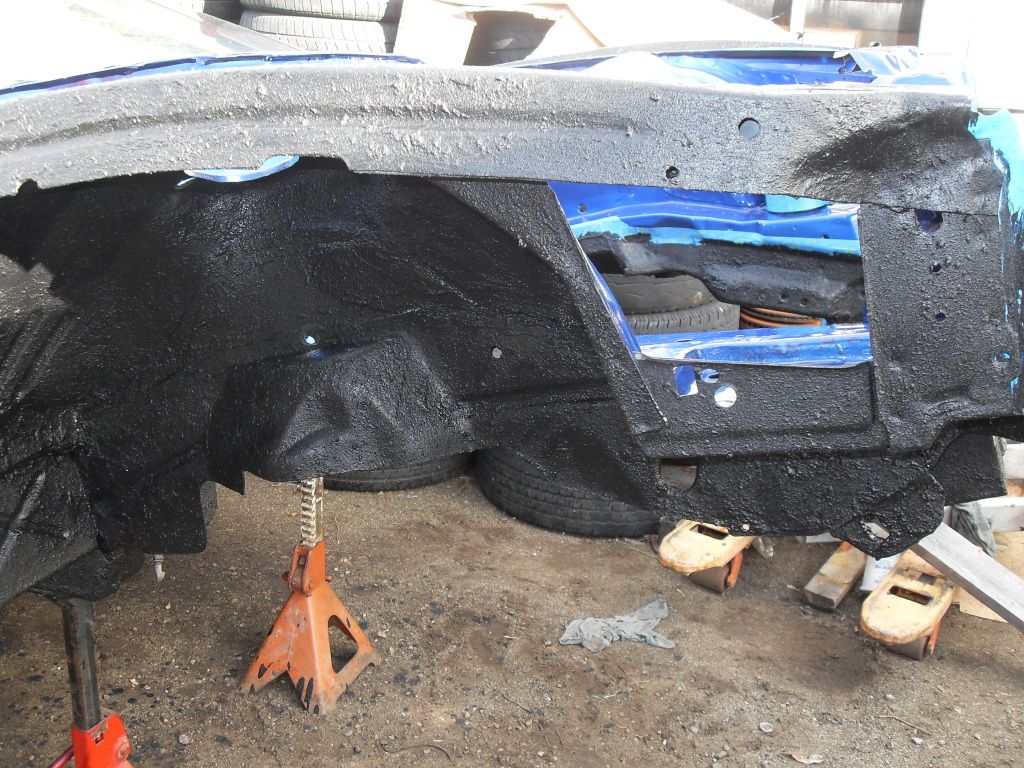
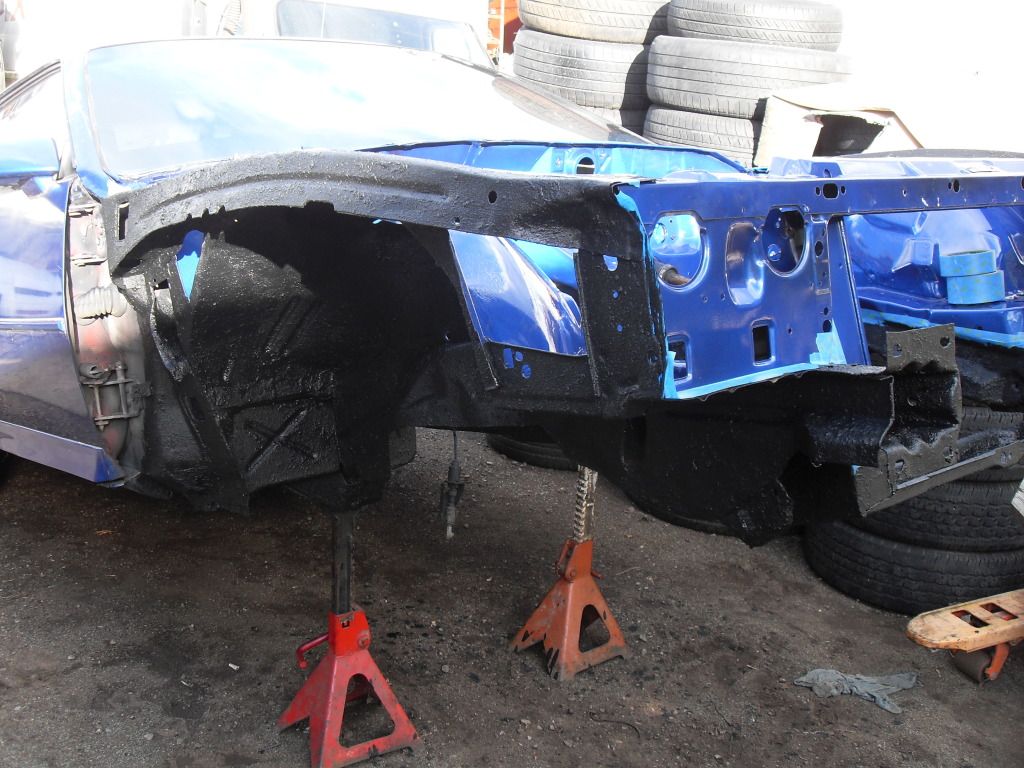
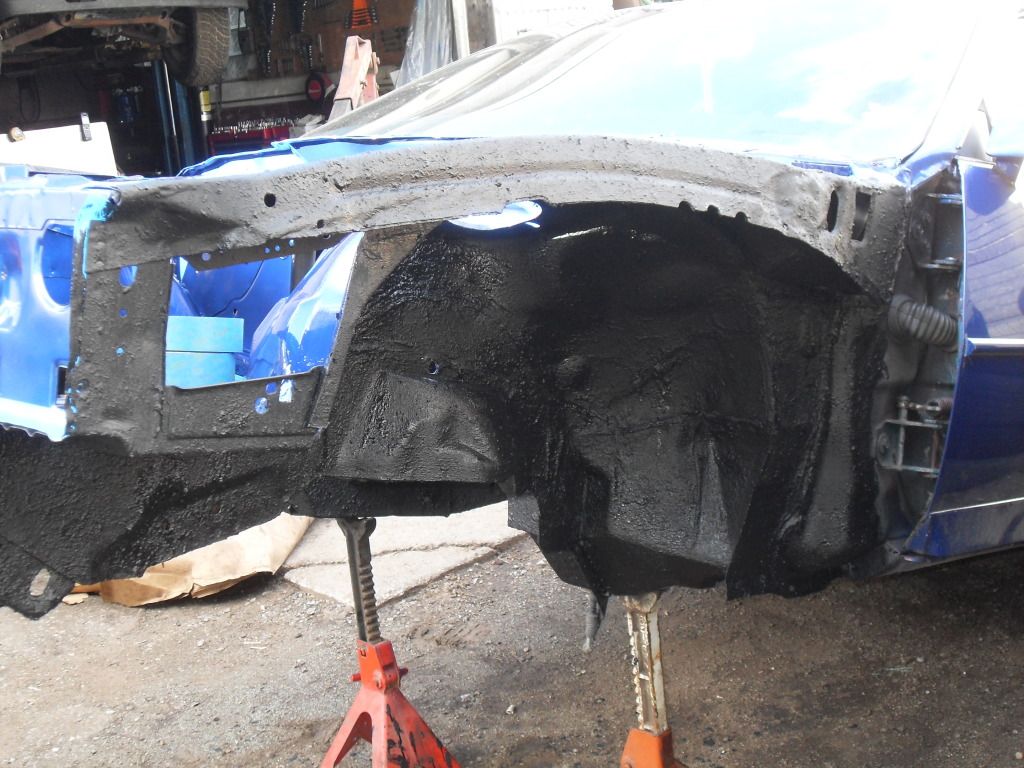
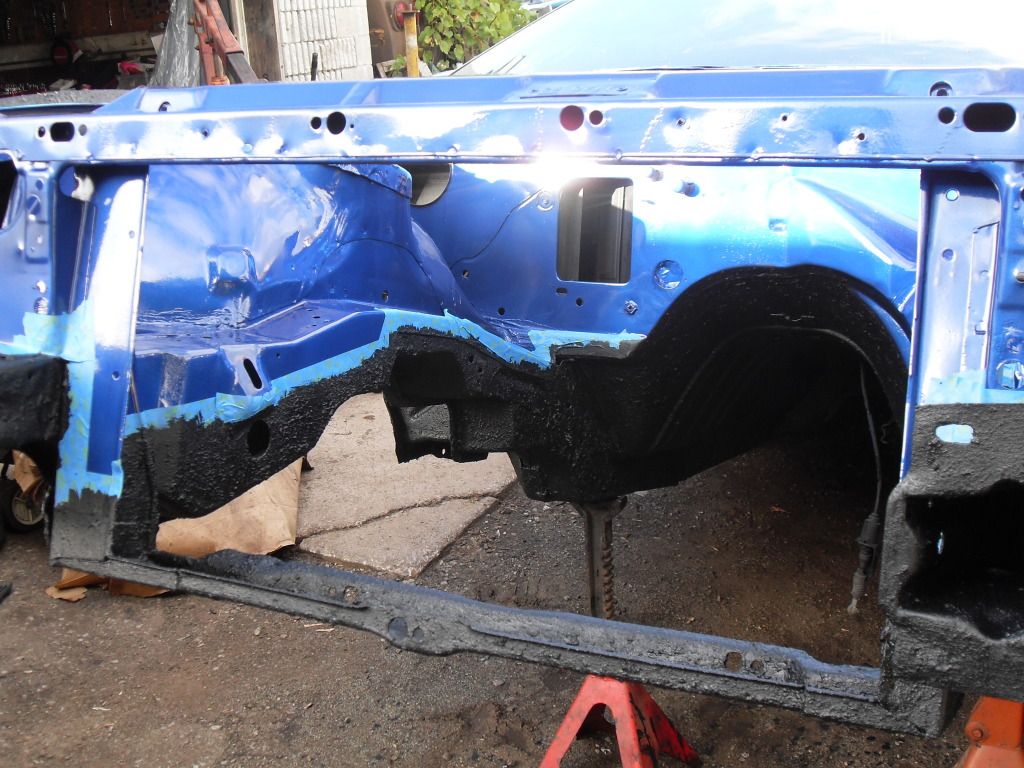
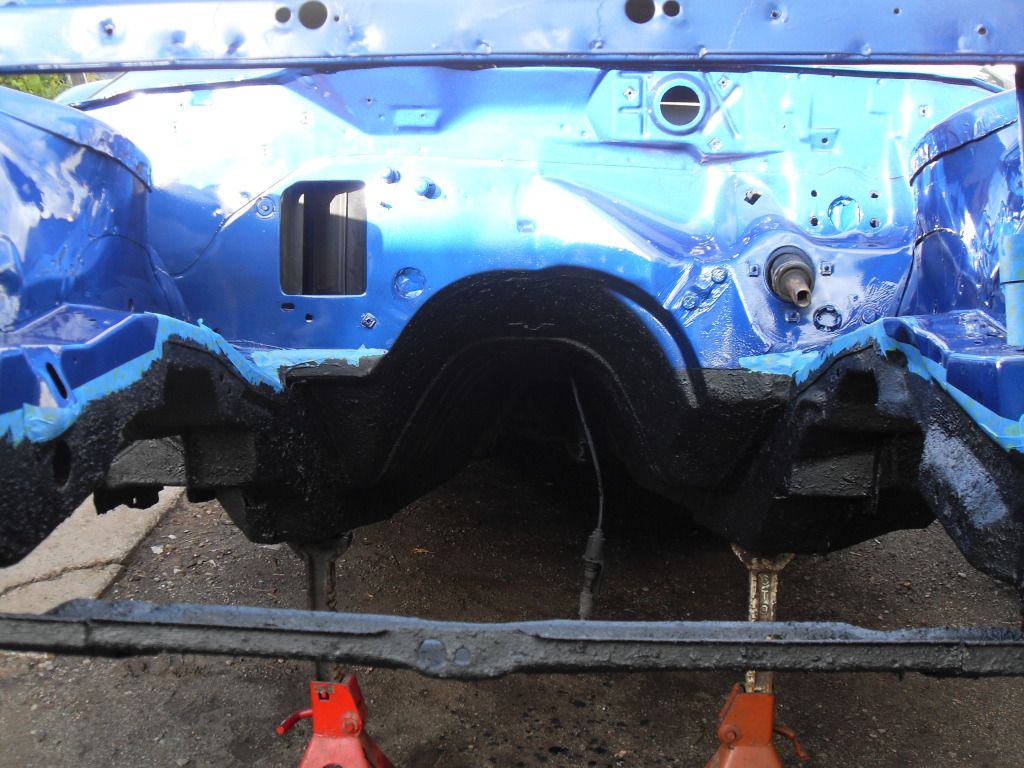
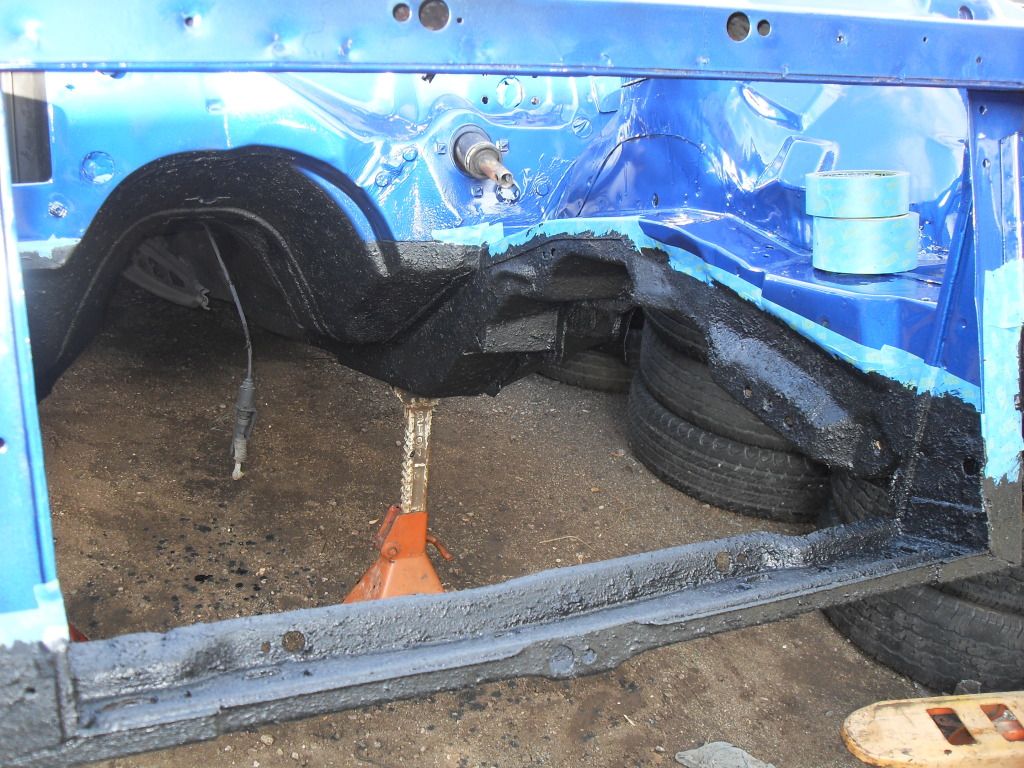
Spent the day applying the Duplicolor bed liner to the inner fenders, tranny tunnel, underside, frame rails and rad cradle.
If you're going to use this stuff (and it works great) a few things; the supplied roller does not work on non flat surfaces but thankfully the supplied brush does, go the dollar store and buy another brush (for the second coat) and a smaller brush (1") for the hard to reach places, lastly USE GLOVES!! bed liner is a pain to remove!!
You should apply two coats and the second coat can go on a bit thicker. It dries quickly and there is little smell. I put three coats on the rad cradle just because.
It dries to a texture but as you won't see most of the bed liner, it doesn't matter if it dries smooth or not.
Just rolling with the dog pound..Comment
-
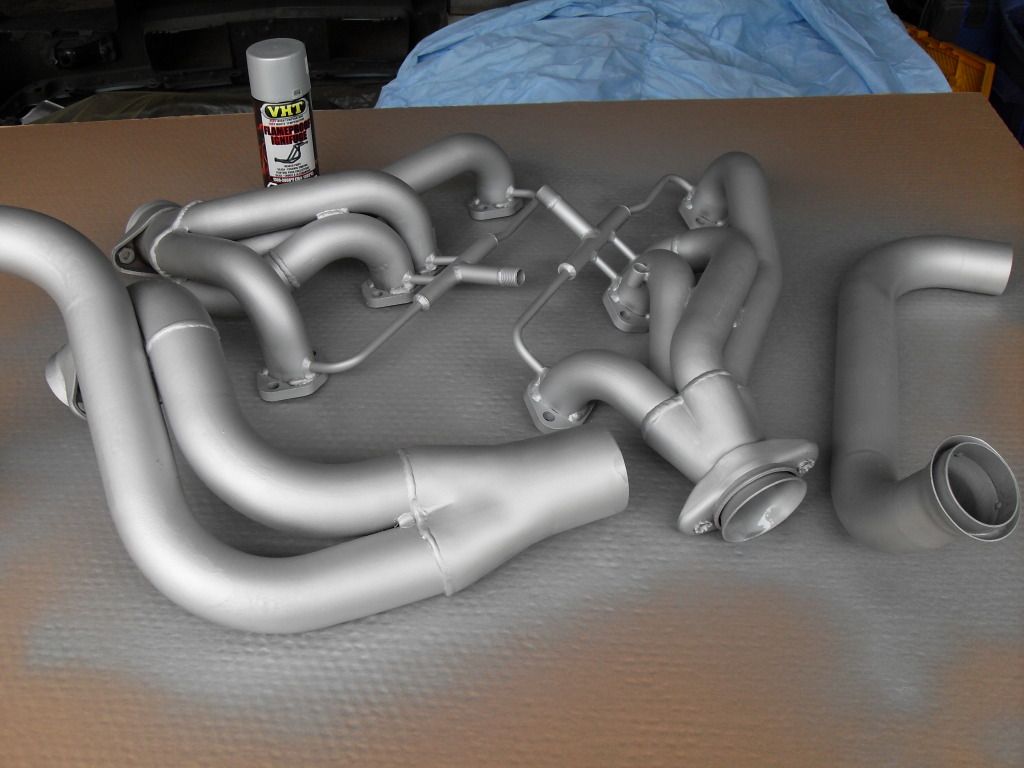
Picked up a set of almost new SLP headers and matching Y pipe. They look like they were never used and have no rust on them. Decided to give them a few coats of High Temp paint. Came out pretty good. Wonder if VHT will give me a discount!!
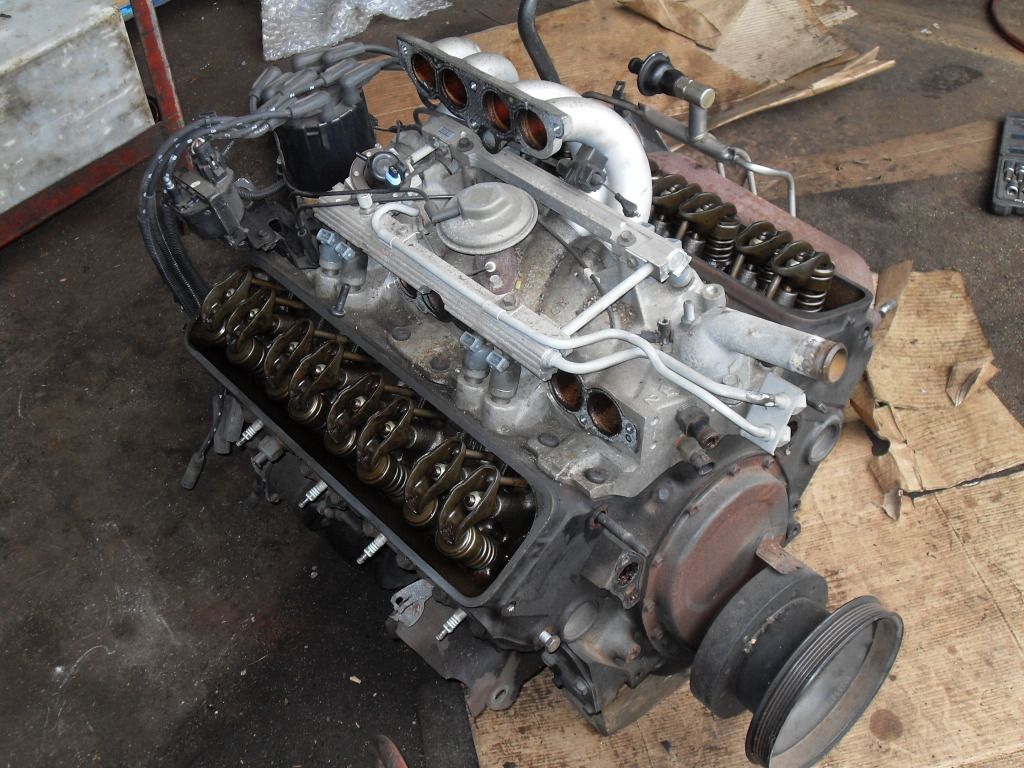
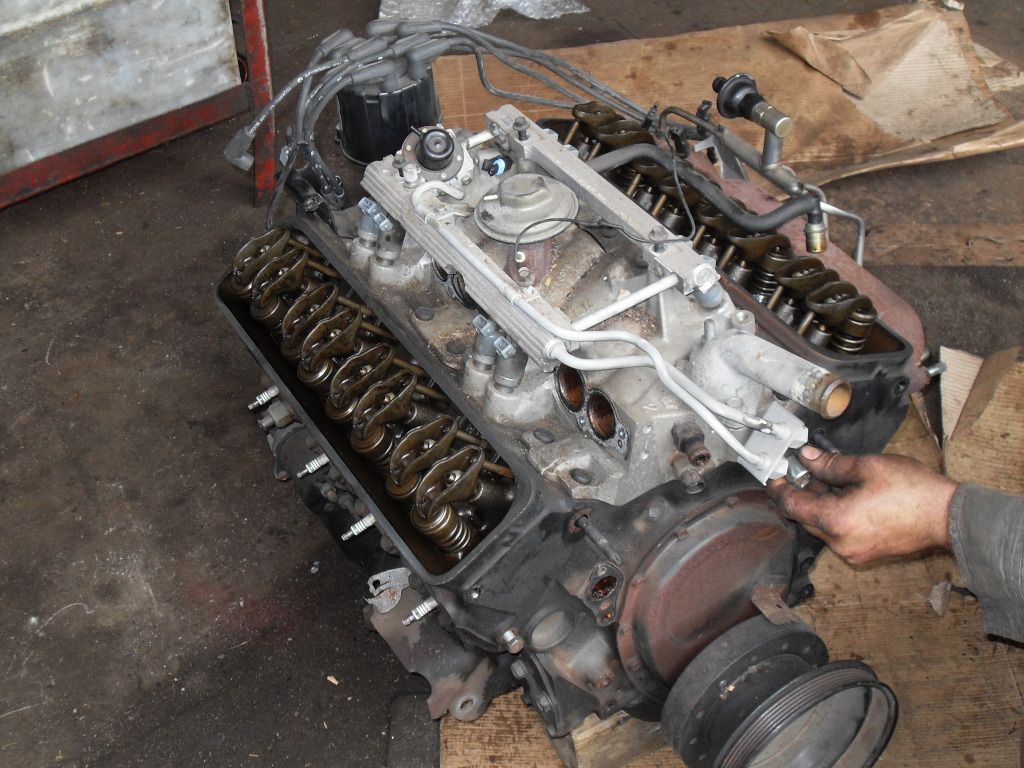
ENGINE REBUILD TIME.
Few pics of the engine teardown and prep before adding the ZZ4 cam, springs and retainers as well as Comp Cams Pro Magnum rockers, Comp Cams Chrome Moly rods, Comp Cams double roller timing chain, MSD 8.8 wires, Holley AFPR and above mentioned SLP headers.
Motor was in storage at the shop for a few years. Came out of a US IROC with only 35,000 mi.
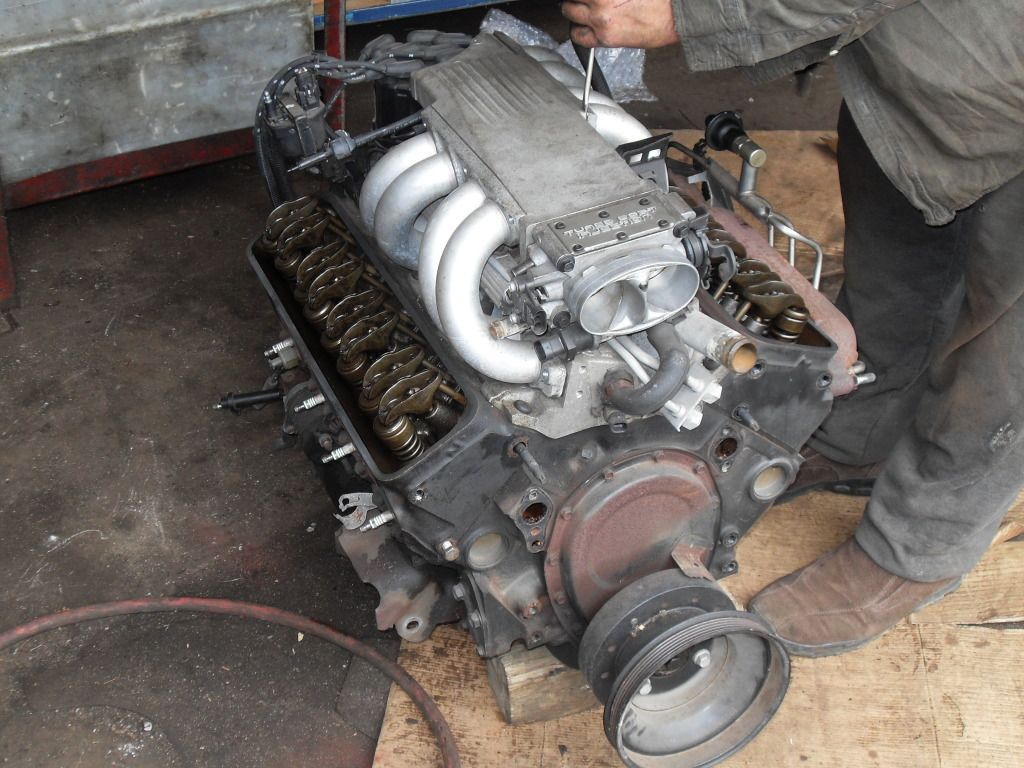
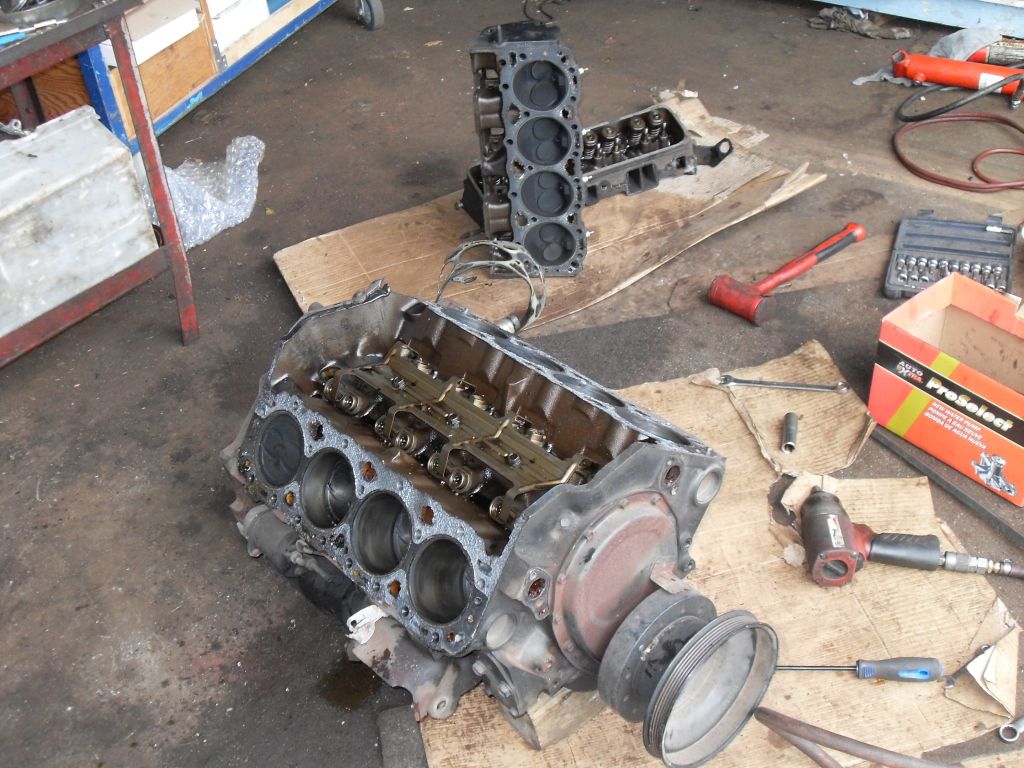
Removed parts waiting for a good clean.
Will start the build next week.
Just rolling with the dog pound..Comment
-
Quick update…head work today.
Removed the factory push-in studs and then taped the holes for the Comp Cams screw-in studs. It was a MAJOR PIA to tap the studs by hand but well worth the effort. Used LOTS of oil to keep the tool from getting hot while tapping and cleaned after each stud.
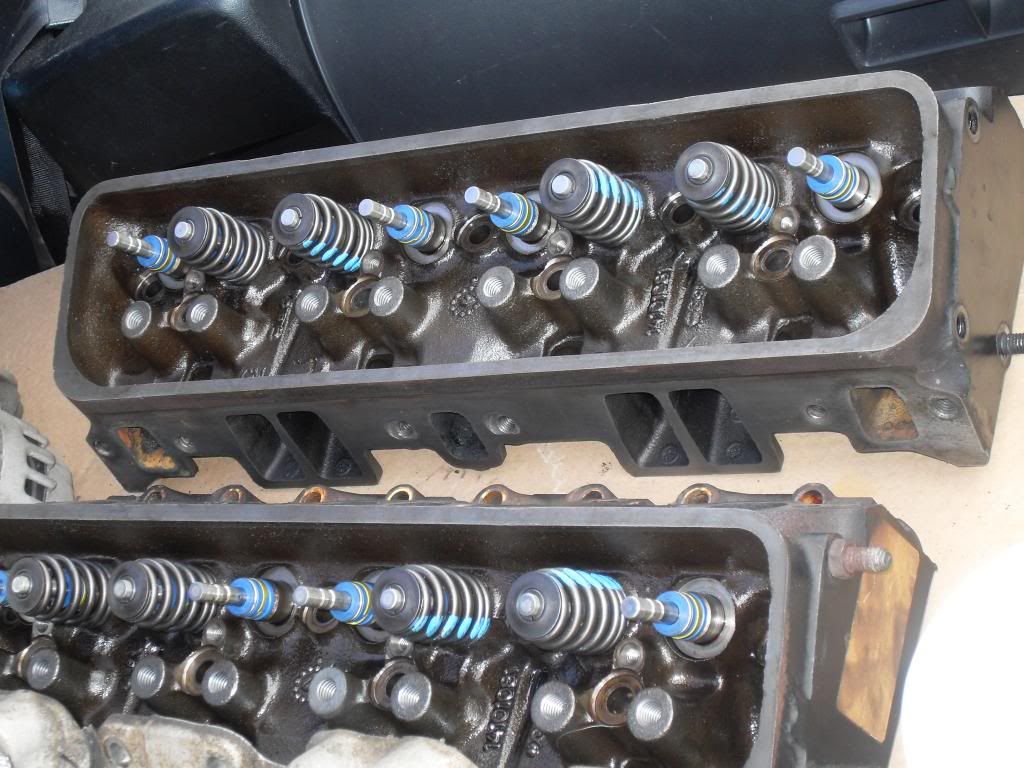
Discovered the ZZ4 springs would not fit the 305 heads without machining the spring pocket. Fortunately, my mechanic “just happened” to have a complete set of Comp Cams bee hive springs with matching retainers and locks. A quick call to Com Cams and “Randy” at CC confirmed the springs would fit but the exhaust valves would probably need a spacer to keep valve float at bay. Good news is the springs are good for 600 lift
Lastly, installed Fel-Pro posi valve seals to keep the excess oil from coming thru.
Will post pics next week.
Just rolling with the dog pound..Comment
-
howd you remove the push in studs91 Trans am, 305, Lt1 cam, 24lb injectors, headers, SLP LM2, SW chassis, massive panhard, lowered, modded TPI, Tuned, 4.10s, Lincoln locked
85 Z28 406/th400?/3.42 4th gen disc rear/4th gen dash
00 Tahoe Z71........Stock
97 K1500 lt4 cam, 1.6s, MPFI, Solid axled, IROKs,------winter beaterComment
-
My mechanic has this tool.Originally posted by TylerT/AZ28 View Post
http://www.summitracing.com/parts/SUM-900136/
According to summit - Our Summit® stud removal tools make short work of pressed-in rocker arm studs. Just position the tools over side-by-side studs, screw down the retaining nut, and the stud is forced out. Plus, you can use the supplied arbor to accurately align bosses for screw-in studs
You put the tool over the stud and added a flat washer to distribute the pressure and protect the top of the tool.
I used the factory nut with the socket and drill, to pull the stud out.
When we pulled the stud half way up we slid a bolt (you can used some washers) over the stud for extra length and turn the nut again. The stud pulls right out. Make sure the bolt is tall enough so you don't run out of stud thread to turn.
The factory nut is good for about four studs before it becomes hard to use. Since the Comp Roller rockers comes with nuts, the factory ones are not needed.Last edited by The Project; October 7th, 2012, 09:04 PM.
Just rolling with the dog pound..Comment
-
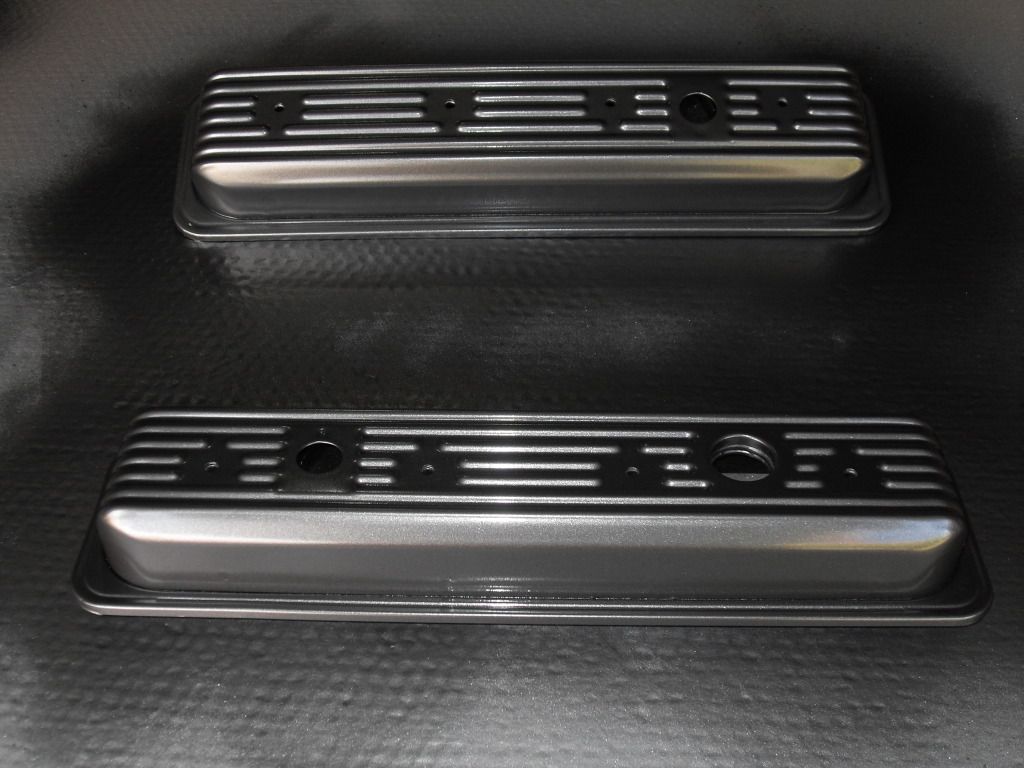
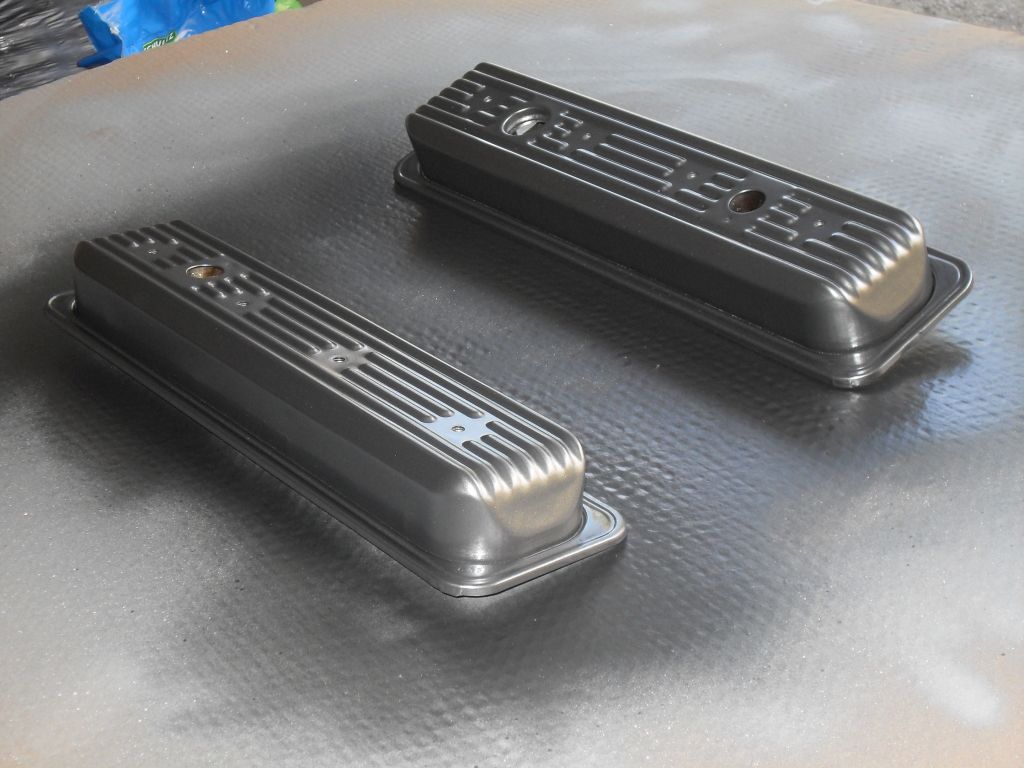
Since the valve covers were off the car, decided to give them a good clean, light 180 grit scuff and apply some Duplicolor Charcoal Gray Met. paint. Didn't turn out too bad.
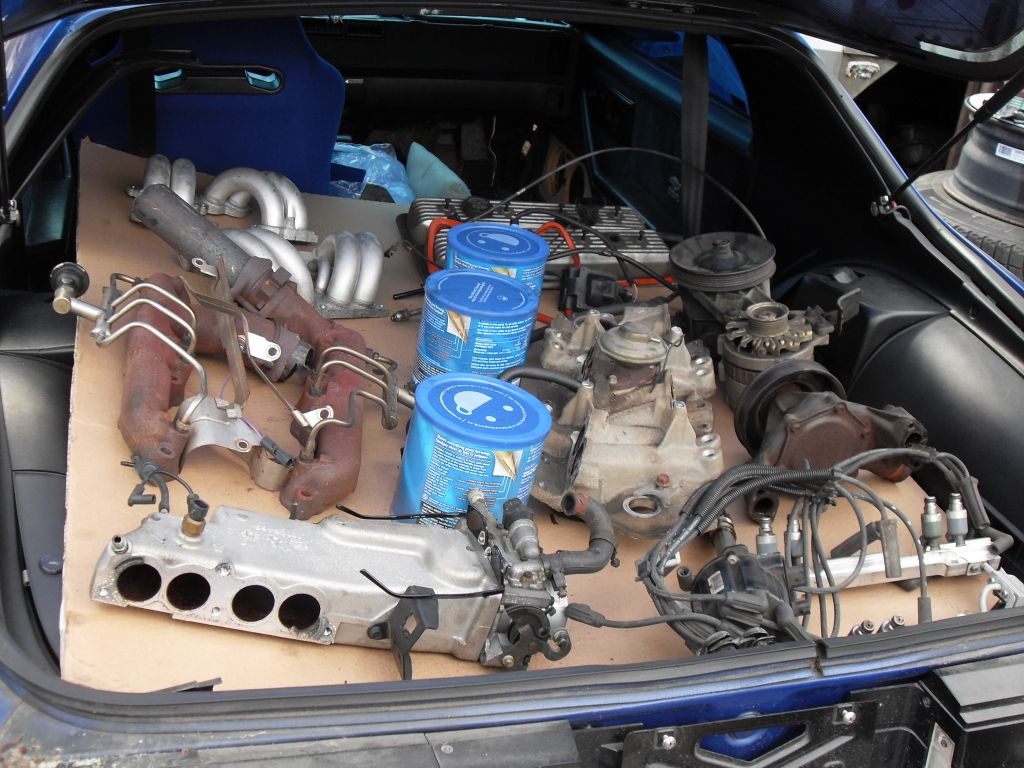
Picked up a set if TPIS runners and port matched plenum. Haven't decided what to do with the paint scheme yet
Anyone have ideas?
Just rolling with the dog pound..Comment
-
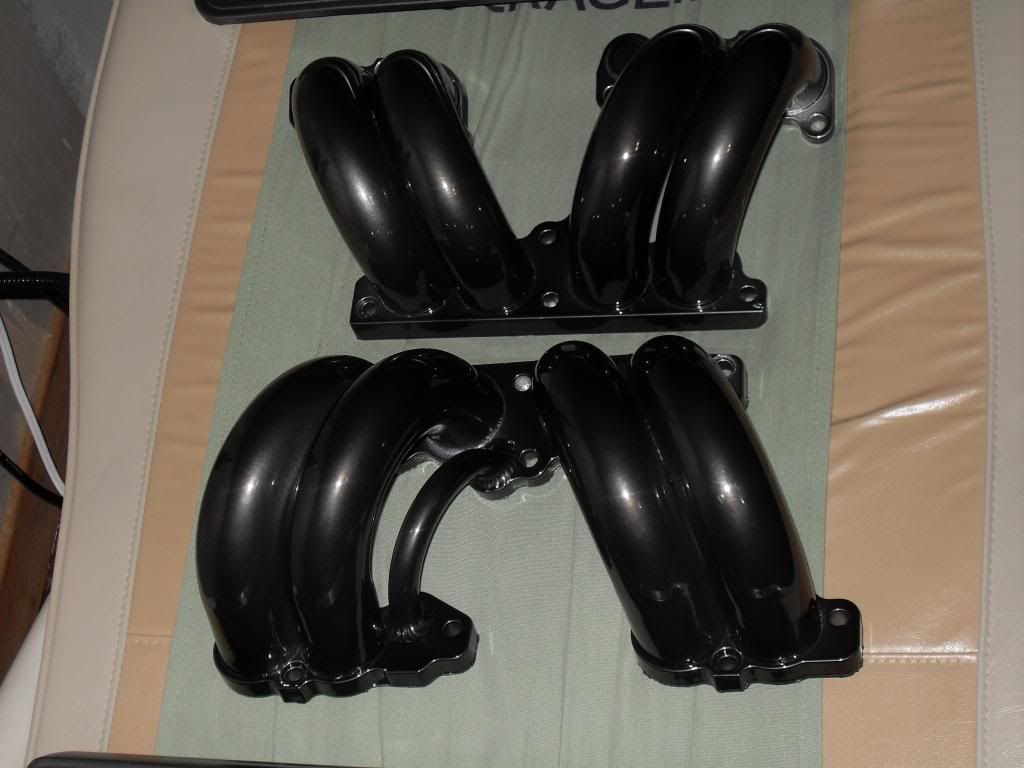
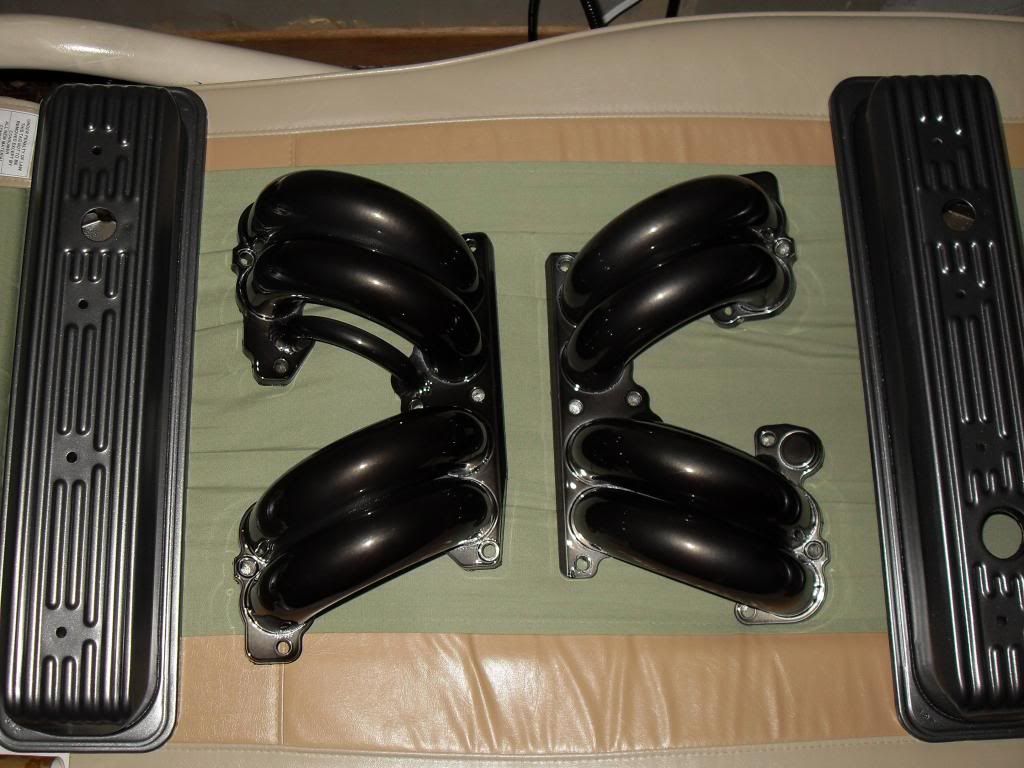
Picked up a set of TPIS large tube runners. Had them stripped and powdercoated in Black Chrome.
Here are some before and after shots and the runners with the painted valve covers. Looks pretty good so far.
Still not sure what to do with the plenum.
Before

After
With valve covers
Just rolling with the dog pound..Comment
-
Looking good man!Comment
-
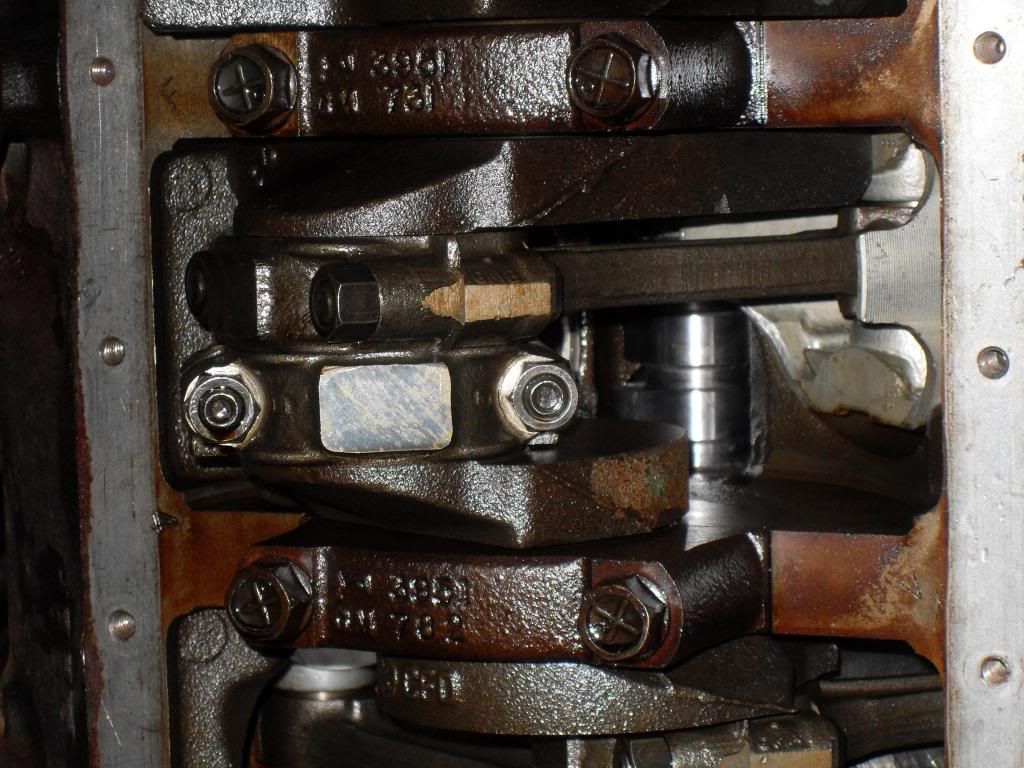
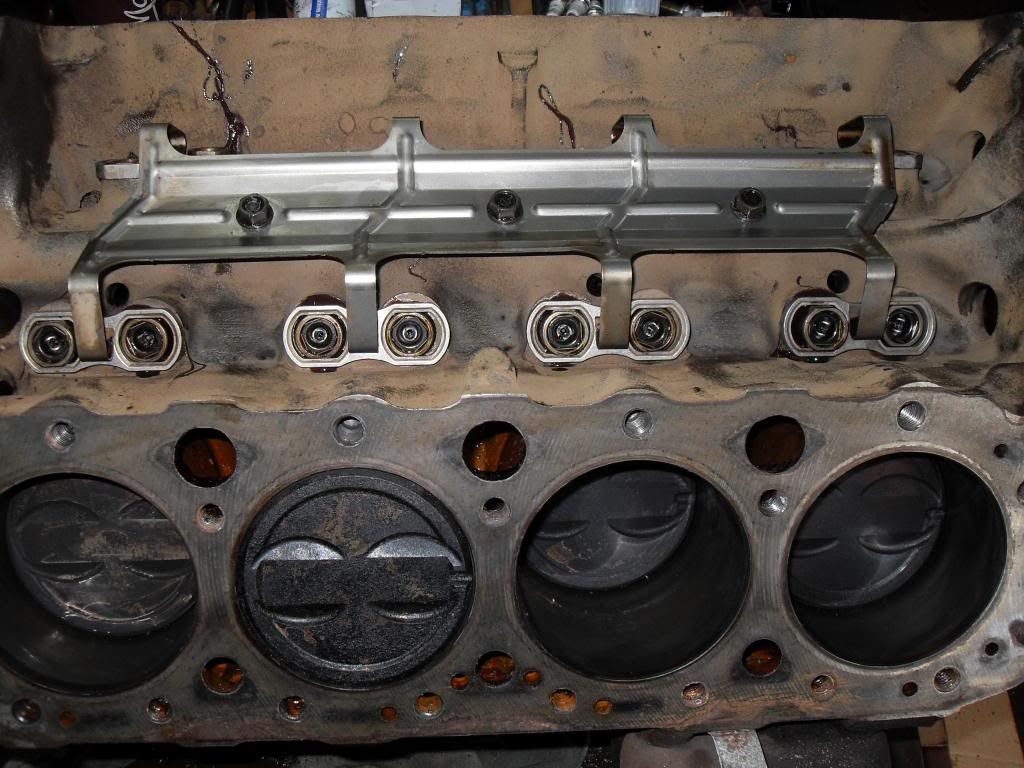
Started the engine reassembly.
Heads with the Comp Cams valve springs & Fel-Pro posi valve seals.
Shot of the block...no cracks or "extra metal" present
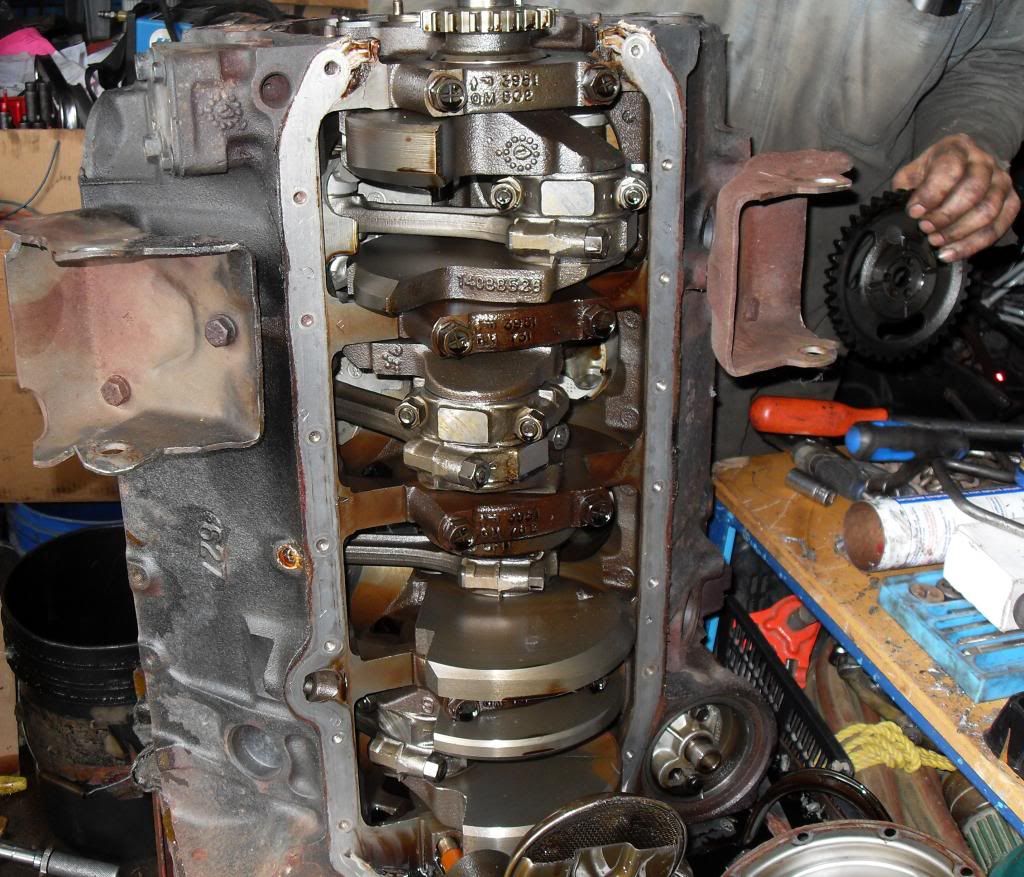
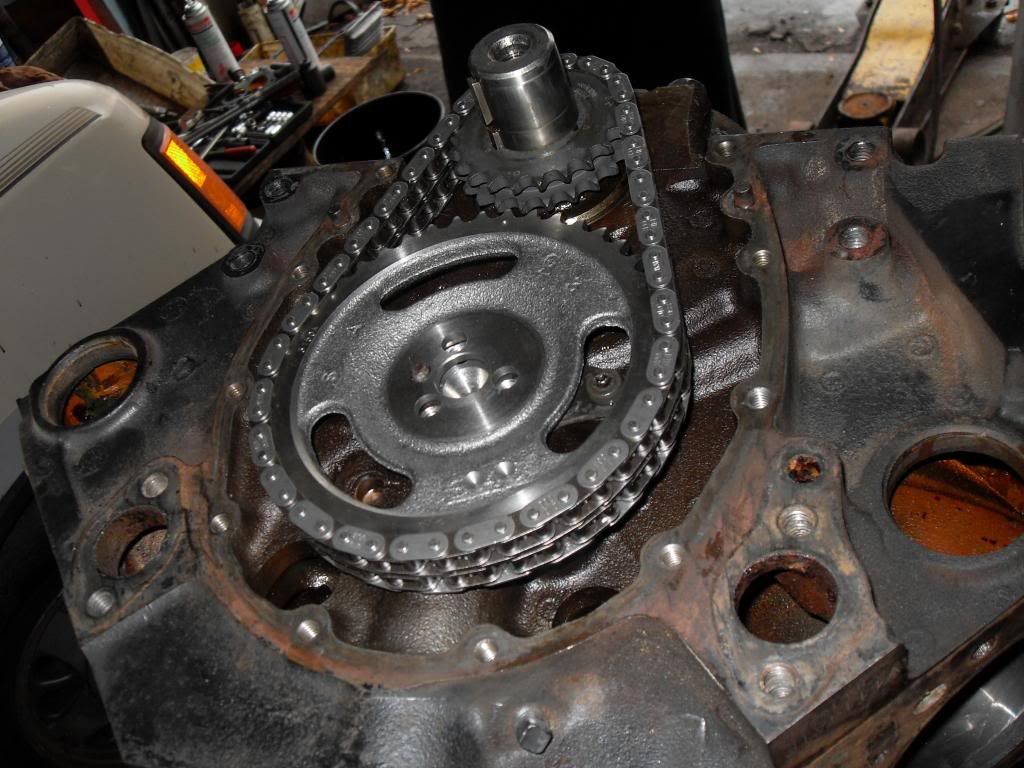
ZZ4 cam installed
Comp Cams Double Roller Timing Chain
Melling High Volume oil pump and solid shaft
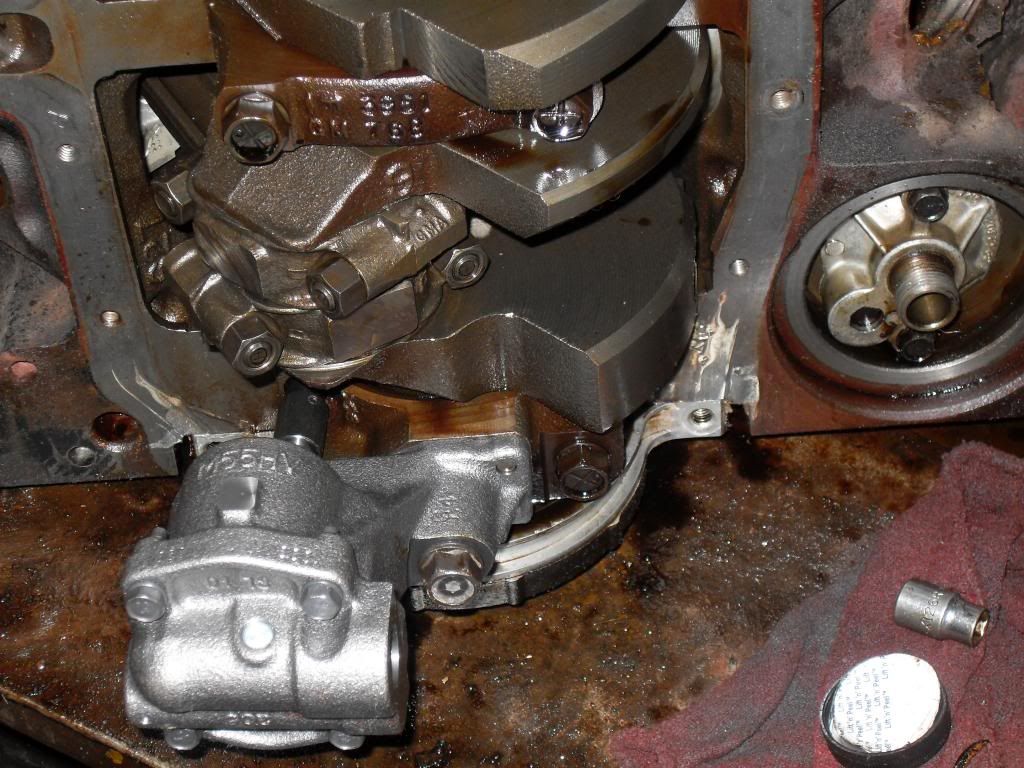
Lifters reinstalled
Reusing the stock oil pan and added a deeper timing chain cover to clear the double roller. More pics soon.
Just rolling with the dog pound..Comment
-
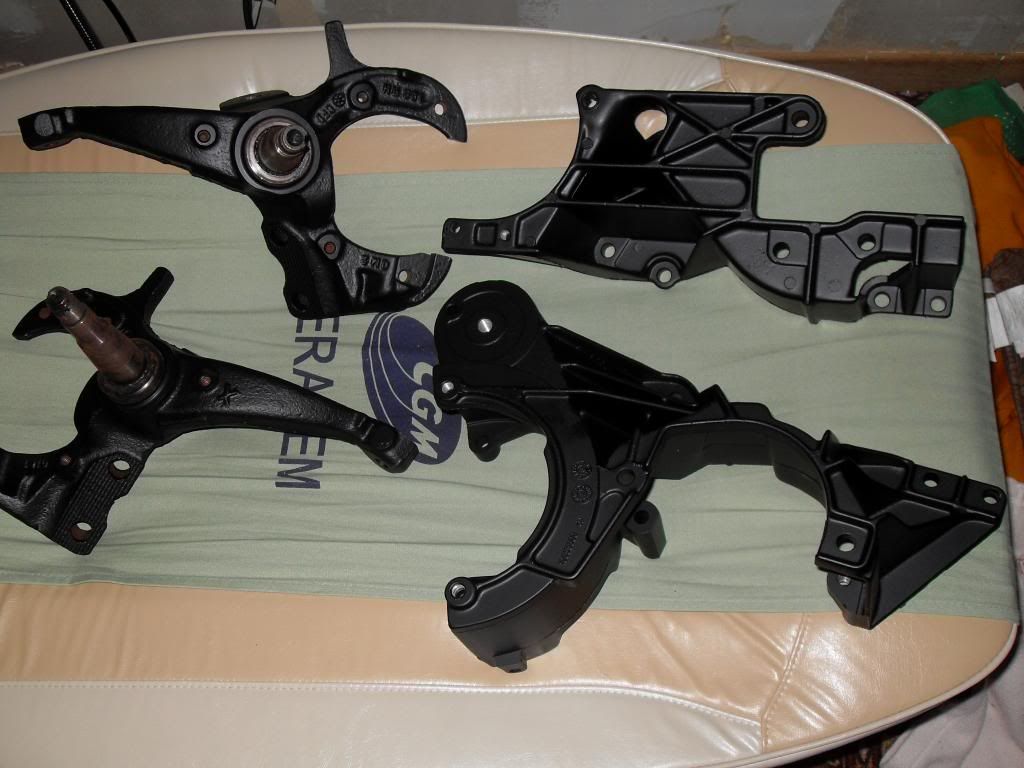
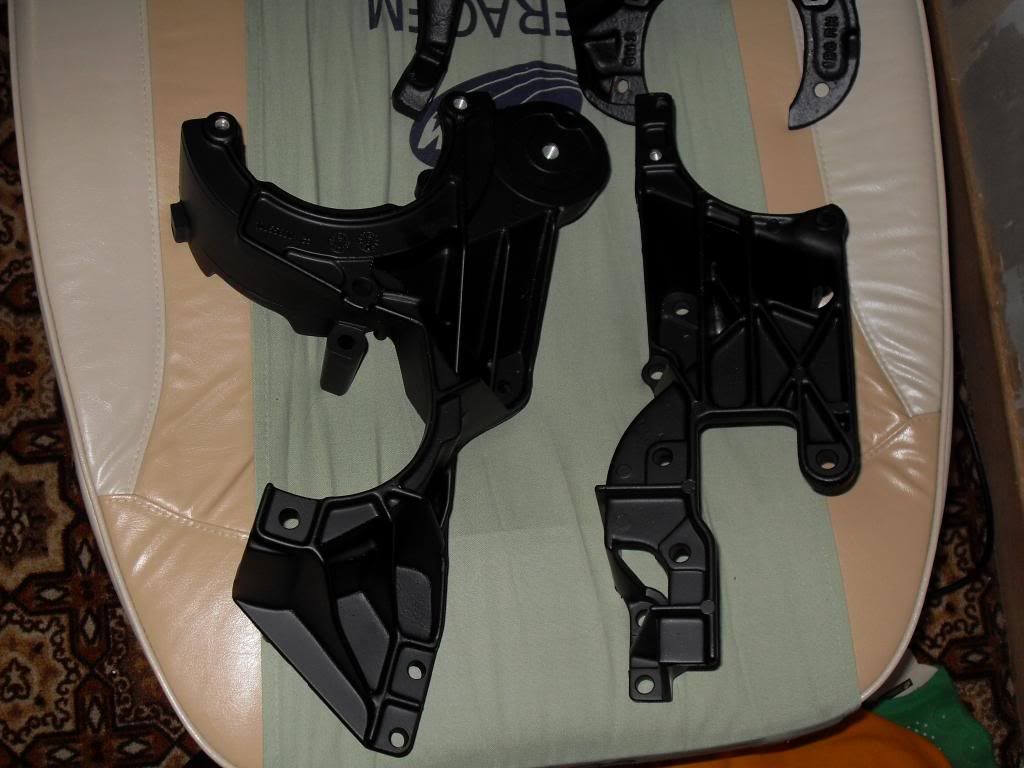
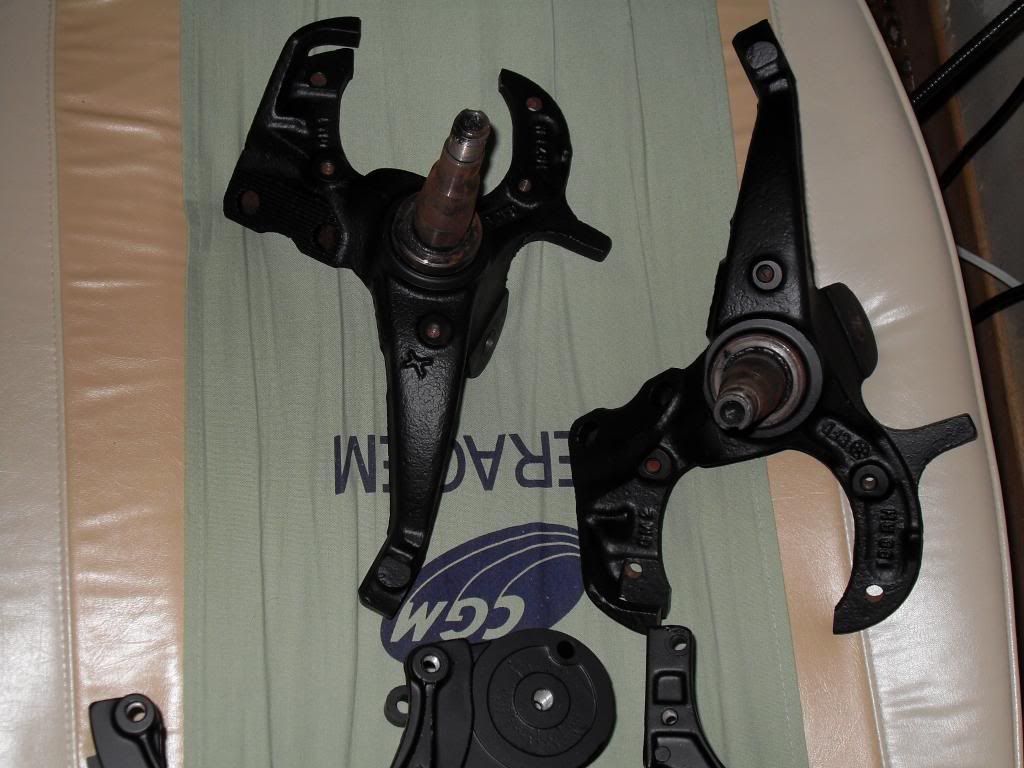
Had the spindles and engine accessory brackets powdercoated in a flat black. Came out pretty good.
Here are a few pics.
Just rolling with the dog pound..Comment
-
I plan on getting back to finish rebuilding the engine in a few weeks after it warms up a bit.
I did pick up a few items from MSD to help the stock ignition out. I figured my 15 year old Accell coil needed a break. I added a MSD Digital 6 box and MSD harness as well.
I wanted to paint the Digital 6 as nothing in my engine bay is red and I'm going for the blue/gray look. The guys a MSD sent me a new cover FREE and said after I paint it, return the box and painted cover and they would install it and reseal the box. Sounds like a plan to me.

I picked up some Clarion component speakers for the doors. I heard them in a car a few years ago and was impressed with the clear detailed sound they produced.
I plan on modifying my door buildouts next month and will post up step-by-step.

Just rolling with the dog pound..Comment
-
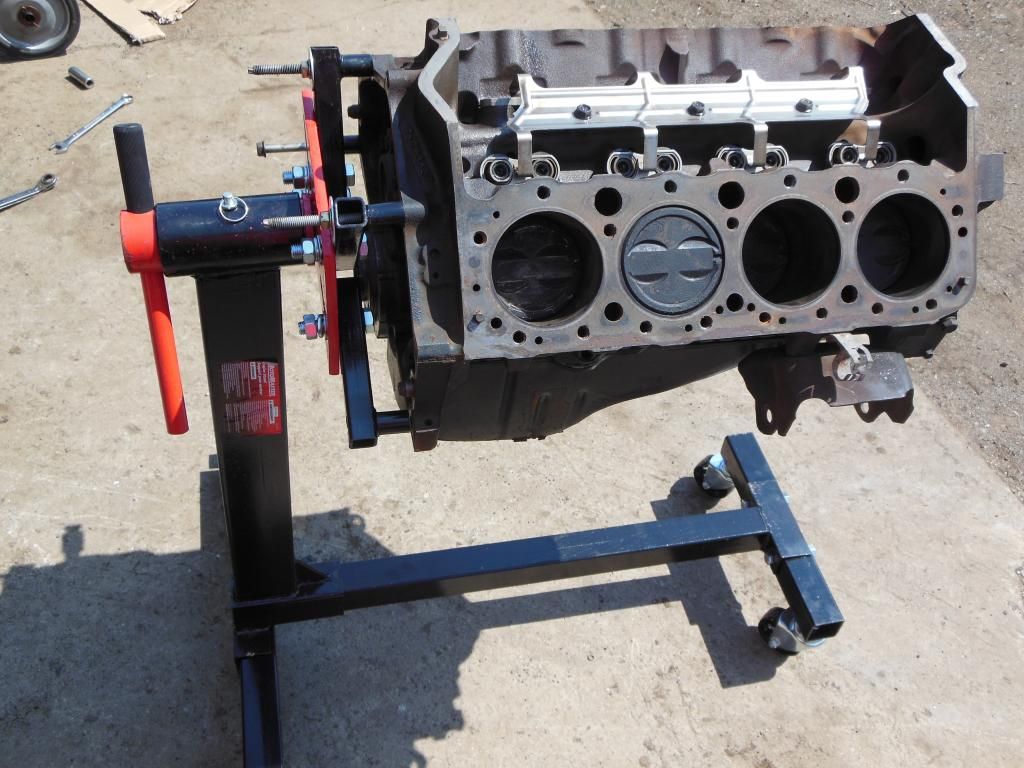
FINALLY put the engine stand together and got the engine mounted for reassembly. Will start next weekend.
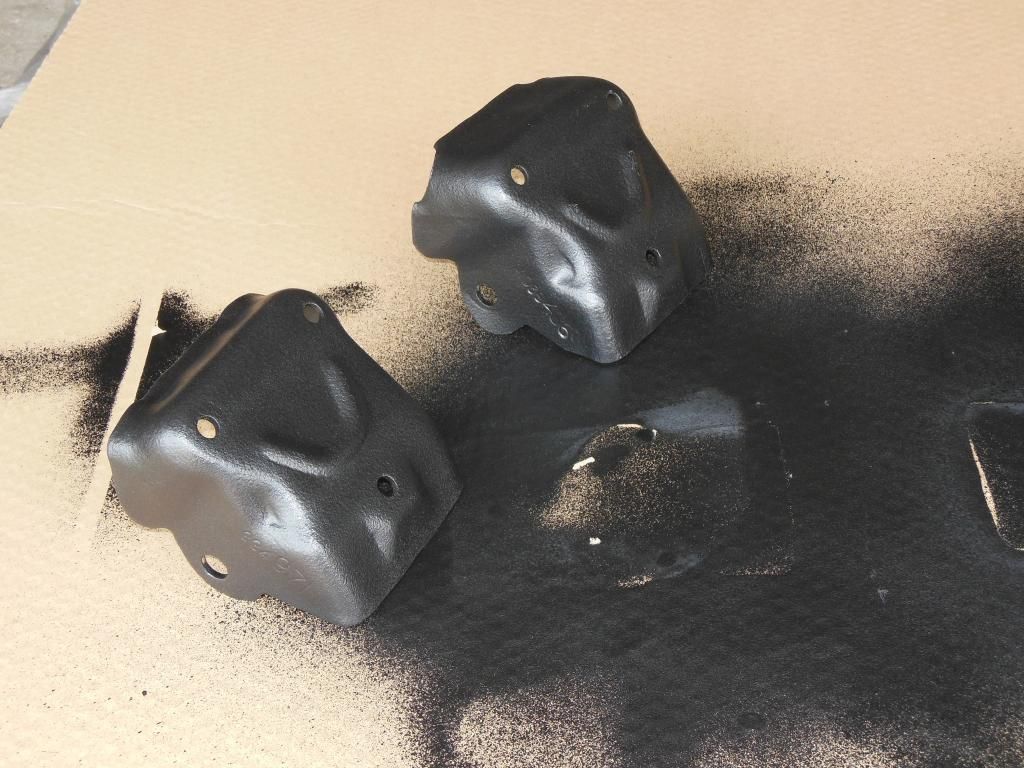
More parts prep...
Degreased and sanded the motor brackets. Then hit em with a few coats of bedliner. I know I won't see these brackets, but since I'm coating most of the undercarriage, might as well do these as well. Also soaked the bolts and washers in some CLR for a few hours to remove the rust.
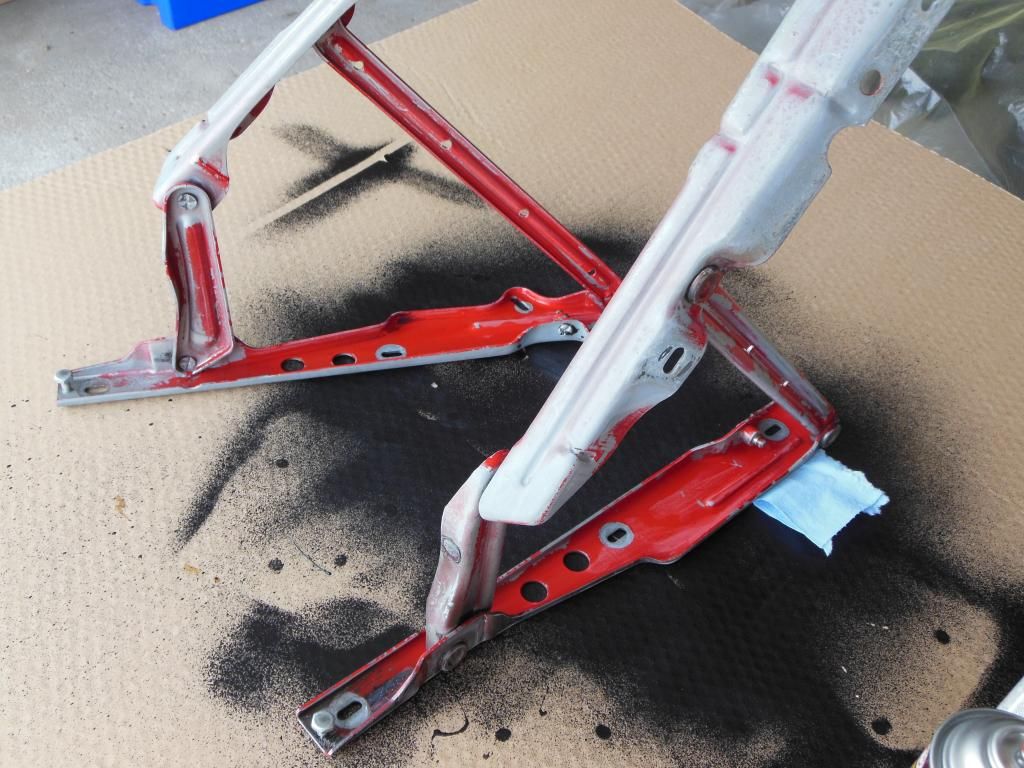
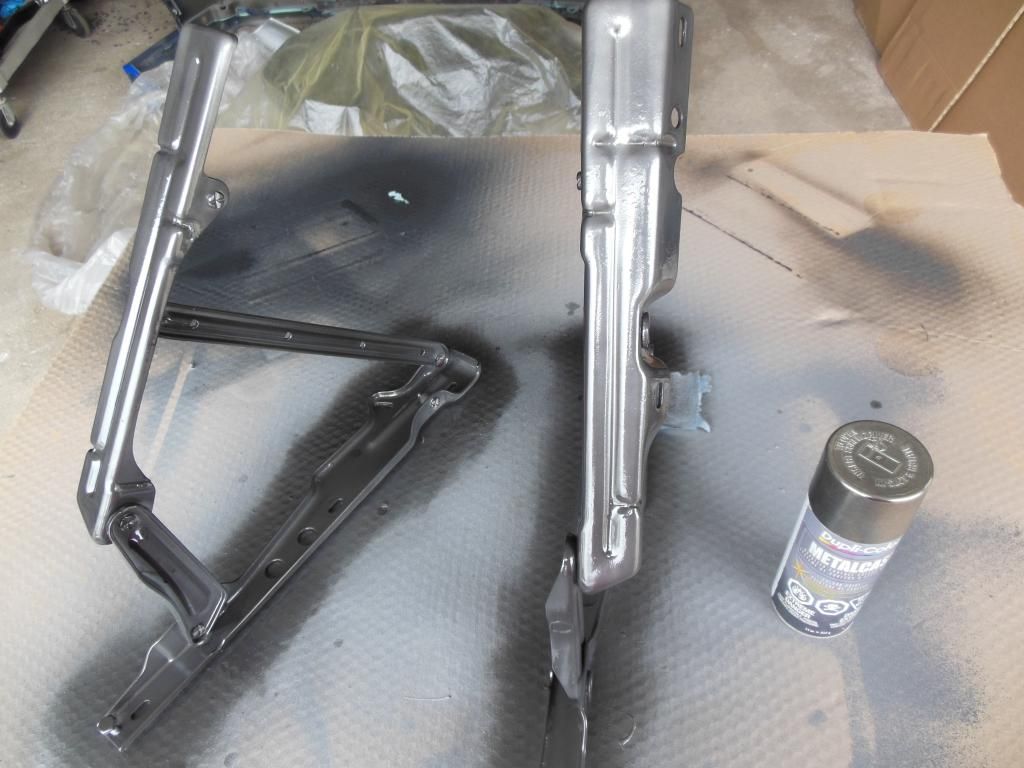
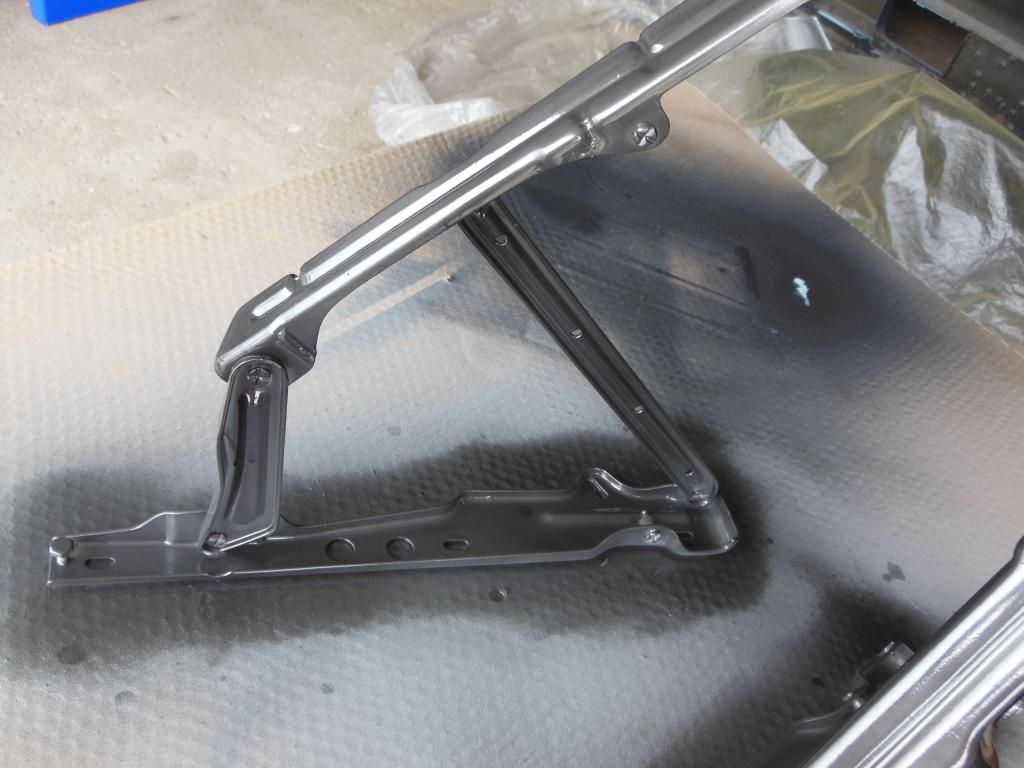
Had an idea to repaint the hood hinges with some cans of Duplicolor Metalcast I had laying around. Time to try the paint effect on the hinges.
Not quite a black chrome effect...looks more like a pewter. Applied the grey base then the dark chrome top coat. Will do for now, but next year will take the hinges to the powdercoater and go with a flat black.
Before
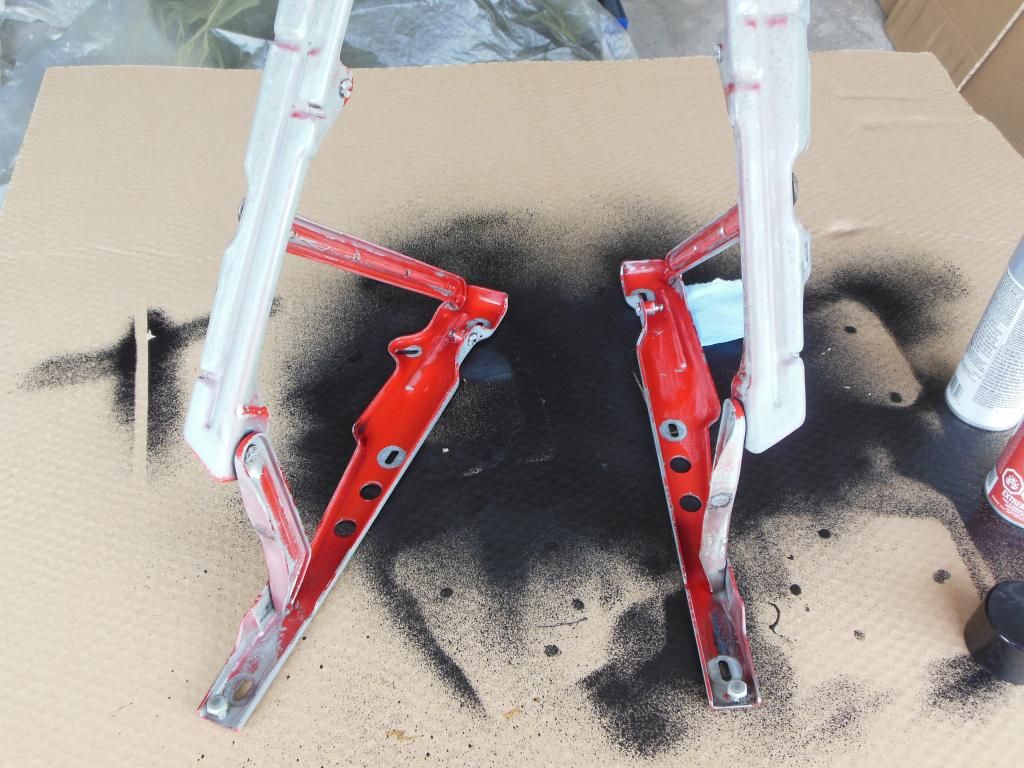
After...Smoke Anondized or Pewter??
Just rolling with the dog pound..Comment


Comment