
 Tweet
Tweet
Okay So I replaced the flasher under the dash. All the bulbs are good. The light on the dash isnt lite up sold or anything like that. When I turn my blinker on it doesnt flash on the dash or blinker itself. Any idea what could be wrong? Im wondering if Im low on blinker fluid..haha. Ive check my fuses as well. Was told there might be another flasher somewhere?
-

-
do the hazards work?sigpic
Sold!
www.fquick.com/lozanoa11
94 Grand Cherokee (sold)
95 Accord(for sale)
99 Outback (snow destroyer) -
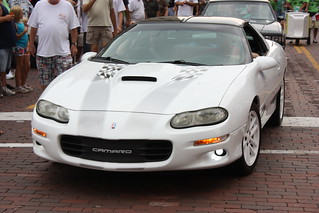
Theres 2 flashers, one for hazards and one for turns, maybe you replaced the wrong one??1999 Camaro - 6 liters of fury.....
Comment
-
Chainging your Blinker Fluid
The following instructions are intended to help the inexperienced mechanic with basic knowledge of automobiles change their own blinker fluid. In this set on instructions the driver's front turn signal will be used as an example to be changed.
First you will need to locate the location of the blinker fluid bottle. Most commonly it will be located directly next to the light bulb on standard vehicles. If you are unaware where the blinker fluid bottle is locate in you vehicle, locate your vehicles owner manual to locate the blinker fluid bottle in your vehicle.

Once you have located the blinker fluid bottle in your vehicle you will need to verify that the blinker fluid is the problem. Sticking out of the top of the bottle you will notice a yellow ring that is either made of plastic or metal, this is you blinker fluid dip stick.. The purpose of the blinker fluid dip stick to verify the level of the blinker fluid and to see if it is clean and or dirty. As you can see the blinker fluid is low and very dirty. Blinker fluid should be a nice bright orange when new providing the best possible glow and blinking speed.

Since the blinker fluid is low and dirty it will need to be drained and changed. Lift the vehicle off the ground using a jack and jack stands or ramps to lift the vehicle to a height making it comfortable to work underneath the car while still taking safety first. Refer back to your owner's manual if you are unsure where you lifting points are to safely raise your vehicle.


Jack Stands (above) Jack (below)

Once the vehicle is off the ground you will need to locate the blinker fluid drain bolt . Commonly it will be located underneath the light, if you are unsure where the bolt is located or how it looks refer back to your vehicle owners manual. After the bolt is locate you will need to acquire a wrench or socket wrench to remove the bolt for the drain and to drain the fluid into a proper container for disposal. Position yourself underneath the vehicle not directly in the path of the fluid to avoid spillage while still maintaining visual contact with the bolt. Place your container under the bolt to catch the blinker fluid and then turn the bolt counter clockwise to brake the seal, once it has been broken you can remove the bolt with your fingers until the bolt has been removed. Now the blinker fluid will flow down the drain into the container that is provided.


Socket Wrench (above) Breaking Bolt (below)

Location Of Bolt (above) Draining Fluid (below)

As you can see the blinker fluid is very dirty. You can also see in the second picture that there is rice in the blinker fluid, this is common in imported cars however rice can now be seen in some domestic cars.


Now with the blinker fluid in a container it should be properly disposed of at your local auto parts supplier after the blinker fluid has been changed. With all the blinker fluid drained return the blinker fluid drain plug back to the drain tube by turn the bolt clockwise until snug while avoiding over tighten.
With the blinker fluid drain bolt reinstalled the new blinker fluid can be added to the blinker fluid bottle. You can chose from a variety of brands of blinker fluid at your local automotive supply store. You may also follow the recommended brand of type of blinker fluid that your vehicle manufacture recommends for the application. For the replacement STP brand blinker fluid will be used due to its superior lubrication and blinking capabilities over other brands.


STP Blinker Fluid (left) OE Blinker Fluid (right)Remove the blinker fluid dipstick again so the blinker fluid can be added into the system. Place a funnel into the blinker fluid dipstick hole making sure that a tight fit has been achieved so no blinker fluid will leak out. Once the funnel has been installed you are ready to pour the blinker fluid into the blinker fluid bottle. Again check your vehicles owner manual to see how much fluid is needed to fill the blinker fluid system. Once you have determined how much blinker fluid is needed to top off the system it is time to pour it into the blinker fluid bottle. Pour the blinker fluid slowly as to not fill up the funnel to fast otherwise the funnel can burp or gasp for air resulting in spillage of the blinker fluid. After the blinker fluid has been added reinsert the blinker fluid dip stick and check the level of the blinker fluid to assure that the level is at the full mark indicated on the blinker fluid dip stick. If the blinker fluid level is still low add more blinker fluid to the bottle, if the blinker fluid level is at the full mark reinsert the blinker fluid dip stick and push down to make sure a proper seal has been made.

Now with the new and clean blinker fluid it is time to check the turn signals. Flip the turn signal switch to see if they are blinking properly. With the turn signals blinking normally, look underneath the vehicle to check for leaks from the blinker fluid drain, if no leak is detected you may lower the vehicle back down onto the ground. Clean your work area and give yourself on the back for you have now changed your own blinker fluid.
 Last edited by TSTONE; April 17th, 2009, 02:50 PM.
13th!!! Annual Michigan FBody Meet & Greet Car Show 2017
June 10th, 2017 - 9am to 3pm!!!
Bakers of Milford, Milford, MI

Classics only cost alot if you add up what you spend!
sigpic
"The winner ain't the one with the fastest car, it's the one who refuses to lose."- Dale Earnhardt -
Comment
-
ROFLOL, someone did a writeup? Thats awesome!1999 Camaro - 6 liters of fury.....
Comment
-
Haha omg, somebody has way toooo much time on their hands. Back to the issue at hand. I'm actually having the same problem with my DD, a monte carlo. The Hazard flasher on my monte is a combo flasher. I have the hazards just no blinkers. And i already replaced the combo flasher checked all turn signals and fuses. We seem to be in the same boat. I'll let you know if i get it figured out before you do....sigpic1994 Camaro Z28 83K M6, CAI, AFR 190cc, 11.6:1, Hooker headers, Hooker ORY, Mangnaflow exhaust, AI 230/238, 1.6 RR, B&M Short throw, Hays clutch, 4.10 gear.
Member: The Mid Michigan Modern Muscle Car Club
Originally Posted by 1BADAIR manuals should be launched off the limiter and the throttle shouldn't leave the floor til 10 feet after the finish line
Comment
-
does the monte have brake lights?Comment
-
this is for who ever wrote that up lol

while your there check the muffler bearings:
 sigpic
Sold!
www.fquick.com/lozanoa11
94 Grand Cherokee (sold)
95 Accord(for sale)
99 Outback (snow destroyer)Comment
-
^ HahahaComment
-
Rotflmao. Yes hazzards work. Where is the flashers all located at?oh and I just changed blinker fluid and muffler bearings and no change!Last edited by Extreme; April 20th, 2009, 09:12 AM.Comment
-
Probably have a bulb socket bad or corroded, Turn blinker to right turn, check all bulbs back may have 2. do the same for left. Look for a bulb that is dim or out. then turn on parking lights look for brighter bulb. I have seen sockets go bad and series to ground usually bad socket is dimmer or brighter than the rest depends on how its bad. I had this problem on my rear Cad sevelle. Took a while to figure out.sigpic
1998 Trans Am Convertible A4 - WS6 hood, WS6 air lid, WS6 rims, drilled/slotted rotors.Comment
-
one flasher is in the fuse box and one is taped to the harness under the knee bolsterComment
-
you may have to adjust the turbine ejaculator and replace the flux capacitor?
if those dont work you either have a loose/disconnected wire or bad socket im thinkingComment
-
Have you actually replaced all of the running/parking/blinking bulbs?1999 Camaro - 6 liters of fury.....
Comment
-
This thread is awesome
I love the blinker fluid write up

VicePresident of West Michigan Firebird Club
A.K.A The Maverick
http://www.cardomain.com/ride/660128/1
93 TA Currently Under Construction AGAIN
2007 2500 Chevy Silverado Crew Cab w/ 6.0L & 3.73'sComment

Comment