Announcement

Collapse
No announcement yet.

4th gen. audio installation

Collapse
X
Collapse
Who has read this thread:
 
  • Filter
  • Time
  • Show
Clear All
new posts

  • 4th gen. audio installation

    I wanted to put some basic information out there for the 4th genners that want some improvements in their stock audio. A lot of this is basic and will be filed in the "who cares" category but for anybody contemplating the equipment and concepts I'm undertaking it could help.

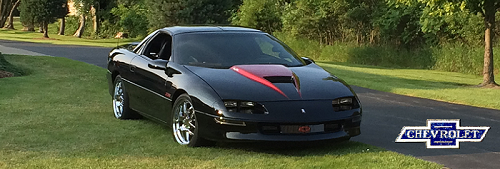
    The #1 goal for my installation is 100% stealth. This is meant to be the exact opposite of the ghetto boy ricer sh$t that pollutes Woodward. Looking at my car nobody will know it packs any firepower. It's the "sleeper" tactic for audio. There won't be any gigantic Alpine or Kenwood or Oakley Thermonuclear Protection windshield banners or decals.

    We've all seen the 1984 Chrysler K cars in high school parking lots with the annoying boom-boom rattling license plate frames, Walmart non-brand subwoofers, limo tint, and 22" made in China non-performance ghetto rims. Screw that.

    The stealth goal means everything is concealed even to passengers. Also, the spare tire, jack, and T-top holders must remain 100% usable... all while stashing a subwoofer and 5-channel amp. Think you can't have the best of both worlds? Wrong, read on.
    Last edited by Steel Priest; February 10th, 2014, 02:40 PM.
    "Heavy by birth, metal by choice."

  • #2
    Do you have the monsoon system ?
    sigpic

    Go BIG or go HOME!

    2000 Camaro SS Triple Black, 6 speed, Born 6/16/2000. SLP #8468. Plenty of Goodies

    Comment


    • #3
      I picked the JL Audio XD700/5 amp. It is extremely compact, especially for 5 channels. I've had great luck with a JL Audio amp that is 8 years old. And some, but not all, of JL's products are made in the USA. This amp is not, however. But better to give my money to Floridians that build some stuff in the USA rather than to pajama jumpers that enslave underpriveleged 10-year-olds...

      I used some thick drop ceiling hanger wire to estimate the size of the amp mounting plate. As seen in the photo I bent and clamped it to get a shape I thought would work.
      Brandon-20140201-02716.jpg

      The wire template.
      Brandon-20140201-02709.jpg

      Then I traced its shape to 1/8" thick cardboard and clamped that into place. Note that I added a rectangle of material to the right of the masking tape to make the plate bigger than the original wire template design.
      Brandon-20140201-02723.jpg
      Last edited by Steel Priest; February 10th, 2014, 04:30 PM.
      "Heavy by birth, metal by choice."

      Comment


      • #4
        Originally posted by SOPES View Post
        Do you have the monsoon system ?
        No sir, no Monsoon. My 2002 Z28 had the Monsoon but that car was sold. Actually my current radio doesn't even work right now. More on that debacle later...
        "Heavy by birth, metal by choice."

        Comment


        • #5
          Well It looks good so far !! Excellent Fabbing ! JL is always good, I love Alpine head units but I know you wanted to keep it looking stock. I know alpine makes a small 4 channel amp that can be hidden behind a radio and then you can get away with a Sub amp which may save some real estate
          sigpic

          Go BIG or go HOME!

          2000 Camaro SS Triple Black, 6 speed, Born 6/16/2000. SLP #8468. Plenty of Goodies

          Comment


          • #6
            Once I finalized the cardboard template I cut up some 1/4" MDF. I also bought 1/2" MDF but felt it was far too thick and heavy considering how small this amp really is. To maintain resale value as well as originality I wanted to drill as few holes as possible. So I used a factory hole in the lower left-hand corner and drilled 1 hole in the upper left-hand corner. The right-hand of the plate is attached to the power antenna motor.

            My installation departs from the norm right NOW. If you seach the internet you'll notice most 4th genners do something similar to my setup except their amp is wedged between the plate and fender sheet metal. Not a bad setup, but the plate itself blocks access to the controls and connections. I wanted to go beyond that and have full access without having to un-install everything. In other words, NO tools are required to adjust or connect my amp. It's as easy as popping off the trim panel that covers the spare tire.

            Also, to further maintain factory/stealth appearance I used all black oxide M6 - 1.0 bolts... you're not going to find old school chrome 1/4 - 20 on these modern day cars. Like it or not, metric is the way it's done authentically.
            Brandon-20140207-02745.jpg
            "Heavy by birth, metal by choice."

            Comment


            • #7
              Next we get to the real MacGyver sh#t. This is like The A-Team where B.A., Murdock, Face, and Hannibal get locked inside a barn that happens to have an acetylene torch and gun powder in the loft...

              To create the 3rd mounting point on the right-hand side of the plate I found this cool little band clamp at Home Depot (from here out renamed "China Depot"). The power antenna motor is about 1 1/2" in diameter and is held firmly in place with factory bracketry.
              Brandon-20140207-02744.jpg

              But in order to accept an M6 - 1.0 bolt I attached a "riv nut" to the band clamp. For those unsure, a riv nut works like a combination of a drywall anchor and rivet. As the riv nut body collapses, the metal material mushrooms and latches onto the sheet metal hole. But it keeps the inside M6 - 1.0 threads intact. I don't have a spot welder, so a weld nut wouldn't work for me. But this riv nut works like a charm! The picture below shows the band clamp. In the lower left of the photo is an example of a collapsed "mushroomed" riv nut. In the lower right is a stock unmolested riv nut.
              Brandon-20140208-02748.jpg

              And here's the riv nut completely attached to the band clamp.
              Brandon-20140208-02749.jpg
              Last edited by Steel Priest; February 10th, 2014, 04:29 PM.
              "Heavy by birth, metal by choice."

              Comment


              • #8
                Originally posted by SOPES View Post
                Well It looks good so far !! Excellent Fabbing ! JL is always good, I love Alpine head units but I know you wanted to keep it looking stock. I know alpine makes a small 4 channel amp that can be hidden behind a radio and then you can get away with a Sub amp which may save some real estate
                Thanks boss for the compliment. I ama big believer in JL Audio. I have that old 2-foot wide 5-channel they debuted back in 2000 I think and it still slams. And I love their StealthBoxes. As with anything in life, the best stuff is the pricey stuff but there's a damned good reason. JL Audio rules!
                "Heavy by birth, metal by choice."

                Comment


                • #9
                  OK thrashers, here's where the proof is - can a mere mortal fit a 5-channel amp, jack, spare tire, power antenna, AND maintain tool-free access to all amp connections, controls, and adjustments?

                  Well F yeah MFs! Here's proof of life...
                  Brandon-20140207-02740.jpg

                  See that JL Audio amp back there givin' you the ol' evil eye?
                  Last edited by Steel Priest; February 10th, 2014, 04:29 PM.
                  "Heavy by birth, metal by choice."

                  Comment


                  • #10
                    Now what kind of jackhole leaves a wooden MDF board back there where a wet spare tire, water leak, or moisture can rot it out? Also, doesn't it just look retarded? Wood grain clashes with purple sheet metal, this looks lame! So I fixed it!

                    I used Dupli-Color Bed Armor to coat the MDF board. It's made in USA and I had great luck with it on my Sierra rocker panels. If you wonder if Bed Armor sticks to wood, believe me, this Bed Armor sticks like Michael Jackson to a chimpanzee!
                    Brandon-20140209-02753.jpg

                    Now here's what it looks like with the amp bolted on with M4 - 0.7 bolts. Again, in keeping with modern car themes everything I did is metric.
                    Brandon-20140209-02755.jpg

                    Brandon-20140209-02758.jpg
                    Last edited by Steel Priest; February 10th, 2014, 04:28 PM.
                    "Heavy by birth, metal by choice."

                    Comment


                    • #11
                      I went with JL Audio TR650-CXi coaxials for speakers. They are 6 3/4" and oddly enough work in my stock door and B-pillar locations. So I bought 2 pairs. I will not be running any speakers at all in the rear fender well areas. The stockers have been removed for weight savings and a clever place to store tools - just pop off the grills and there's plenty of room for a small tool bag. Or gun.

                      All wiring is made in USA by JSC Wire & Cable. I went with 14 AWG for all 4 speakers. Amplified power and ground is being handled by JSC Wire & Cable 4 AWG.

                      Doors:
                      Brandon-20140208-02750.jpg

                      B-pillars:
                      Brandon-20140208-02751.jpg

                      BE WARNED!
                      1. The ABS plastic door speaker pods need to be trimmed to fit these specific speakers. 2 minutes with a Dremel and you're done.
                      2. The ABS plastic door speaker pods are total pieces of crap and the 3 screws used to attach them to the door aren't enough; I switched to M6 - 1.0 bolts/clips and it's still not enough; I will possibly add my own 4th M6 - 1.0 bolt to tighten the pod to the door. Total Walmart design.
                      3. The B-pillar sheet metal needs new holes drilled or a simple adapter plate; I drilled 4 new holes but purists and/or collectors might want to cut plastic adapter plates so no factory sheet metal is tampered with.
                      "Heavy by birth, metal by choice."

                      Comment


                      • #12
                        Cool project. Nice to see new members posting things like this.
                        1998 Chevrolet Camaro Z28 - 6 Speed

                        Comment


                        • #13
                          Looks good so far! I agree that the ABS speaker pods are junk, I'd recommend making new baffles out of 1/2" MDF and use some closed cell foam as a gasket between the baffle and the door as well as between the speaker and the baffle. Wouldn't be a bad idea to do the same for the sail panel speakers as well.

                          Where'd you get the rivnuts from? Do they require a special tool to install them? I like that clamp solution on the antenna motor!
                          Last edited by birdie2000; February 10th, 2014, 06:37 PM.

                          Comment


                          • #14
                            Originally posted by birdie2000 View Post
                            Looks good so far! I agree that the ABS speaker pods are junk, I'd recommend making new baffles out of 1/2" MDF and use some closed cell foam as a gasket between the baffle and the door as well as between the speaker and the baffle. Wouldn't be a bad idea to do the same for the sail panel speakers as well.

                            Where'd you get the rivnuts from? Do they require a special tool to install them? I like that clamp solution on the antenna motor!
                            I gasketed all 4 speakers with compressible PVC foam tape. I use it all the time at work and it rules! I like your advice on replacing the baffles entirely but I might try to reinforce them and/or add a 4th and 5th bolt to hold them tighter to the doors. The rears speakers, however, are rock solid in the sail panel area with my new screw holes and PVC foam tape.

                            Regarding riv nuts, I got some from work as they're used all the time on the C7 Corvette that I work on. In the assembly plant there is a special tool. Basically, it's a pneumatic rivet gun. Pull the trigger and in 1 second in clinches the riv nuts to the panel with no effort. However, backyard mechanics like me can do it simply by taking a bolt and nut and tightening the bolt and nut heads on the riv nut forcing its body to collapse. It's a pain in the ass, but not even dealerships have the special riv nut pneumatic gun. It's usually assembly plants only.
                            "Heavy by birth, metal by choice."

                            Comment


                            • #15
                              Good thread!
                              -Joel
                              1995 Z28 M6 - AI226/234 - autocross ricer
                              1984 Scottsdale K10 - 305/4bbl/4spd


                              WTB List:Midwest Chasis DS Loop

                              Comment

                              Working...
                              X